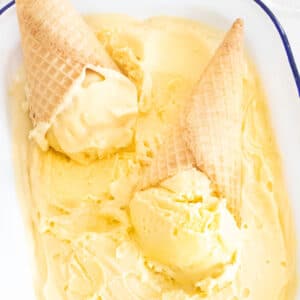
Creamy Mango Ice Cream Recipe (Dairy-Free)
This easy recipe uses ripe mangoes, coconut cream, coconut condensed milk and honey to create a delicious and refreshing dairy-free ice cream that's easy to scoop. The perfect summer treat!
Print
Pin
Servings: 6 servings
Calories: 547kcal
Equipment
- Ice Cream Maker
Ingredients
- 2 large very ripe mangoes (3 cups/600g/1.3lb)
- 1 can coconut cream, (chilled overnight)
- ¾ cup sweetened condensed coconut milk
- ¼ cup raw honey
- 1 tsp vanilla essence
- Pinch of salt
Instructions
- Place the can of coconut cream in the fridge overnight. This is also a good time to pre-freeze your ice cream machine bowl if needed. I use a Cuisinart ice cream maker, and this is a necessary step. If yours is different follow the manufacturer’s instructions for preparing the bowl to churn.
- When you’re ready to make the ice cream, cut the cheeks off each mango and cut the flesh into chunks. Also cut any excess mango from around the seed before discarding it.
- Add the mango chunks to a blender along with the sweetened condensed coconut milk, honey, vanilla and salt. Blend to combine then pour into a large bowl and set aside.
- Take the coconut cream from the fridge and scoop the hardened cream into the bowl of a stand mixer, or another large bowl if you’re using a hand mixer. Discard the liquid in the bottom of the can or keep for smoothies.
- Beat the chilled coconut cream until stiff peaks form. This will take a minute or two.
- Take half the whipped coconut cream and gently fold it into the mango mixture until well combined (see how to do this in the video). Fold in the remaining whipped cream until the mixture is silky smooth.
Ice Cream Maker Steps (Churned)
- Freeze the mango mixture for an hour so it's well chilled before being churned.
- Take the ice cream maker bowl from the freezer and add it to the machine.
- Start the machine churning then add the chilled mango mixture into the bowl. Churn for 20 minutes or until the ice cream has taken on a thick and creamy texture.
- Once done, tip this into a freezer-safe container with a lid or a clean loaf pan. If using the latter be sure to cover the top with some plastic wrap that sits right on top of the ice cream.
- Freeze for at least 8-10 hours but best overnight then serve. Store in the freezer for up to one month.
No Churn / No Ice Cream Maker Steps
- Pour the mango mix into a freezer-safe container with a lid or a clean loaf pan. If using the latter be sure to cover the top with some plastic wrap that sits right on top of the ice cream.
- After an hour, stir vigorously with a whisk or spatula to break up any large ice crystals that are forming. Repeat this step every 30 minutes for the next 2-3 hours. This will ensure the ice cream won’t freeze to rock solid.
- Freeze for another 4-5 hours or overnight then serve. Store in the freezer for up to one month.
Video
Notes
After the first 24 hours the ice cream will start to become much firmer and slightly more difficult to scoop. To combat this leave it to sit on the bench for 5-10 minutes allowing it to soften slightly.
For the no-churn ice cream - Not stirring the ice cream thoroughly or often enough will cause ice crystals to form. This will affect the overall texture making it difficult to scoop and icy to eat, and it can also affect the flavour. If this happens, the best way to rectify it is cutting out the amount of ice cream you'd like and whizzing it up in a blender. This will make the ice cream lovely and creamy again. It will be more like a soft serve consistency this way but equally delicious.
Nutrition
Serving: 2scoops | Calories: 547kcal | Carbohydrates: 74g | Protein: 8g | Fat: 28g | Saturated Fat: 23g | Polyunsaturated Fat: 1g | Monounsaturated Fat: 3g | Cholesterol: 22mg | Sodium: 88mg | Potassium: 579mg | Fiber: 3g | Sugar: 69g | Vitamin A: 923IU | Vitamin C: 29mg | Calcium: 204mg | Iron: 2mg
