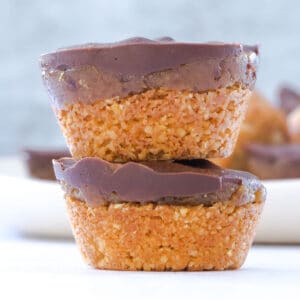
Twix Cups
These deliciously irresistible and wholesome Twix cups have a cookie base, creamy caramel filling, and are topped with chocolate to finish.
Print
Pin
Servings: 12 people
Calories: 243kcal
Ingredients
Cookie Base Ingredients
- ¾ cup almond flour
- 3 Tbsp maple syrup
- 2 Tbsp coconut oil (melted)
- Pinch of salt
Caramel Filling Ingredients
- ¼ cup smooth peanut butter
- 10 medjool dates (roughly 150g / 5 oz)
- ½ tsp vanilla
- Pinch of salt
- 1 - 2 tsp any plant-based milk (only if needed)
Chocolate Topping Ingredients
- ½ cup chocolate chips (dark or light - depending on your preference)
- ½ tsp coconut oil
Instructions
For The Cookie Base
- Preheat the oven to 180ºC / 350ºF and grease a 12-hole mini muffin tin with melted coconut oil, then set it aside.
- In a medium-sized bowl - mix together the almond flour, melted coconut oil, maple syrup, and pinch of salt. It should all just come together and if you pinch some between your fingers it should stick.
- Spread this mixture out between each of the holes in the muffin tin and push down with the back of the spoon or your fingers to flatten out (see note 1).
- Move to the oven and bake for 12 minutes. They should be golden by this point. If you're oven runs hot though - check them around the 10-minute mark.
- Once done, remove the muffin tin from the oven and set aside to cool.
For The Caramel Filling
- In a blender add in the dates, smooth peanut butter, vanilla essence and a pinch of salt. Blend on high until the mixture starts to come together. If needed - add in a little plant-based milk one teaspoon at a time to help the caramel form. (See note 2 for extra tips to ensure you don't have soggy caramel).
- Scoop the caramel filling over the cookie base in the mini muffin tin. Flatten down so this covers another 1/3 of the muffin hole. It's very sticky so you'll need to do this with your fingers (see note 3).
For The Chocolate Topping
- Add the chocolate chips and coconut oil to a small saucepan and melt over a low heat, stirring constantly. The small amount of coconut oil means the chocolate should be thick but pourable.
- As soon, as the chocolate chips are completely melted, remove from the heat and start spooning the chocolate over the caramel filling. This will take up the last 1/3 of the muffin cup.
- Transfer to the freezer and leave to chill for one hour. This will ensure the caramel filling is firm.
- Remove from the freezer, run a knife down one edge and the Twix cups should just pop out easily. Leave to sit for 5 minutes then enjoy as is or sprinkle with a little extra sea salt. Store any leftovers in an airtight container in the freezer.
Notes
Note 1: You want to fill each muffin hole roughly 1/3 of the way with the cookie base. This was about 1 Tablespoon for me, and I used a 15ml Tbsp measure. Essentially the cups will be 1/3 base, 1/3 filling, 1/3 chocolate - but you can make each layer more or less as you like. And no need to stress about making it perfectly even. You can see from the pics that mine aren't.
Note 2: When the caramel is done it should be very sticky and come together in a ball. You don't want to see a date and peanut butter paste! This is important or the caramel filling won't firm up in the freezer. As such, it's best to start by blending the base ingredients - if you see this is looking like little pebbles and won't come together add in 1 tsp of oat/almond milk (or any plant-based variety) and blend again for a good 20 seconds. If it still looks a bit pebbly add in another tsp and blend again. It should be forming a bit of a ball now - or at least be stuck together in big chunks you can pick up. If not add 1/2 a tsp and so on until you get a caramel, you can pick up in your hands.
 Note 3: You will have caramel left over from this recipe. I find too small a batch just doesn't work in the blender. Save the leftovers for another batch of cups or roll it into balls and dip it into melted chocolate, chill for 30 mins and enjoy as a separate snack!
Note 3: You will have caramel left over from this recipe. I find too small a batch just doesn't work in the blender. Save the leftovers for another batch of cups or roll it into balls and dip it into melted chocolate, chill for 30 mins and enjoy as a separate snack!Nutrition
Serving: 1Twix cup | Calories: 243kcal | Carbohydrates: 28g | Protein: 5g | Fat: 15g | Saturated Fat: 4g | Polyunsaturated Fat: 1g | Monounsaturated Fat: 2g | Sodium: 24mg | Potassium: 202mg | Fiber: 3g | Sugar: 22g | Vitamin A: 30IU | Calcium: 57mg | Iron: 1mg