Miso Fermented Garlic
Garlic miso is a quick and easy ferment to make year round and has an abundances of uses.
Print
Pin
Servings: 33 Tablespoons
Calories: 1037kcal
Equipment
- 1 Glass jar
- 1 Spoon
Ingredients
- 1 lb red miso (I use either Carwari Red Miso or Spiral Genmai Miso) (500g)
- 1 head garlic, all cloves peeled
Instructions
- Add roughly ¾ inch/2cm of miso paste to the base of a VERY clean glass jar (mine was 16oz / 480ml)
- Now add a few garlic cloves and just gently push them into the miso so they’re snug. Try and avoid letting them touch so how many you add will be dependent on the size of your jar. Three was perfect for me
- Add another ¾ inch/2cm of miso to cover the garlic and try and get out as many air bubbles around the sides as you can (not always achievable!)
- Next add another lot of garlic as you did above. Keep repeating the steps of a miso layer, followed by a garlic layer, then a miso layer etc. until you have about ¾ inch/2cm left at the top of the jar. It was about five layers for me. Remember to try and keep the air bubbles out as you go. The most important thing though, is making sure all the garlic is covered and none can be seen around the edges of the jar
- That’s it! Leave the jar on the kitchen bench out of the sun for three to five days to ferment. Transfer to the fridge and leave to ferment for at least another month or even two if you can wait
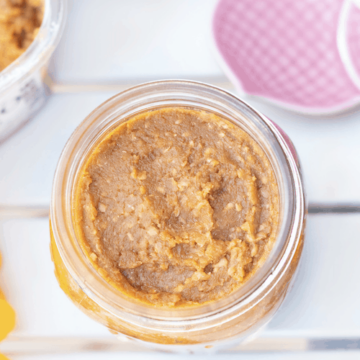
- Once ready you’ll have a jar full of garlic infused miso and miso infused garlic. What a combo! See extra notes below on how you might use it.
Notes
Once ready, dig out a garlic clove, wipe off the excess miso with a knife and put it back in the jar. Slice the clove up and add it on top of Guacamole Toast, to soups, chopped through salads or anything you like. You can also whizz up a clove with your salad dressing of choice. The garlic infused miso makes the MOST delicious marinades and soups. Try it in lots of different things and see how you like to enjoy it.
Note: Serving size suggestions are based on 1 Tbsp of miso and a garlic clove.
Nutrition
Serving: 1Tbsp | Calories: 1037kcal | Carbohydrates: 142g | Protein: 60g | Fat: 30g | Saturated Fat: 6g | Sodium: 18645mg | Potassium: 1162mg | Fiber: 28g | Sugar: 31g | Vitamin A: 435IU | Vitamin C: 9mg | Calcium: 336mg | Iron: 13mg
