Creamy Coconut Panna Cotta (Dairy Free)

This creamy Coconut Panna Cotta recipe is a luscious dessert that’s quick to make and requires little effort. It’s perfect for those days you’re short on time but still want something special to make for yourself or guests. It’s also dairy-free and can be made vegan if needed.

Key Ingredients
The ingredients in this panna cotta come together to create a luscious and indulgent dessert with little effort required. Overall it’s quick and easy however, it will require a minimum of four hours refrigeration to set.

- Vanilla extract or vanilla pod – either is fine for a touch of flavour, however, the vanilla beans show as little black flecks in the panna cotta. I like this, but if you’re going for pure white use vanilla extract instead.
- Maple syrup – adds sweetness and hints of caramel and toffee that mix perfectly with the coconut and vanilla.
- Canned coconut milk – use a full-fat coconut milk to ensure you get a silky smooth, creamy texture.
- Coconut cream – adds more creaminess but also a deep coconut flavour to the panna cotta.
- Gelling agent – unflavored gelatin powder is used to set this dessert, however, see the how to make a vegan panna cotta section below for an agar agar substitute.
- Lime zest – adds a fresh, citrusy note that is a great pairing with the coconut.
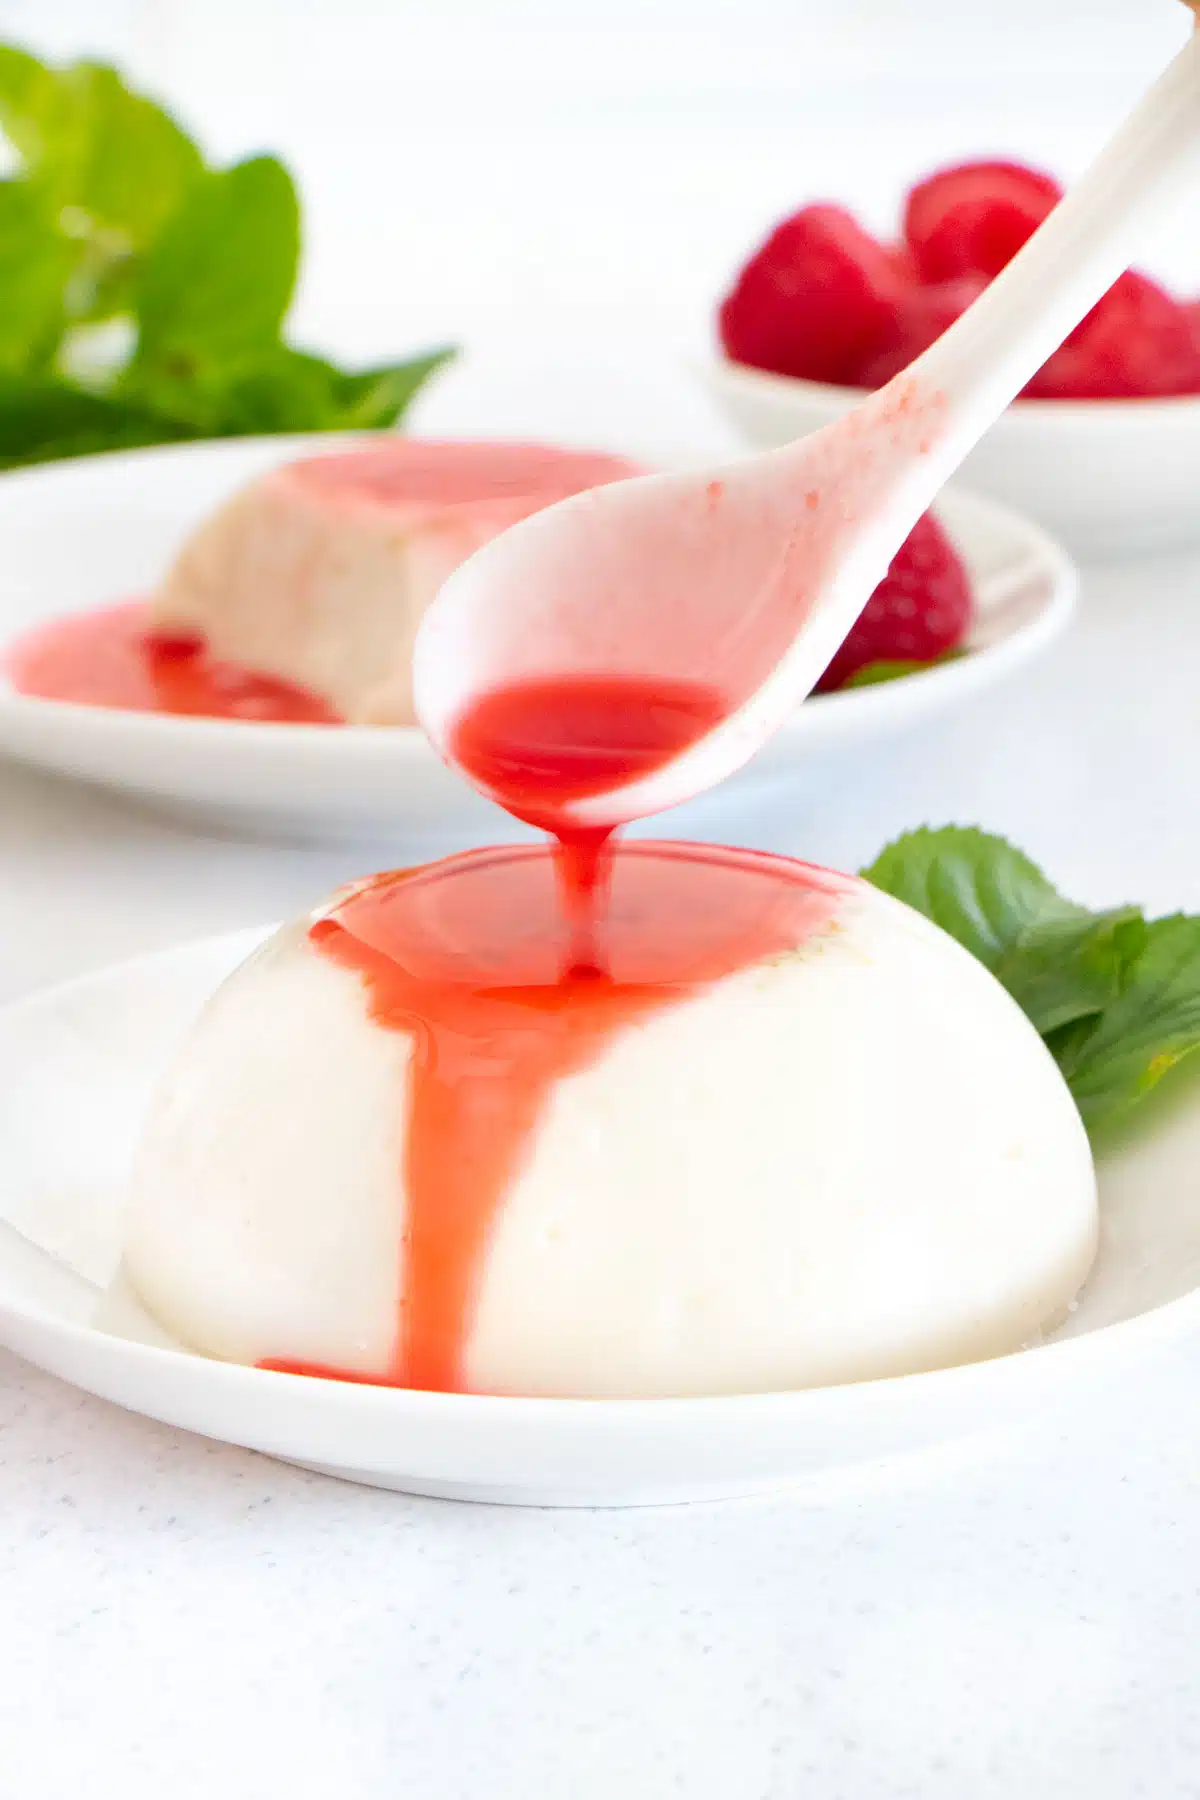
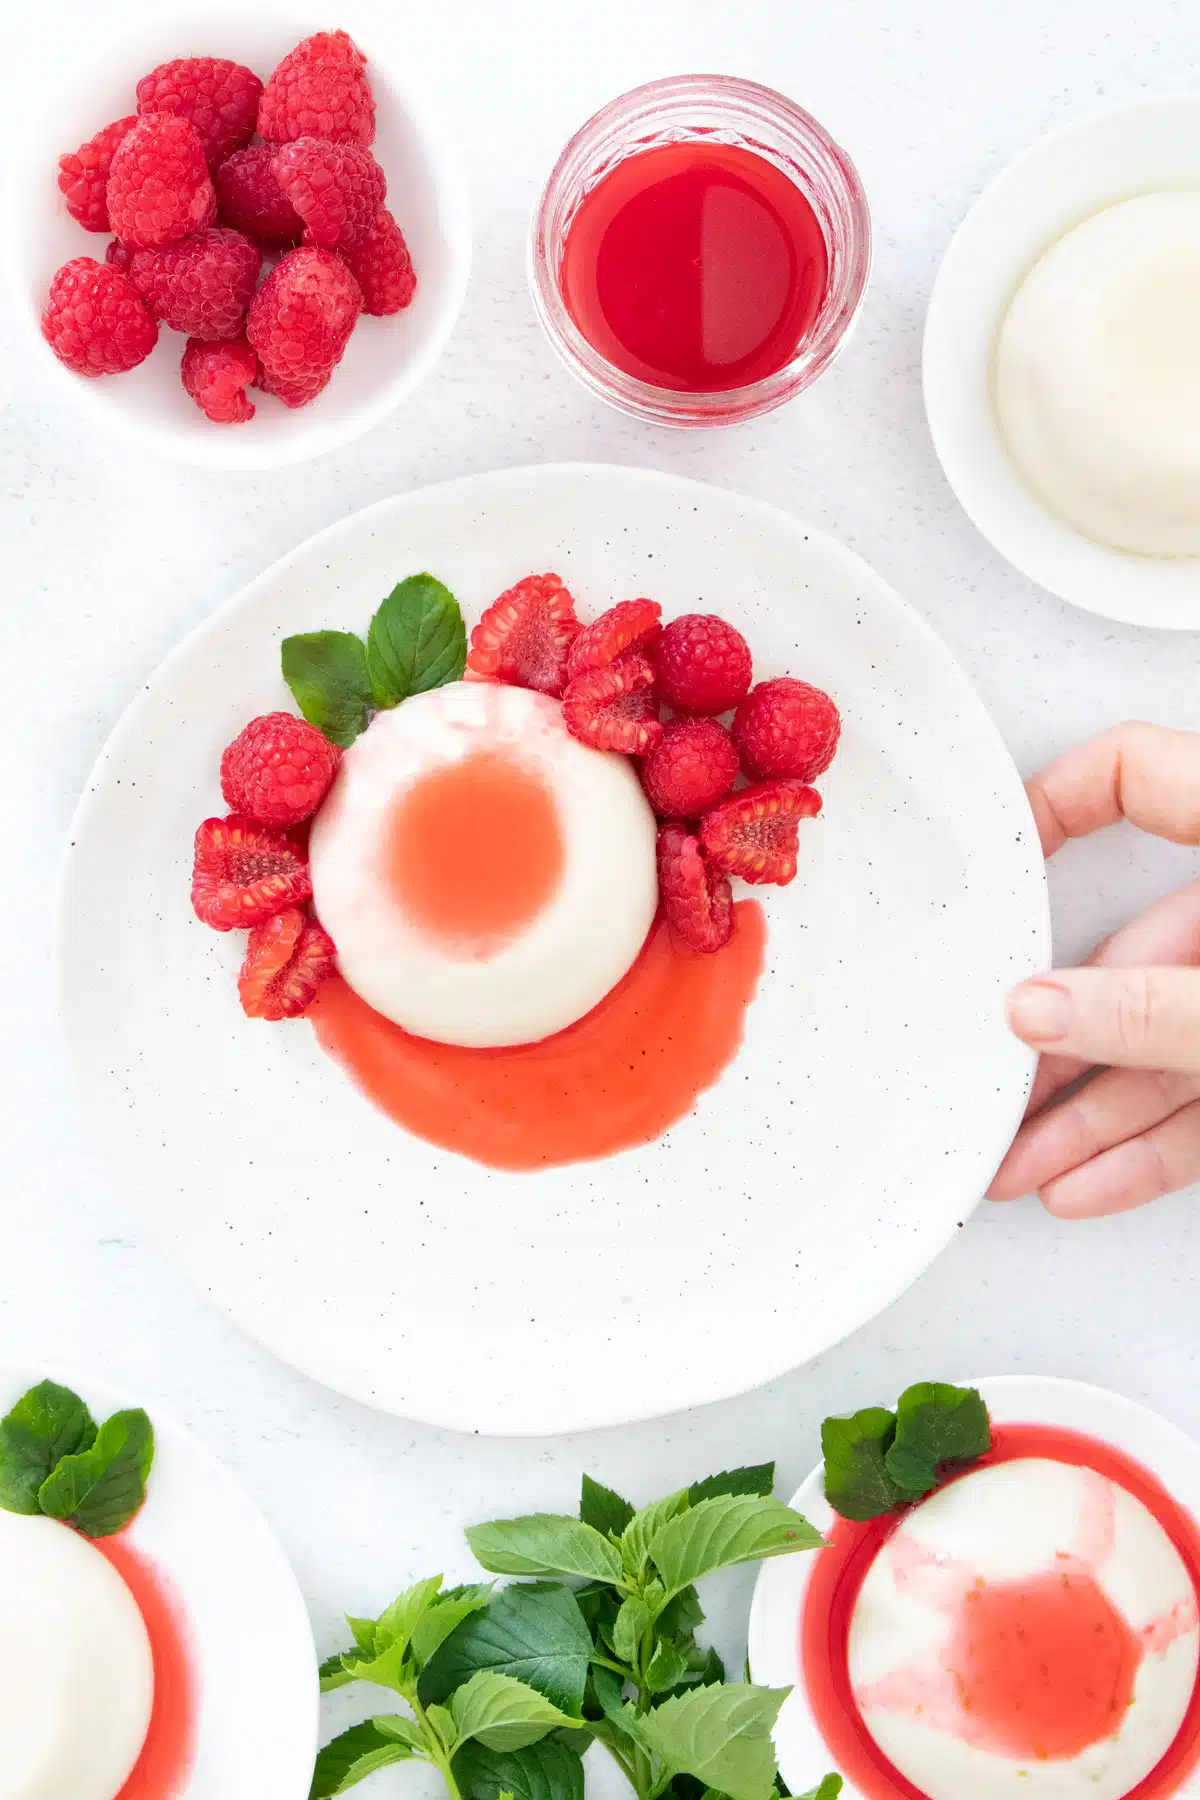
- Raspberries and lime juice – make a delicious, tart sauce to pour over the finished dessert.
These ingredients form the base recipe but when it comes to serving, you can make any additions you like. A drizzle of strawberry sauce instead of the raspberry, passionfruit and fresh berries, or even some crushed pistachios and mint are all delicious additions.
Substitutions And Variations
For a vanilla flavoured panna cotta simply leave out the lime zest. Just note this does help cut through the richness of the coconut cream and milk.
Tropical fruits as a topping are especially good with coconut though fresh berries are equally delicious.
Got a Valentine that doesn’t like chocolate? This is the perfect little treat to share with them on Valentine’s Day!
How To Make Coconut Panna Cotta
While simple to make this recipe can quickly go wrong if the gelatin is not completely dissolved. Don’t rush that step in the process to ensure your panna cotta sets to perfection.
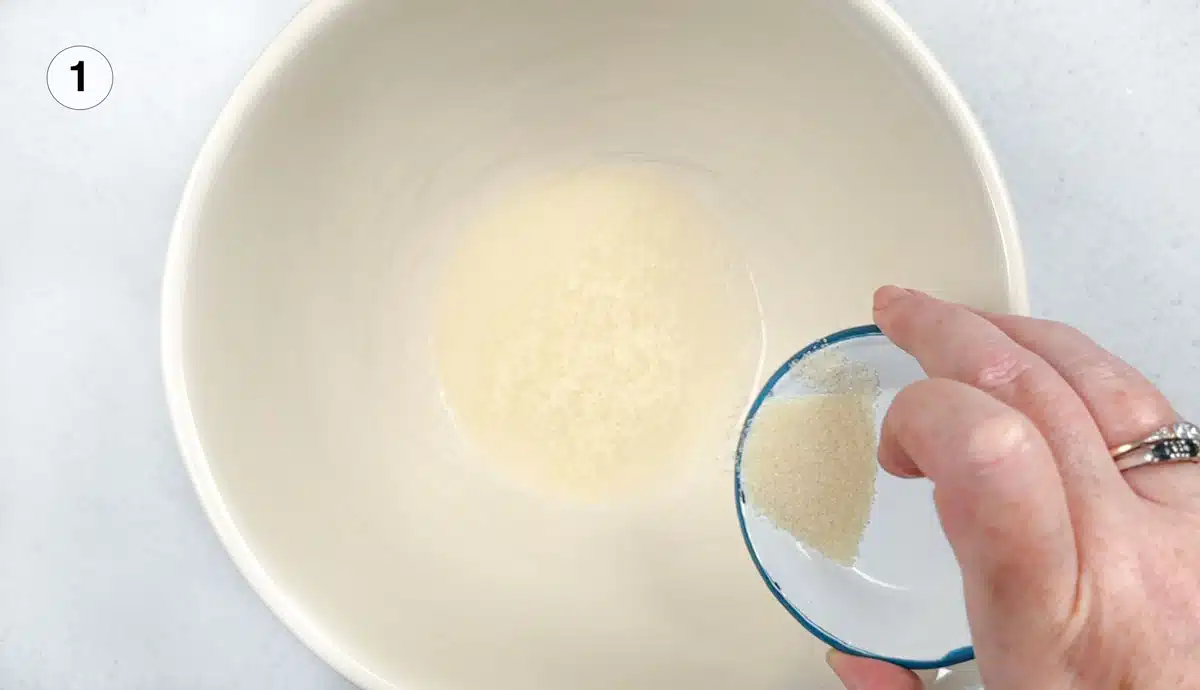

- Pour the water into a medium-sized bowl and sprinkle the gelatin evenly over the surface. Let stand for 5-10 minutes to ‘bloom’, which is the gelatin softening and hydrating as it soaks up the water.
- In the meantime, lightly grease six small ramekin moulds with melted coconut oil and set aside.
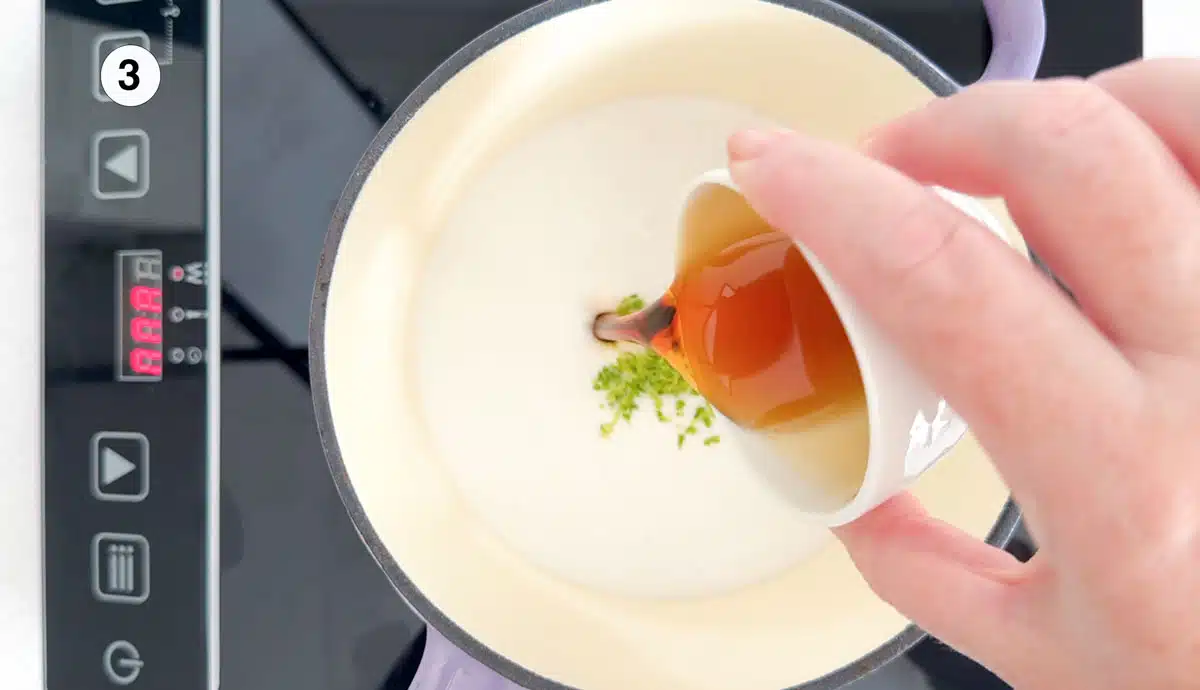
- Heat the coconut milk, coconut cream, maple syrup, and lime zest in a small saucepan over medium-low heat. You’re just looking to warm the panna cotta mixture through, not boil it.
- Remove from the heat and add in the vanilla extract or seeds then pour this over the bloomed gelatin. Gently stir the mixture until all the gelatin has completely dissolved.
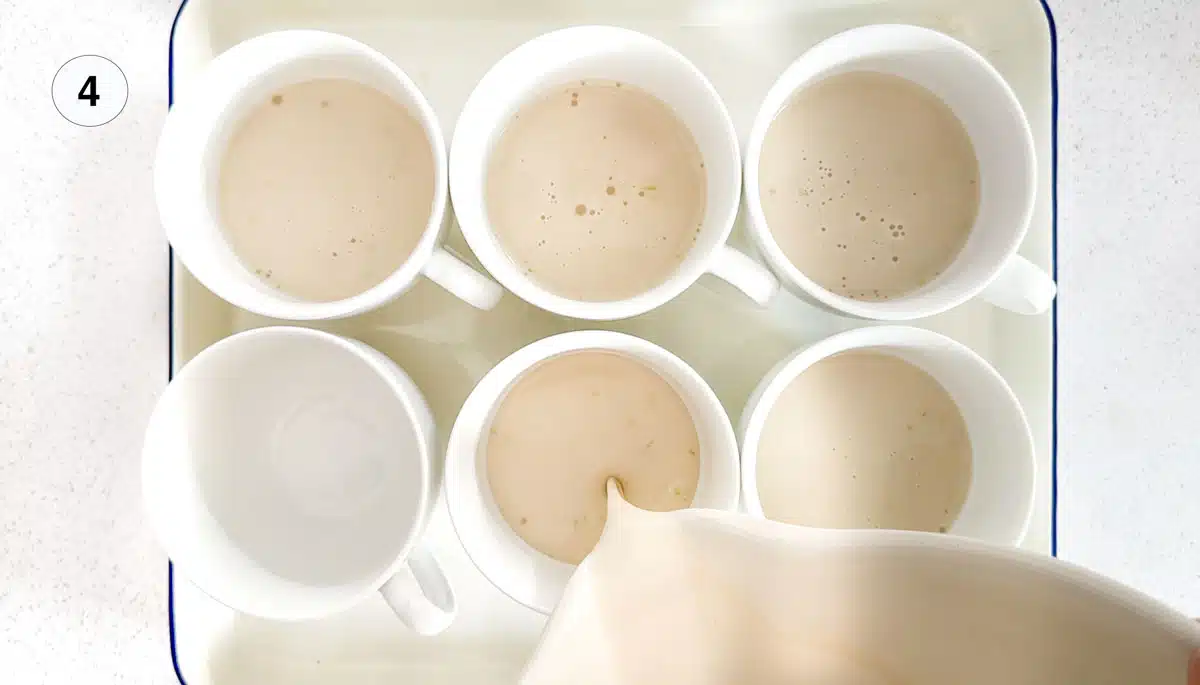
- Evenly divide the panna cotta mixture between the moulds, then chill for four hours or overnight for best results.
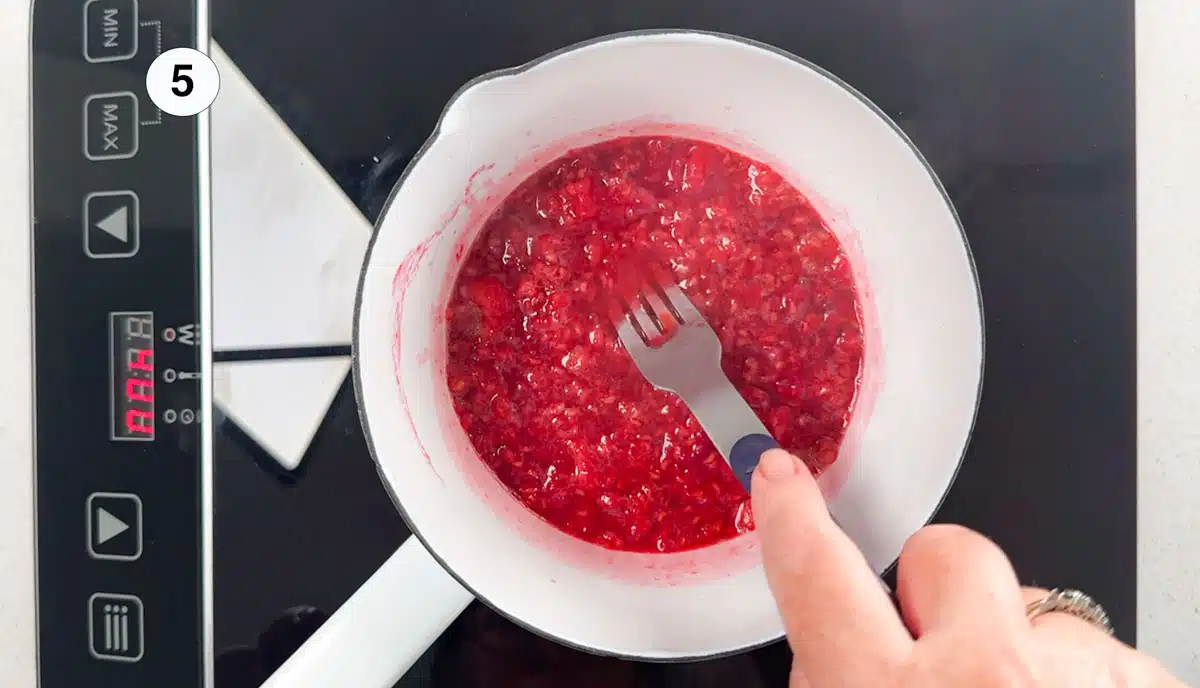
- Now make the raspberry sauce by placing the raspberries, maple syrup and lime juice in a small pot. Heat for 2-3 minutes as you crush the raspberries with a fork. The mix should just begin to boil at this point. Strain through a fine mesh sieve and refrigerate until you’re ready to serve.
- When ready to serve – un-mold the panna cotta onto serving plates, drizzle with the raspberry sauce and add some coconut flakes or other toppings of your choice.

While each panna cotta may seem small when turned out, it is a very decadent dessert. With the raspberry coulis added on top I can guarantee it will be more than enough.
How To Un-Mould Panna Cotta
- Half-fill a large bowl with hot water from the tap and set aside.
- Take each panna cotta mould from the fridge and dip them into the water in the bowl one by one about halfway up the ramekin. Leave for 10 seconds then remove.
- Gently run a knife around the rim of the panna cotta being careful not to cut into it.
- Place a serving plate over the top of the ramekin then invert both so the ramekin is upside down over the plate. Give it a bit of a shake then you should hear a perfect panna cotta release as it drops onto the plate.
- Lift the mould, set the plate aside and follow the same steps for the remaining five desserts.
If the panna cotta doesn’t come free after its first dunk in warm water, try again for another 5-10 seconds. Giving it a good shake if that’s needed is also fine. The panna cotta is well set so it shouldn’t break if you need to do this.
How To Make Vegan Panna Cotta
To create a vegan version and keep this dessert free of animal products you can replace the gelatin with ½ teaspoon of agar agar powder. This will give similar results to gelatin though it will set a touch firmer.
- Add the coconut milk, coconut cream, maple syrup, lime zest, vanilla and agar agar powder to a small saucepan and whisk well to combine.
- Place the saucepan on the stove over a very low heat and allow it to slowly come to a boil. This should take about 20-30 minutes. If you boil it too quickly the dessert won’t set at all.
- Pour the panna cotta into ramekins lightly greased with coconut oil and refrigerate for at least two hours.
- To un-mould – dip the ramekins (enough that the sides are submerged) into hot water for 10 seconds.
- Gently run a knife around the rim of the panna cotta then place a serving plate over the top of the ramekin and invert both so the ramekin is upside down over the plate. Give it a bit of a shake then you should hear a perfect panna cotta release as it drops onto the plate.
- Lift the mould, set the plate aside and follow the same steps for the remaining five desserts.
- Serve with some of the raspberry sauce and any other toppings of your choosing.

Expert Hints And Tips
Make sure to evenly sprinkle the gelatin over the surface of the water, and avoid adding it in one big clump. This is necessary for successful blooming, which simply means the gelatin has taken on water and expanded.
The right kind of coconut milk is important in this recipe as those found in long-life cartons tend to be far more watery than canned coconut milk. As such, the canned can’t be substituted.
If you don’t have ramekins be cautious with the type of cup or other mould you choose to use! When testing this recipe I had several issues un-moulding when using various coffee cups. All were ceramic and very porous, which meant the panna cotta stuck to the sides.
Don’t use too much oil when greasing the moulds! Coconut oil can create a hard crust on the exterior if too much is used. This will soften so it won’t ruin the dessert but if eaten as soon as it’s un-moulded it can give an unpleasant mouthfeel. I suggest putting some coconut oil on a paper towel and rubbing it over the interior of the moulds.

Storing And Freezing
Store these coconut desserts in the refrigerator for 4-5 days, either in an airtight container or covered with cling film. If you don’t plan to finish them within that time, you can also freeze them. I don’t recommend this but it can be done.
To freeze – cover the top of the panna cotta with a little plastic wrap (directly on the panna cotta) then add some more over the top of the ramekin. This stops it from getting freezer burn. Completely defrost in the fridge before eating. Just note when doing this the texture will change. It will become slightly more firm.
Make Ahead
Panna cotta can be made a day or so before it’s needed. If doing this just ensure the ramekins are covered with beeswax wraps or plastic wrap to stop the formation of a crust on top.
How To Fix A Panna Cotta That Didn’t Set
Panna cotta will not set if boiling liquid is poured straight onto the gelatin or the gelatin is not completely dissolved. In the first instance, it’s difficult to save because boiling will destroy the gelling properties of the gelatin. Where gelatin not being fully dissolved is the culprit this is easily fixed.
Remove the panna cotta from the fridge and allow it to come to room temperature. Tip the panna cotta into a small or medium saucepan (depending on how many you want to re-work) and gently melt them down over a low-medium heat. As the mixture warms up, continue stirring to encourage the proper dissolution of the gelatin. Ensure that there are no visible lumps in the mixture before transferring it back to the mould. Do make sure the moulds are cleaned and re-greased with a little more coconut oil before you do. Refrigerate again for four hours or overnight until it sets and can be removed from the mould.
Coconut Panna Cotta FAQs
This can occur due to rapid temperature changes during the cooling process, insufficient stirring of the ingredients, the gelatin not being dissolved completely, or boiling the ingredients.
Rubbery generally means too much gelatin was used so be precise with this measurement when following the recipe. This can also occur if the panna cotta has been left in the fridge for too long so be sure to enjoy it within 3-5 days of making it.
Tinned coconut milk generally comprises of one or two ingredients when processed and packaged in it’s natural state. These are coconut meat (sometimes labeled as coconut kernel extract) and occasionally, water. This often results in a milk with a slightly grey tinge. Some brands also add gums and whitening agents to their coconut milk during processing so it looks more like a freshly cracked coconut. Which type you choose depends entirely on whether you want your panna cotta to be sparkling white or if you’d prefer to use a product with all natural ingredients.
More Easy Dessert Recipes
- No-Bake Chocolate Tart
- Twix Cups
- Chocolate Covered Dates
- Mango Ice Cream Recipe
- Caramel Cups
- Honey And Sesame Candy Recipe
Did you make this recipe?
If you try this recipe, I’d love to know. Leave a comment, rate it, and remember to tag @wholenaturalkitchen in your pics or reels on Instagram, Facebook or TikTok!

Creamy Coconut Panna Cotta (Dairy Free)
Ingredients
For The Coconut And Lime Panna Cotta
- 1 can coconut milk (13.5oz/400ml)
- ⅓ cup coconut cream (2.7oz/80ml)
- ½ cup maple syrup
- 2.5 tsp gelatin (roughly one sachet)
- 1 tsp vanilla extract (or 1 vanilla bean scraped)
- Zest of 1 lime
- Coconut oil to grease
- ⅓ cup cold water
For The Raspberry Sauce
- 1 cup raspberries (3.5 ounces/100g)
- 1 tbsp maple syrup
- 2 tsp Juice of one lime
Instructions
To Make The Panna Cotta
- Pour the water into a medium-sized bowl and evenly sprinkle the gelatin over the surface (See note 1). Let stand for 5-10 minutes to ‘bloom’, which is the gelatin softening and hydrating as it soaks up the water.
- In the meantime, lightly grease six small ramekin moulds with melted coconut oil and set aside.
- Heat the coconut milk, coconut cream, maple syrup, and lime zest in a small saucepan over medium-low heat. You’re just looking to warm the panna cotta mixture through, not boil it.
- Remove from the heat and add in the vanilla extract or seeds then pour this over the bloomed gelatin. Gently stir the mixture until all the gelatin has completely dissolved (see notes 2 and 3).
- Evenly divide the panna cotta mixture between the moulds, then chill for four hours or overnight for best results.
- Now make the raspberry sauce by placing the raspberries, maple syrup and lime juice in a small pot. Heat for 2-3 minutes as you crush the raspberries with a fork. The mix should just begin to boil at this point. Strain through a fine mesh sieve and refrigerate until you're ready to serve.
To Serve The Panna Cotta
- Un-mold each panna cotta onto a serving plate. To do this dip each mould into hot water that completely covers the sides. Leave to sit for 10 seconds, gently run a knife around the rim of the dessert then turn over onto a serving plate. Give it a shake and the panna cotta should release (see note 4).
- Drizzle with the chilled raspberry sauce and add any other toppings of your choosing.