Easy No-Bake Chocolate Tart

This luscious No-Bake Chocolate Tart is an easy treat that can be whipped up in little time with no fuss. A deliciously rich chocolate ganache filling is poured into a chocolate almond crust, then topped with mixed berries before serving. It’s a melt-in-your-mouth dessert your guests will love.


Key Ingredients
The best part about this delicious tart is that it uses minimal and simple ingredients. You’ll likely have everything you need in your fridge and pantry already.

- Roasted almonds – provide a textured, nutty crust that offers a flavourful foundation for the tart.
- Peanut butter – helps to bind the ground almonds while contributing a rich creamy taste with a hint of sweetness that complements the dark chocolate flavour.
- Cocoa powder – contributes depth and richness, ensuring a robust chocolate flavour throughout the tart shell.
- Medjool dates – work as a binder in the base but also provide much of the sweetness.
- Coconut cream – imparts creaminess without using dairy along with good fats, and a subtle tropical note.
- Chocolate – dark chocolate infuses a rich, intense chocolate flavour with its higher cocoa content, while milk chocolate adds a creamier, milder sweetness. When combined with the coconut cream these ingredients form the rich chocolate ganache filling for the tart. To keep this dessert dairy free, all dark chocolate can be used too.
- Maple syrup – offers natural sweetness and a touch of smokiness that help to cut through the bitterness of the dark chocolate.
- Vanilla extract – contributes a fragrant, aromatic complexity, harmonising and complementing the chocolate tones.
- Sea salt – balances the overall taste profile of the tart.
This is a perfect treat for chocolate lovers and a versatile dessert that can be adapted with different flavours and toppings to suit the seasons. Serve as is or topped with mini chocolate chips and extra sea salt, chocolate shavings or fresh berries with chopped nuts and coconut.
Substitutions And Variations
For a vegan chocolate tart – the rich chocolate ganache filling can be made completely dairy-free by using vegan milk chocolate bars or all 70% dark chocolate. It will be slightly more bitter without the milk chocolate however, the maple syrup and fresh berries will balance that perfectly.
Any nut butter can be used in the base. Almond butter is a good substitute for the peanut as is cashew butter.
How To Make This No-Bake Chocolate Tart
This tart recipe is a chocolate lover’s dream. Chocolate base, chocolate filling, and the option to add more chocolate to the topping. A small slice will go a very long way so it’s a great dessert to make for a crowd.
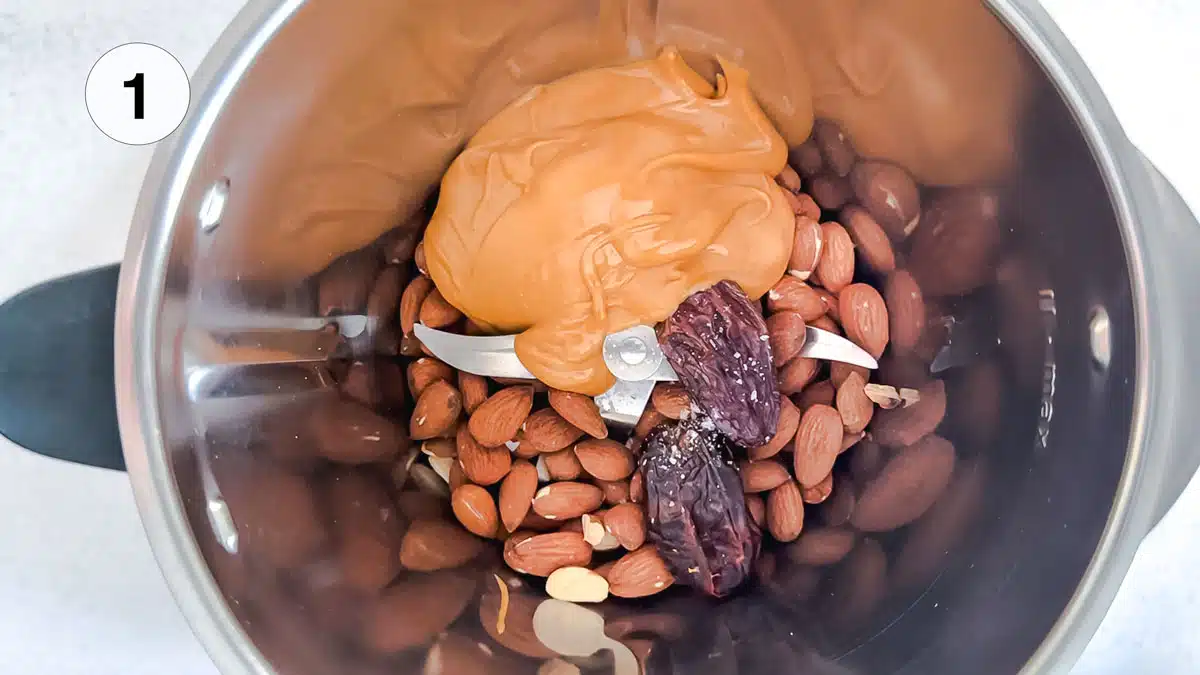
- Add the almonds, peanut butter, dates, cacao powder and salt to a food processor and blend on high until they form into fine crumbs (roughly 15-20 seconds).
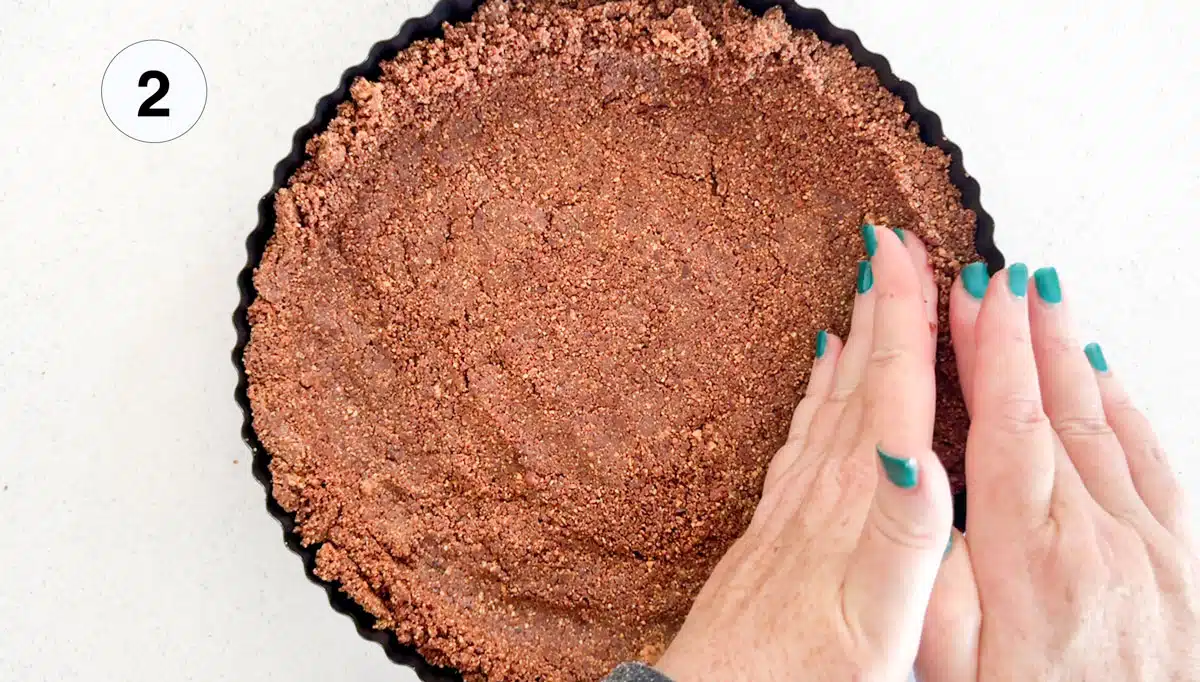
- Press the chocolatey crust mixture firmly into a 10-inch/25cm round tart pan with a removable base to form the tart shell. Place in the fridge while you make the filling.
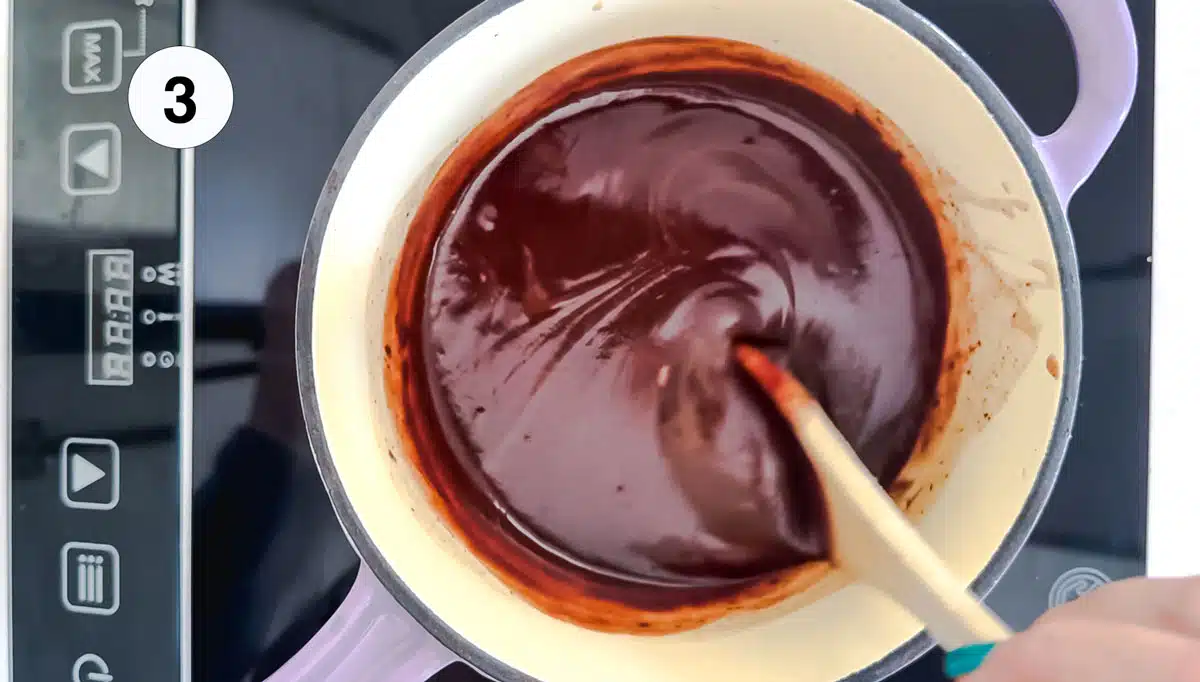
- In a medium saucepan add the coconut cream and maple syrup. Heat for a few minutes until completely warmed through. Turn off the heat, add the chopped chocolate and stir vigorously until well combined with the coconut cream and the mix looks glossy. Add the vanilla and stir through. Your rich ganache filling should now look quite shiny.
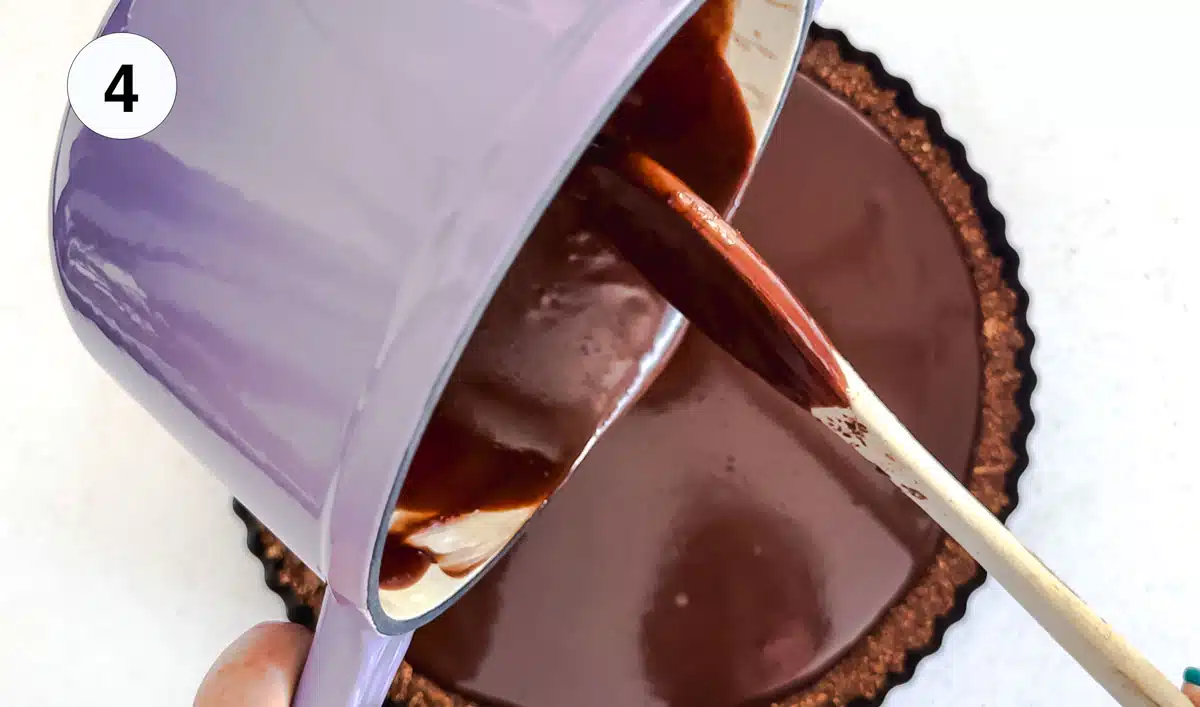
- Remove the tart shell from the fridge and pour the creamy chocolate filling into the base. Place the tart in the freezer to chill for two hours or until the filling is firm (but not frozen!) to touch.

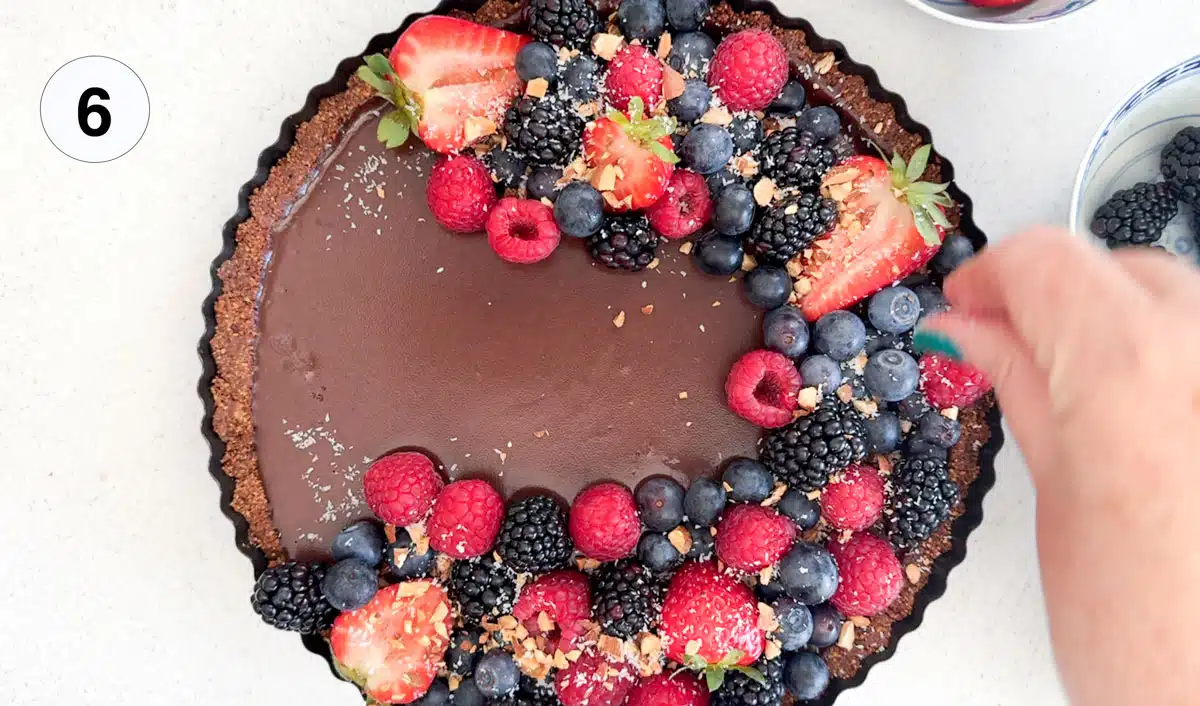
- Remove the tart from the freezer, then gently take it out of the tart tin and place on your serving plate. Decorate the top with plenty of fresh raspberries, blueberries, strawberries and blackberries.
- Once you’ve arranged them to your liking, sprinkle over chocolate shavings, chopped nuts, and desiccated coconut.
This is a simple, delicious dessert, characterized by its rich and decadent flavor. It comes together with ease and is perfect to celebrate special occasions like Valentine’s Day or Mother’s Day.

Tips For Success With This Recipe
Thoroughly chop the chocolate before adding it to the warmed coconut cream. This helps it melt faster than adding in larger squares.
And don’t be tempted to use light coconut cream. The full-fat variety is thicker, and creamier, which will produce a more luscious filling and help the tart set.

What To Serve With This Chocolate Tart
My favourite way to serve this raw chocolate tart is topped with fresh berries, crushed nuts, a little coconut and some shredded chocolate. However, whipped coconut cream, whipped cream, fresh fruit, and vanilla ice cream are all excellent accompaniments for the bittersweet chocolate taste. For opposing yet complementary flavours, a caramel sauce can also be divine.
Make Mini Chocolate Tarts
These are super cute for special days like Valentine’s Day or Mother’s Day. Or even just great for parties. Divide the base between your mini tart tins then do the same with the filling. Place them in the fridge for an hour or two or until the filling is completely set. Decorate each tart with the berries, chopped nuts and coconut. Depending on the size of the tins, this recipe should make between 10 – 15 mini tarts.
Storing And Freezing
Leftovers can be stored in an airtight container in the fridge or on a plate covered with plastic wrap. It will keep this way for up to 5 days or can be stored in the freezer for up to 3 months.
To freeze, cut the remaining tart into slices and store in separate containers or ziplock bags. If using one large container ensure each slice is separated by parchment/baking paper so they don’t stick together.
Make Ahead
If making the tart a day or two ahead I suggest chilling in the fridge instead of the freezer. This will mean it doesn’t freeze solid. I also recommend not decorating until just before serving. This stops the berries from dampening the top of the chocolate ganache.

N0-Bake Chocolate Tart FAQs
A cake pan, springform tin, or quiche dish can all be used to make this if you don’t have a tart tin with a removable base. The springform pan operates much the same way and the tart is easily removed whole. It can’t be removed whole and displayed from cake pans or a quiche dish however, it will still look beautiful when cut into slices and served.
Other No-Bake Dessert Recipes
Did you make this recipe?
If you try this recipe, I’d love to know. Leave a comment, rate it, and remember to tag @wholenaturalkitchen in your pics or reels on Instagram, Facebook or TikTok!

Easy No-Bake Chocolate Tart
Equipment
- 1 10"/25cm tart tin with a removable base
- 1 Food processor
- 1 Small saucepan
Ingredients
FOR THE BASE
- 1.5 cups roasted almonds
- ½ cup peanut butter
- 10 large, pitted medjool dates
- 2 tbsp cocoa powder
- Pinch of sea salt
FOR THE FILLING
- 2 cups coconut cream
- 7 oz dark chocolate, roughly chopped (200g)
- 7 oz milk chocolate, roughly chopped (200g)
- ½ cup maple syrup
- 1.5 tsp vanilla extract
FOR THE TOPPING
- 2 cups mixed berries
- 2 tbsp chopped mixed nuts
- 1 tbsp desiccated coconut
Instructions
- Add the almonds, peanut butter, dates, cacao powder, and salt to a food processor and blend on high until they form into fine crumbs (roughly 15-20 seconds).
- Press the chocolatey crust mixture firmly into a 10-inch/25cm round tart pan with a removable base to form the tart shell. When doing the edges, push the tart mix towards the edge of the tin from the inside and down from the top at the same time to help them firm up (see image 2 in the how to section above or watch it being done in the video below). Place the shell in the fridge while you make the filling.
- In a medium saucepan add the coconut cream and maple syrup. Heat for a few minutes until completely warmed through. Turn off the heat, add the chopped chocolate and stir vigorously until well combined with the coconut cream and the mix looks glossy. Add the vanilla and stir through the rich ganache filling, which should now look quite shiny.
- Remove the tart shell from the fridge and pour the creamy chocolate filling into the base. Place the tart in the freezer to chill for 2 hours or until the filling is set. The top will be firm but have a little bounce, like a chocolate mousse.
- Remove the tart from the freezer, then gently take it out of the tart tin and place on your serving plate. Decorate the top with plenty of fresh raspberries, blueberries, strawberries and blackberries. Once you’ve arranged them to your liking, sprinkle over chopped nuts, and desiccated coconut.
- Serve straight away. If you're making ahead see the notes section below.