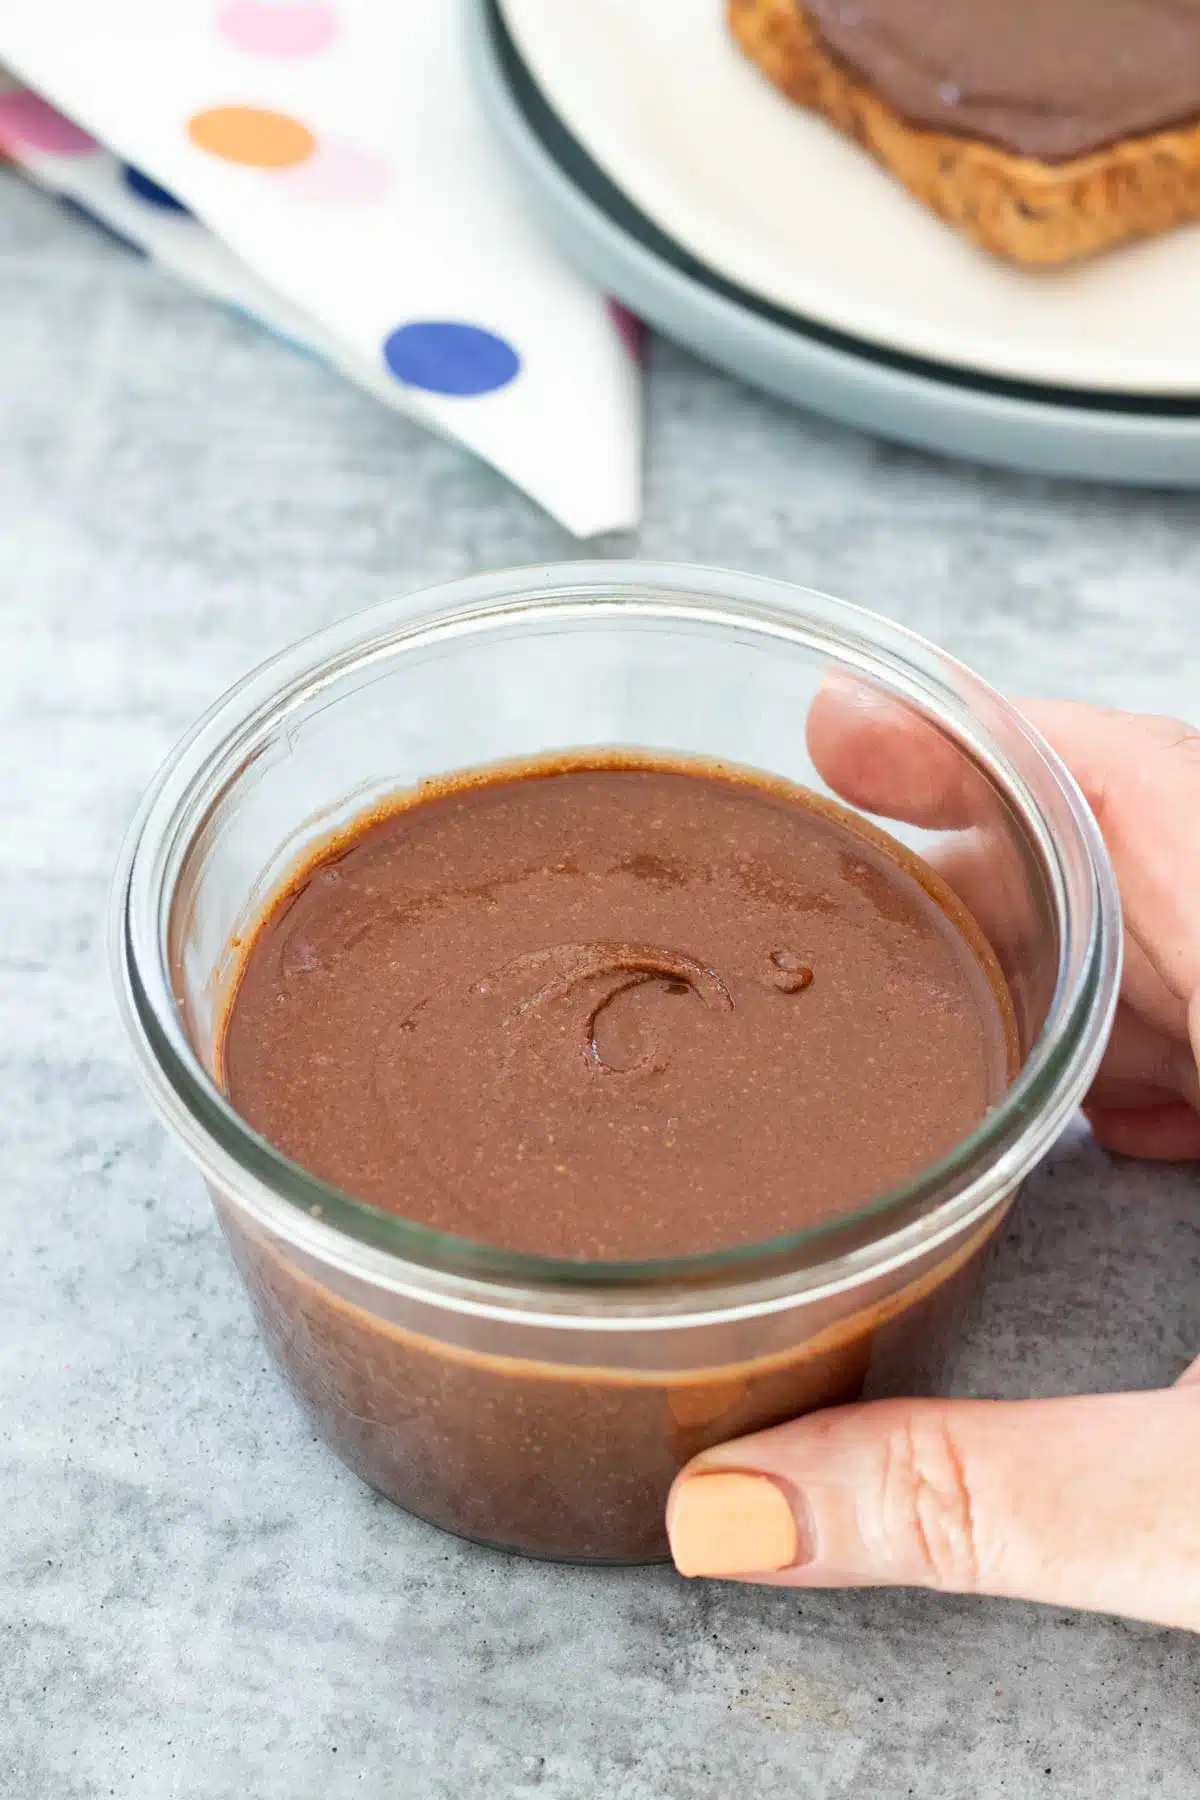
Homemade Chocolate Spread

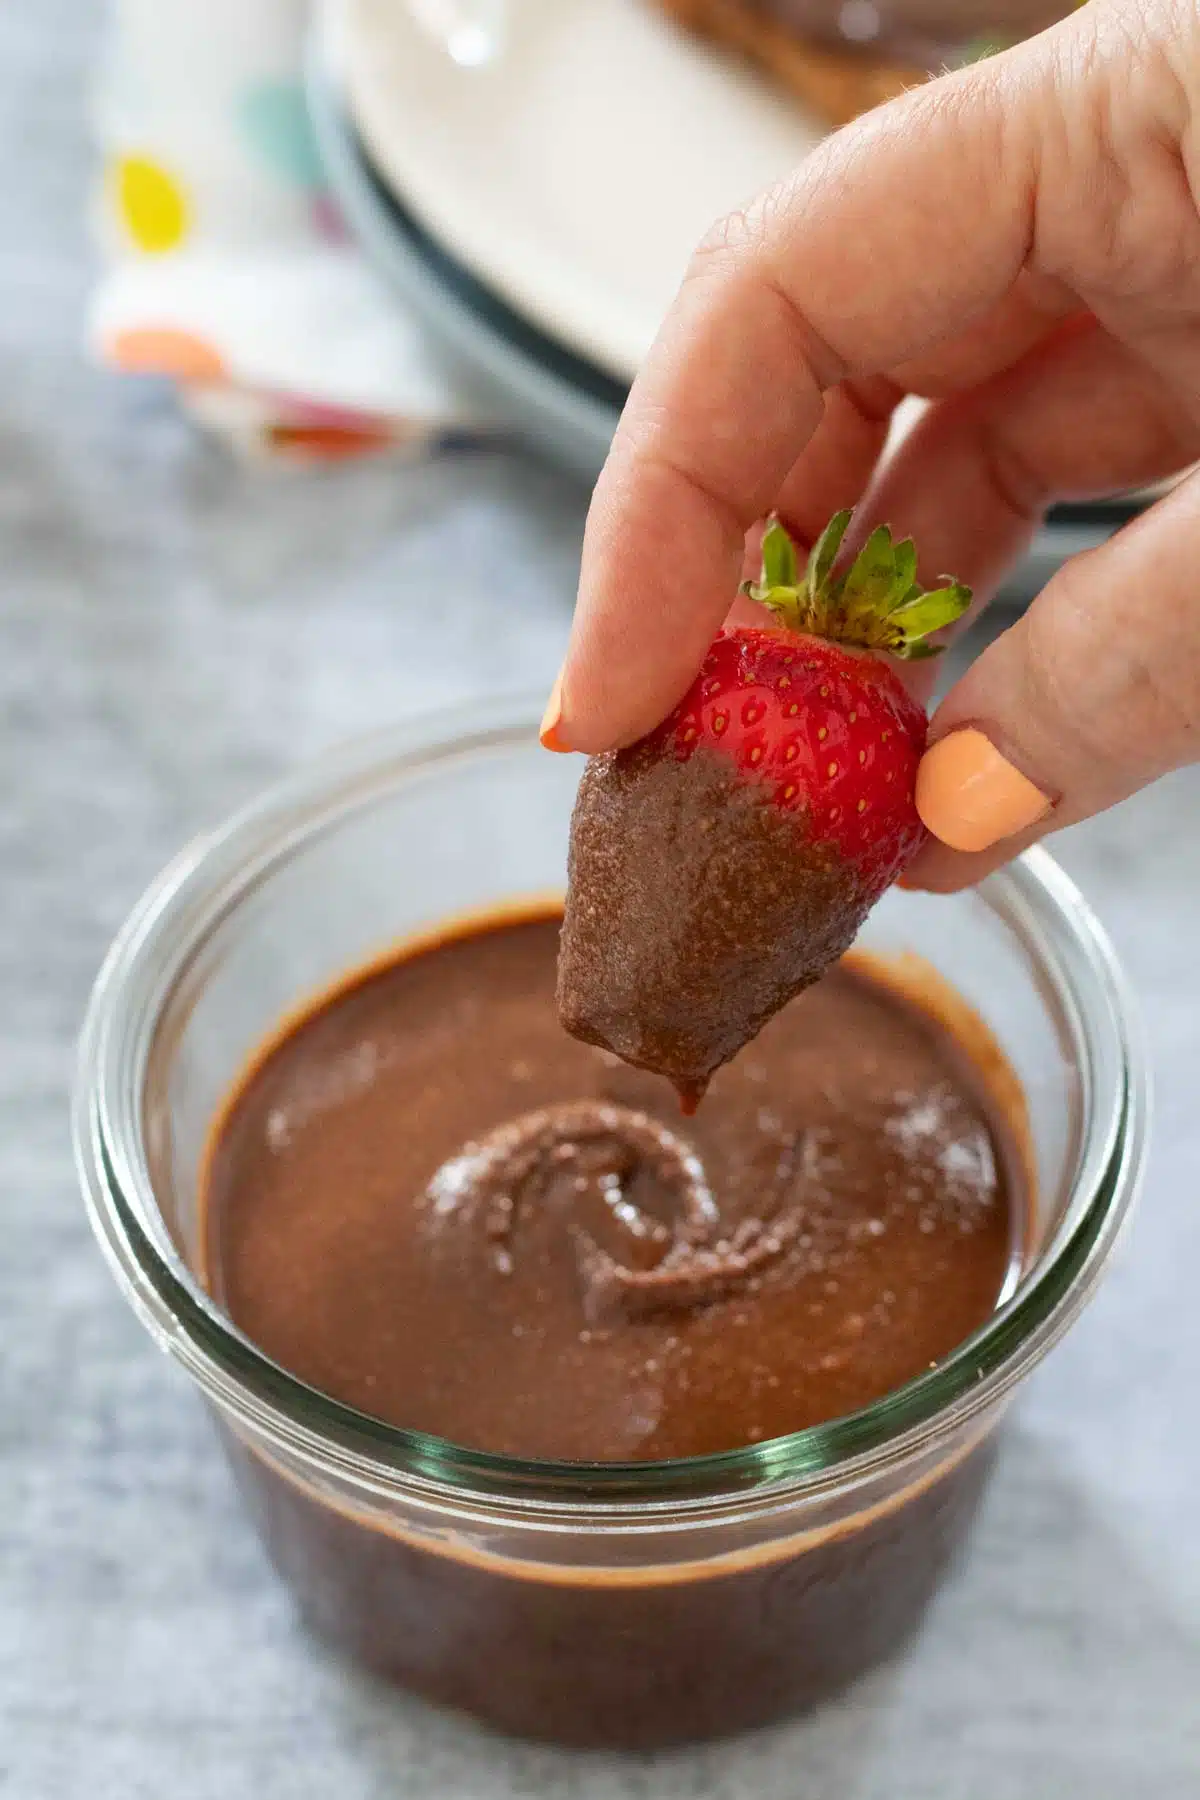
This Homemade Chocolate Spread is like your very own homemade Nutella. It’s delicious and so versatile it can be used on anything from toast, to tarts, to cakes, or even spread over pancakes. Dipping strawberries straight into the jar is also an option!

Key Ingredients
These are very basic ingredients however you have two options with the hazelnuts. You can purchase pre-roasted or buy raw hazelnuts and roast your own.
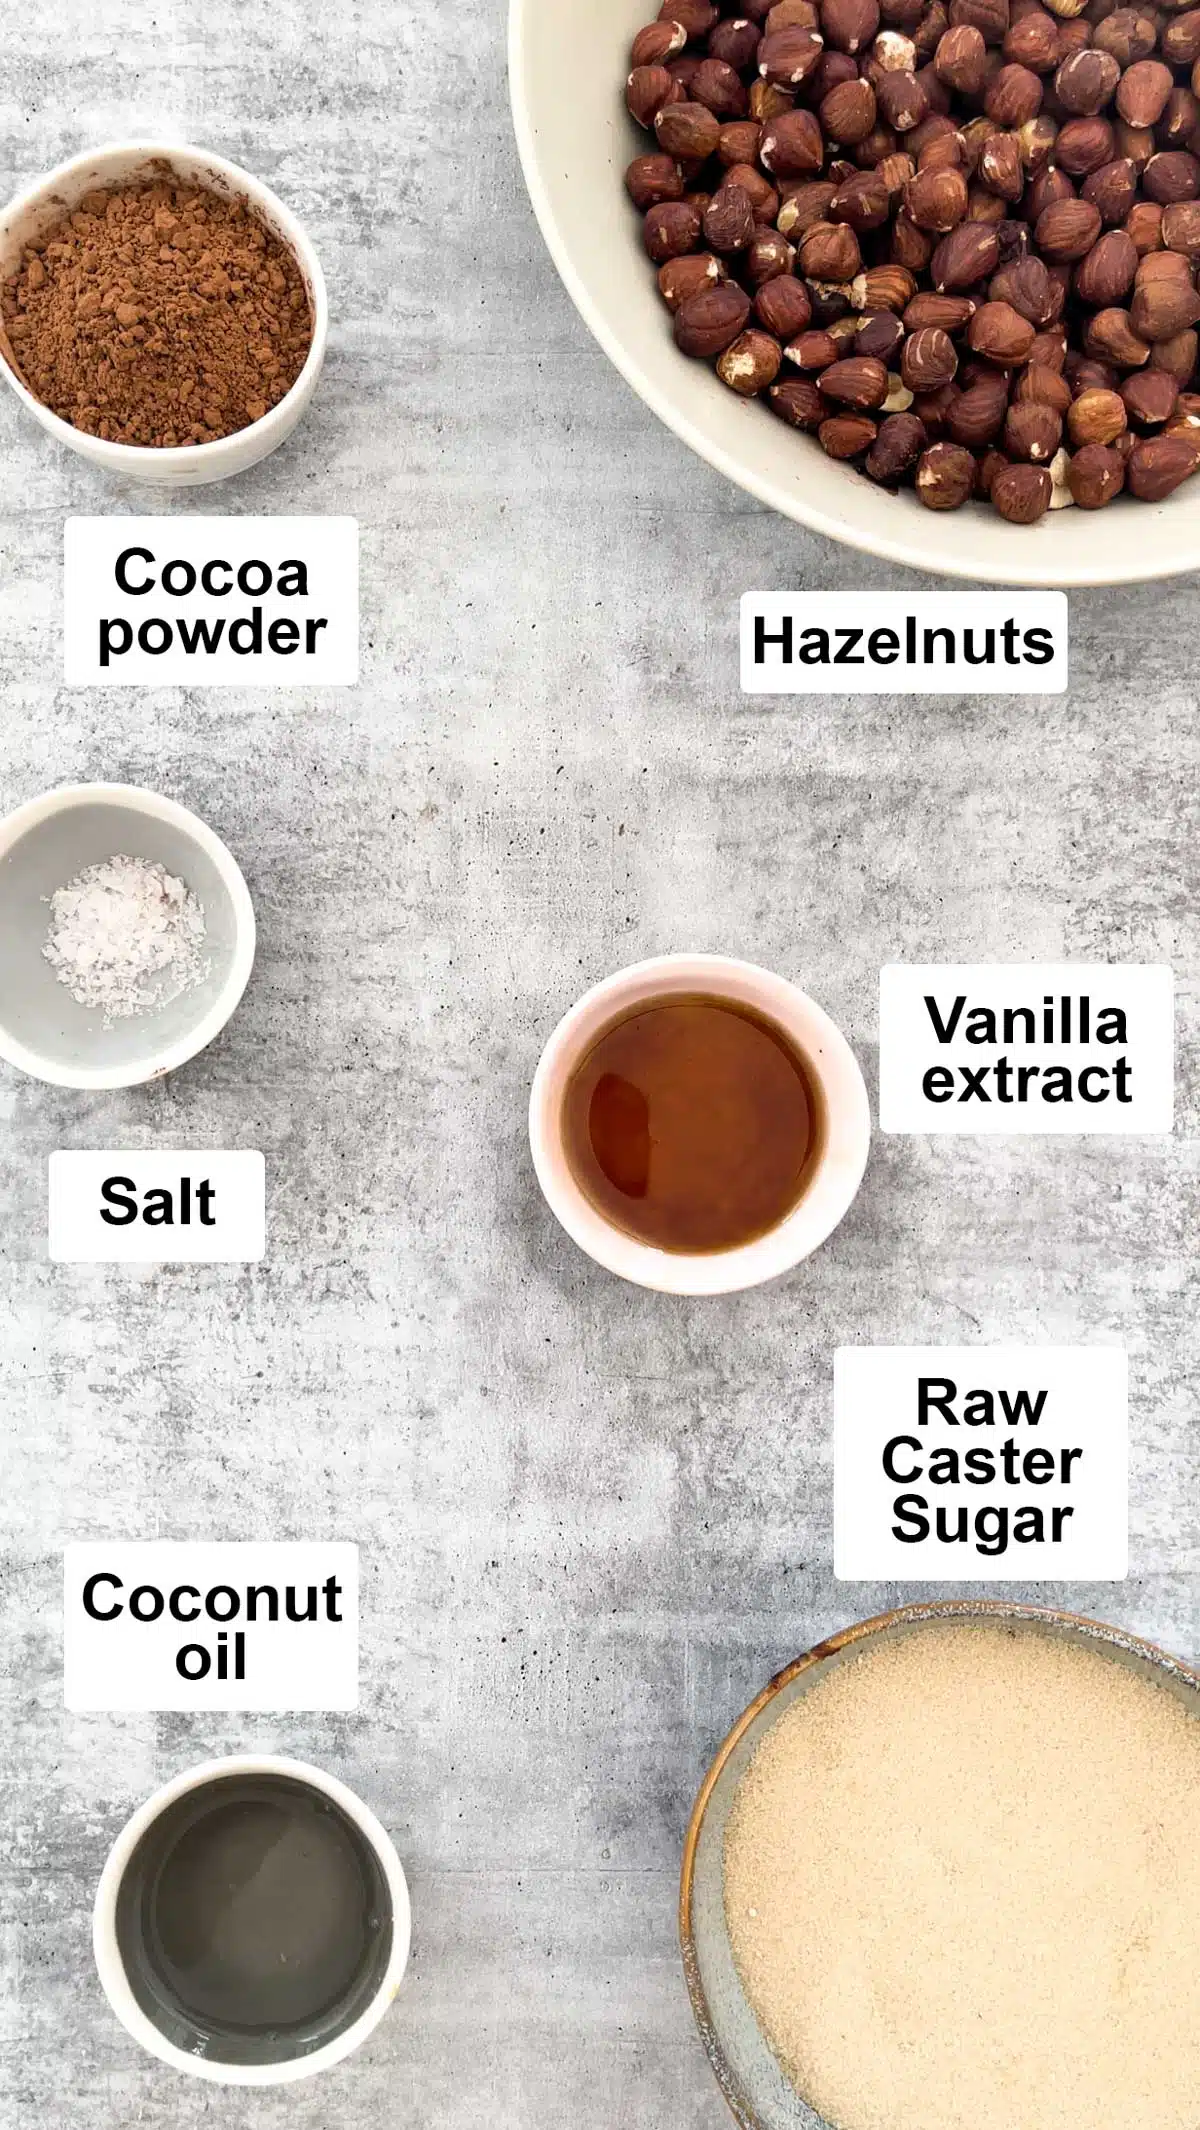
- Hazelnuts – These must be roasted to give the chocolate spread that delicious, rich base. You can buy them roasted if preferred but roasting them yourself is very easy. If they have been bought pre-roasted just ensure the skins have been removed. Leaving the skins on will give the spread a bitter taste.
- Cocoa powder – Go for a Dutch cocoa powder, as it has a smoother, more mellow flavour. Cocoa powders with rich, dark, or raw written on the label are too acidic for this recipe.
- Golden caster sugar – This recipe will work with most granulated sugars but keep their level of sweetness in mind. White sugars can be much sweeter than the brown varieties. If using a white sugar start with 1/2 cup and add more if needed.
- Vanilla essence – Used to enhance the flavours of the other ingredients.
- Coconut oil – Adding flavour and a little more oil to keep this spreadable.
- Salt – Helps to balance out the sweetness.
I’ve tried this recipe with a variety of sugars. Of all of them I don’t think coconut sugar adds enough sweetness without needing a tonne of it. As such, it’s not one I recommend, but that’s for you and your tastebuds to decide.
Substitutions And Variations
Most sugars will work in this recipe however, I found that coconut sugar was not quite sweet enough.
Replace the sugar entirely with ½ a cup of maple syrup. This does slightly change the flavour profile of the recipe but it introduces rich, vanilla notes.
How To Make This Homemade Chocolate Spread
Don’t be tempted to skip on the roasting of the hazelnuts or removing their skins. The skins are incredibly bitter and if not removed, the resulting spread will be too. Roasting them also brings out those lovely natural oils and deepens the flavour. And don’t skip on blending the sugar first either! Without this, the final spread is very gritty.
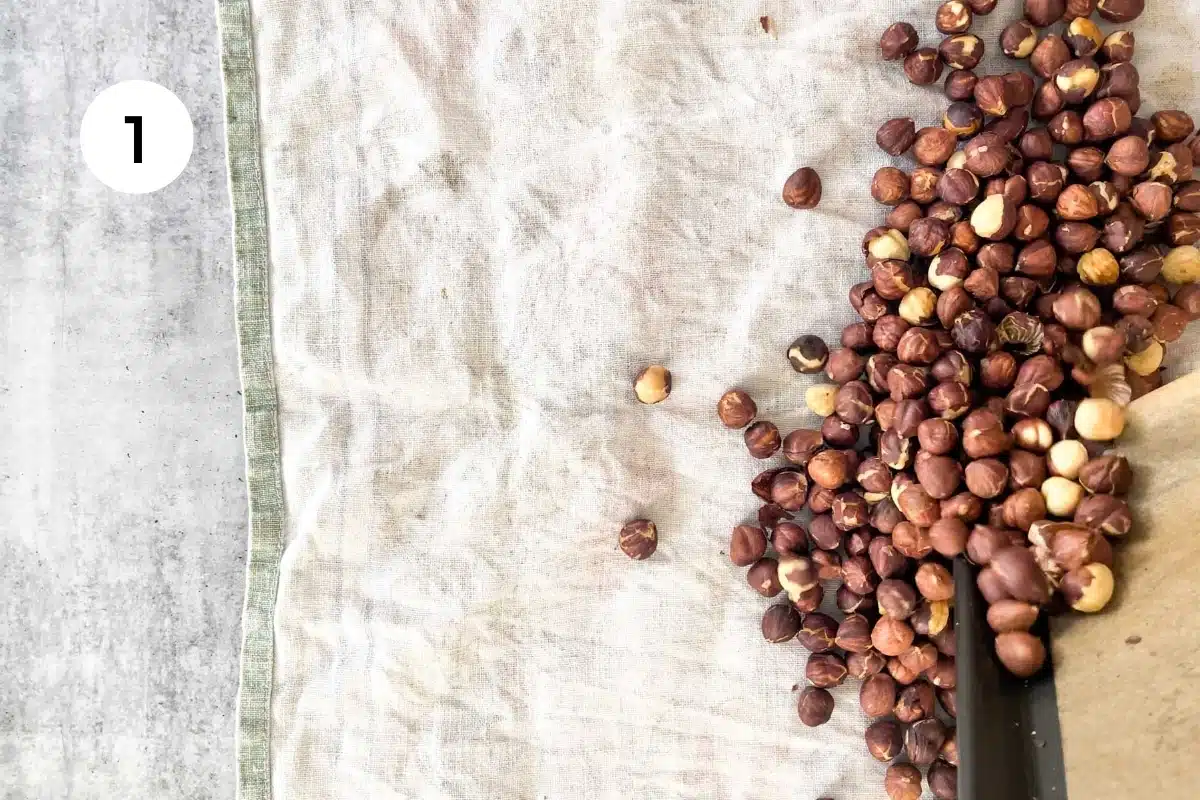

- Preheat the oven to 180ºC / 350ºF. When the oven is hot, roast the hazelnuts for 8 minutes until the skins crack. Remove the hazelnuts from the oven and allow to cool.
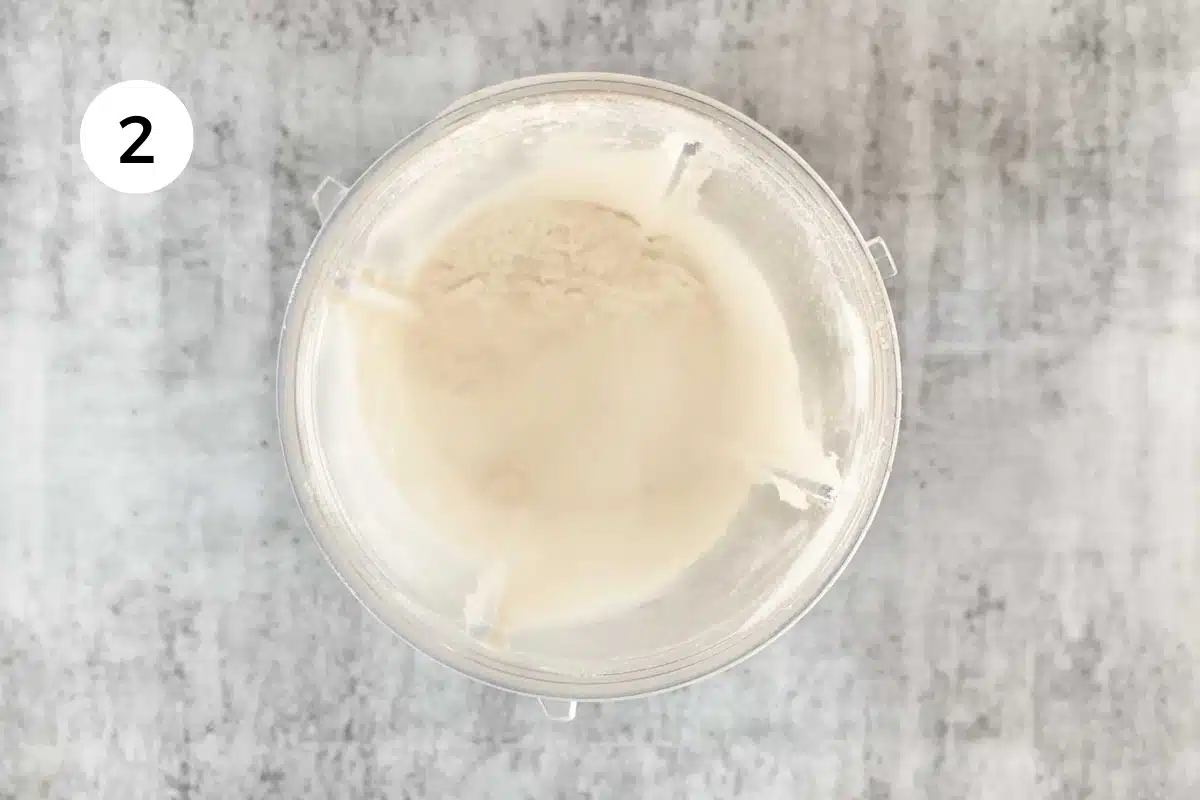
- Add the sugar to the blender and blend on high for 15 – 20 seconds. Or until it has an icing/powdered sugar consistency. Remove from the blender and set aside.
- Lay a tea towel flat on the kitchen bench and pour the cooled hazelnuts into half of it. Fold the other half over the top and rub them vigorously until the skins slide off.
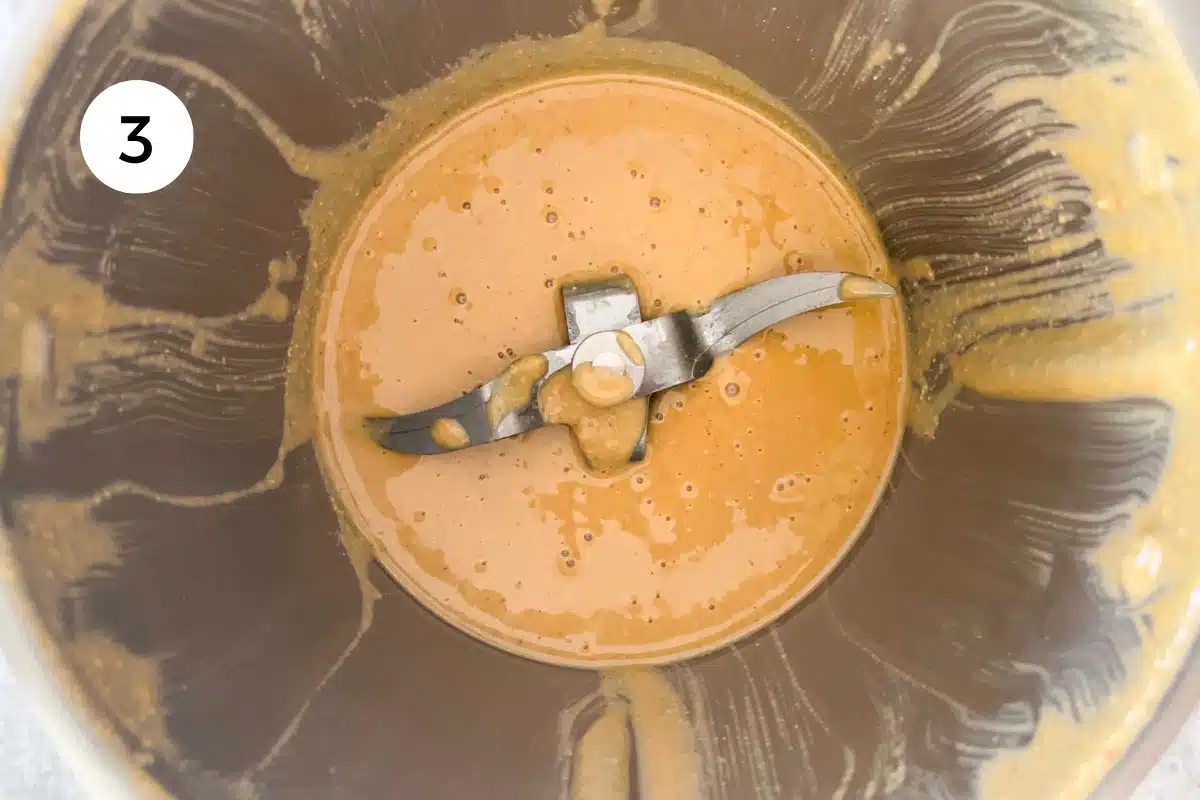
- Add the skinless hazelnuts to a blender and blend on high for 5 minutes. You want to create quite a liquid nut butter.
- Next add all the remaining ingredients and blend again on a medium speed for 2 – 3 minutes until well combined.
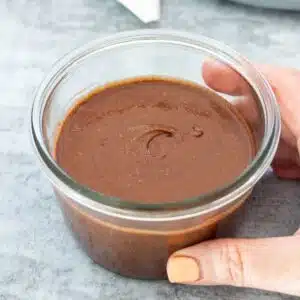
- Pour into a jar, put the lid on and leave on the bench or put it in the fridge to extend the shelf life.
It’s important to try and get the hazelnuts as skinless as possible. There will be a few stubborn ones where the skin sticks and that’s fine. However, too many and your chocolate spread will be bitter. Also be careful not to burn the hazelnuts while roasting. This will burn their natural oils, which can make the nuts taste rancid.
Tips For Success With This Recipe
While it’s tempting to toss everything into the blender at once, you’ll have a very gritty spread if you don’t grind the sugar first. It will taste something akin to chomping on raw sugar.
It’s important to remove as many skins from the hazelnuts as possible. There will be a few stubborn ones where the skin sticks and that’s fine. However, too many and your chocolate spread will be bitter. Also be careful not to burn the hazelnuts while roasting. This will burn their natural oils, which can make the nuts taste rancid.
Go for a Dutch cocoa powder, as it has a smoother, more mellow flavour. Cocoa powders with rich, dark, or raw written on the label are too acidic for this recipe.

Storing And Freezing
Store in a glass jar in the cupboard for up to 2 weeks or in the fridge for 1 month. If it hardens in the fridge, just sit it on the bench for 5 mins or so before using.
The spread can also be frozen for up to 3 months. Freeze it in individual portions for ease of use when defrosting.
Homemade Chocolate Spread FAQs
No. It has low levels of acidity and is a very thick spread, which means it’s not suitable for canning.
It will work with just about any dessert. Use it to fill tarts, spread on cakes, dollop on pancakes, or spread on toast. You can dip strawberries in it too! Any way you would use a traditional jar of Nutella.
More Delicious Spreads
- Strawberry And Rosewater Jam
- Tangelo Curd
- Fig Butter (with cinnamon and honey)
Did you make this recipe?
If you try this recipe, I’d love to know. Leave a comment, rate it, and remember to tag @wholenaturalkitchen in your pics or reels on Instagram, Facebook or TikTok!
Homemade Chocolate Spread
Equipment
- 1 Blender
Ingredients
- 2 cups hazelnuts (12.5oz/350g)
- ⅔ cup golden caster sugar (see note 1) (2.5oz/70g)
- ⅓ cup cocoa powder (see note 2)
- 2 Tbsp coconut oil, liquid
- 2 tsp vanilla essence
- ¼ tsp salt
Instructions
- Preheat the oven to 350ºF/180ºC and put the hazelnuts on a baking sheet lined with baking paper. When the oven is hot, roast the hazelnuts for 8 minutes until the skins crack. Remove from the oven and allow to cool enough to handle.
- Add the sugar to the blender and blend on high for 15 – 20 seconds. Or until it has an icing/powdered sugar consistency. Remove from the blender and set aside.
- Lay a tea towel flat on the kitchen bench and pour the cooled hazelnuts into half of it. Fold the other half over the top and rub them vigorously until the skins slide off (see note 3).
- Add the skinless hazelnuts to the blender and blend on high for 5 minutes. You want to create quite a liquid nut butter. You may need to scrape down the sides of the blender a few times before continuing.
- Next add all the remaining ingredients and blend again on a medium-high speed for 5 minutes until well combined. If needed, stop the blender, and scrape down the sides a few times to ensure everything is well incorporated.
- Pour into a jar and put it in the cupboard or put it in the fridge to extend the shelf life. This homemade chocolate spread will last for 2 weeks in the cupboard or up to 2 months in the fridge.