Homemade Pickled Eggs

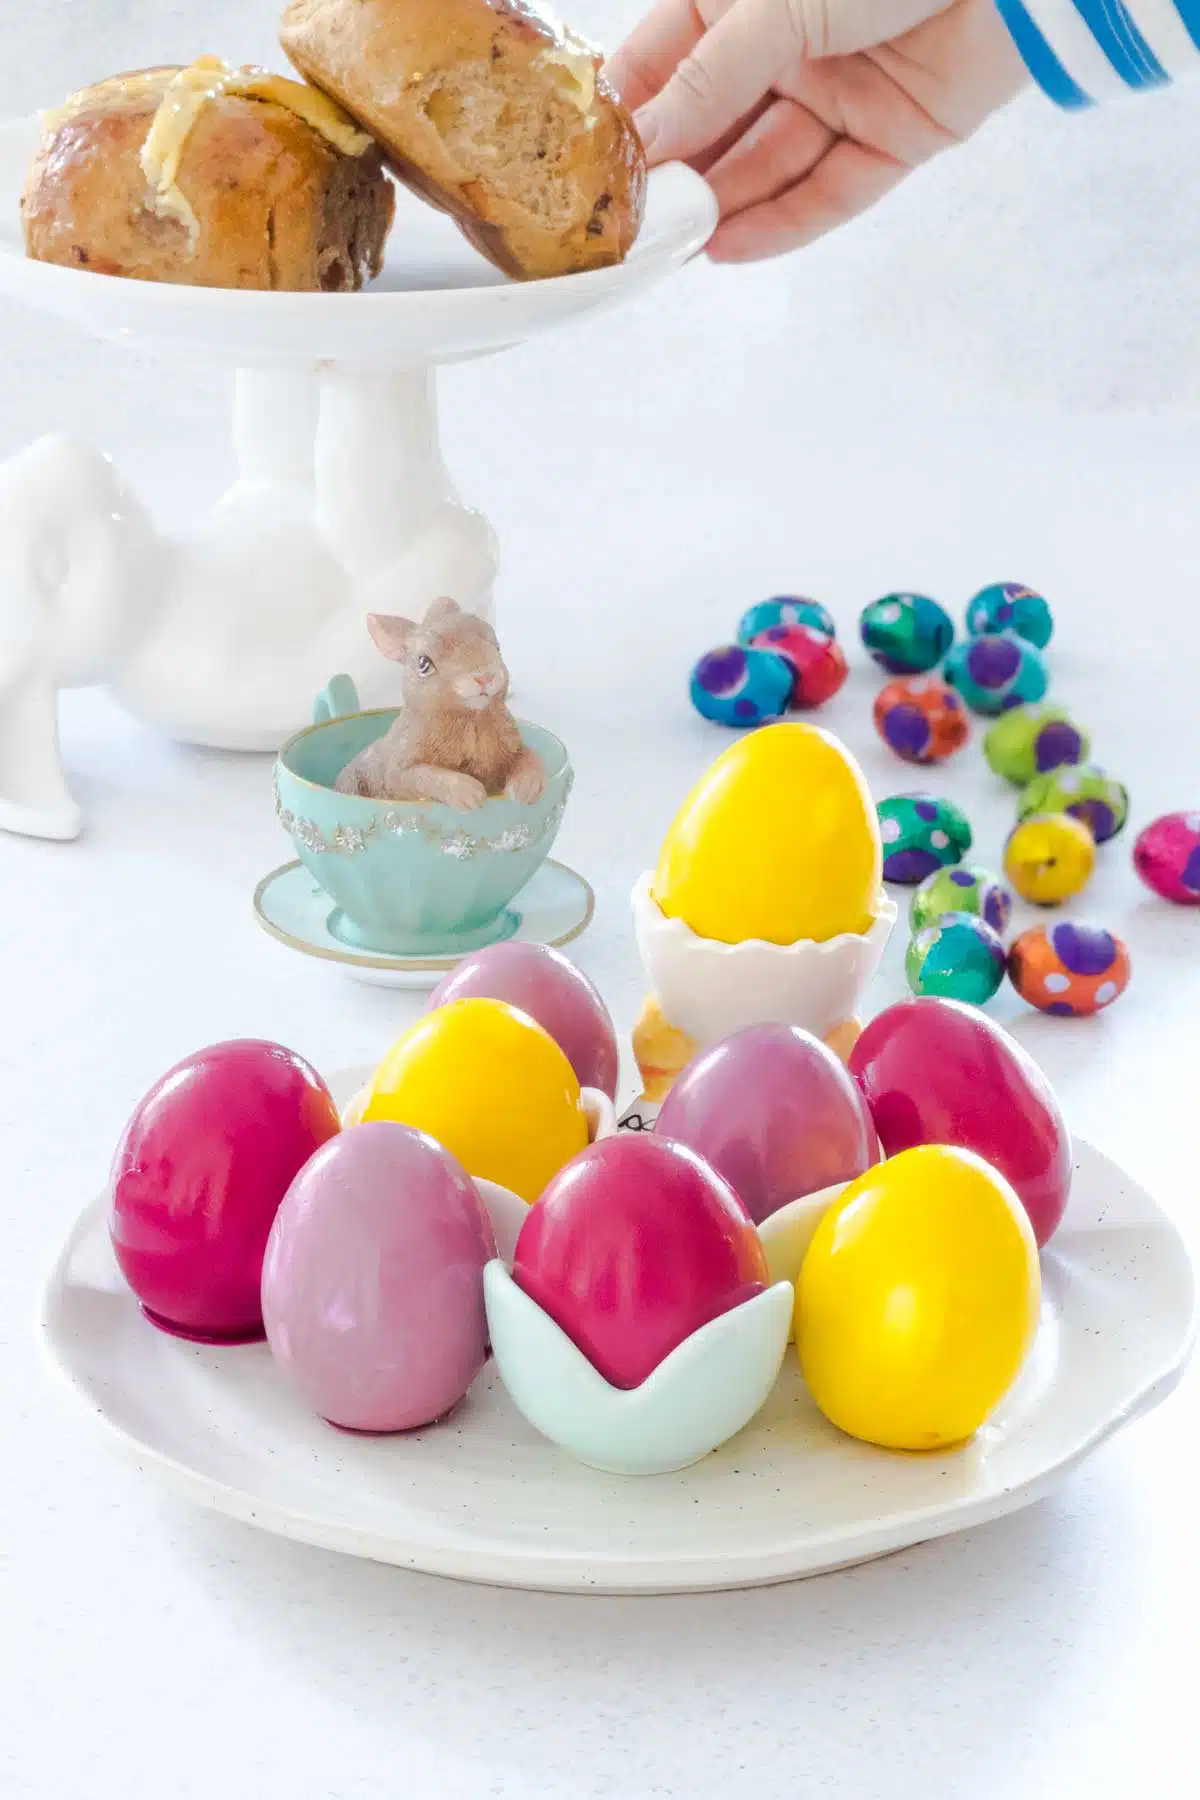
These Homemade Pickled Eggs are a delicious snack made with just a few simple ingredients. They’re great any time of year but you can get very creative with them at Easter and make them vibrant colors to brighten up your lunch table.

Ingredient Notes
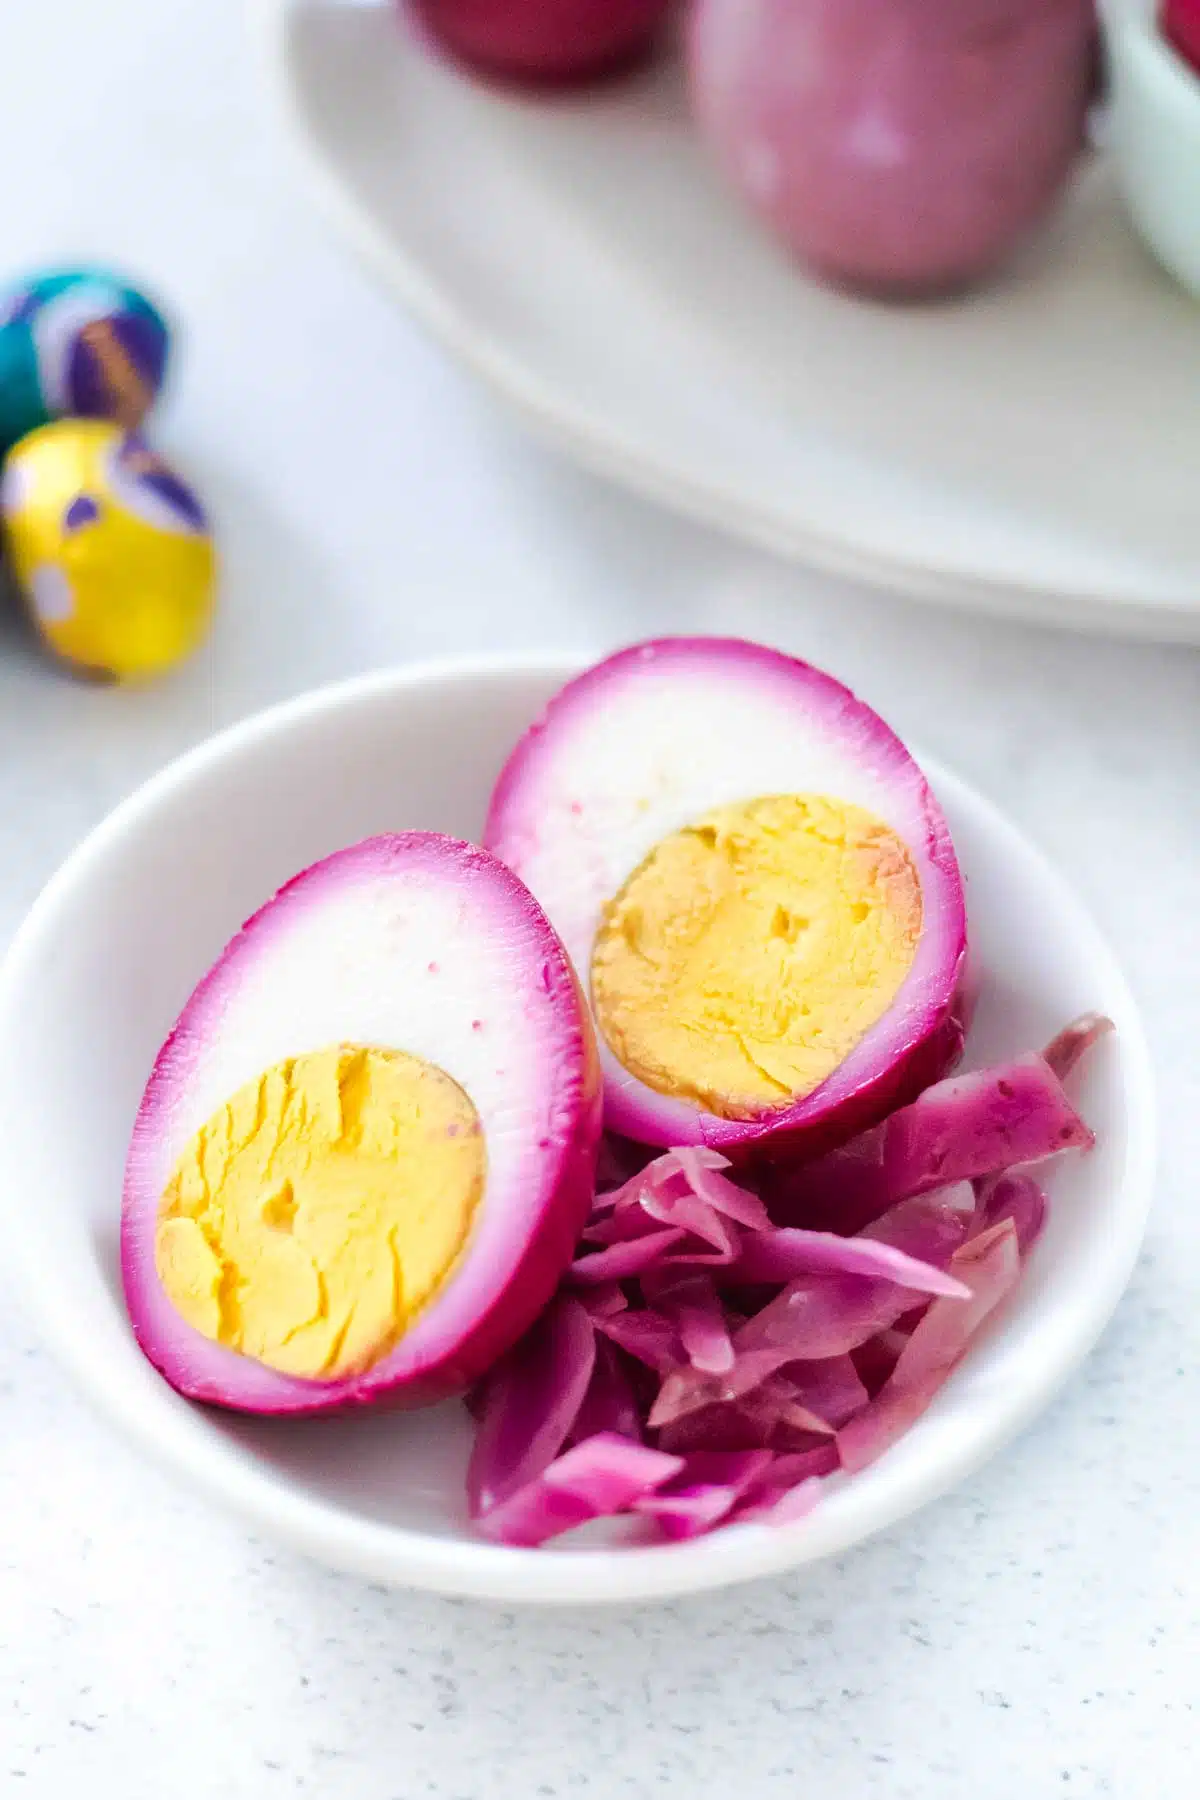
Colored eggs often involves dyeing the shell, while the egg remains white inside. In the pickled egg process, the eggs are first cooked, peeled, and then mixed with ingredients that both pickle and colour the eggs. As a result, you get some beautiful little treats that will brighten up your Easter table. The kids will love the vibrant colours too.
Key Ingredients
The base ingredients are the same for every batch of eggs. After that a variety of things are added to give different colours and flavours. These beautiful combinations will give you yellow, pink, and purple pickled eggs.
- Eggs – We wouldn’t have pickled eggs without them!
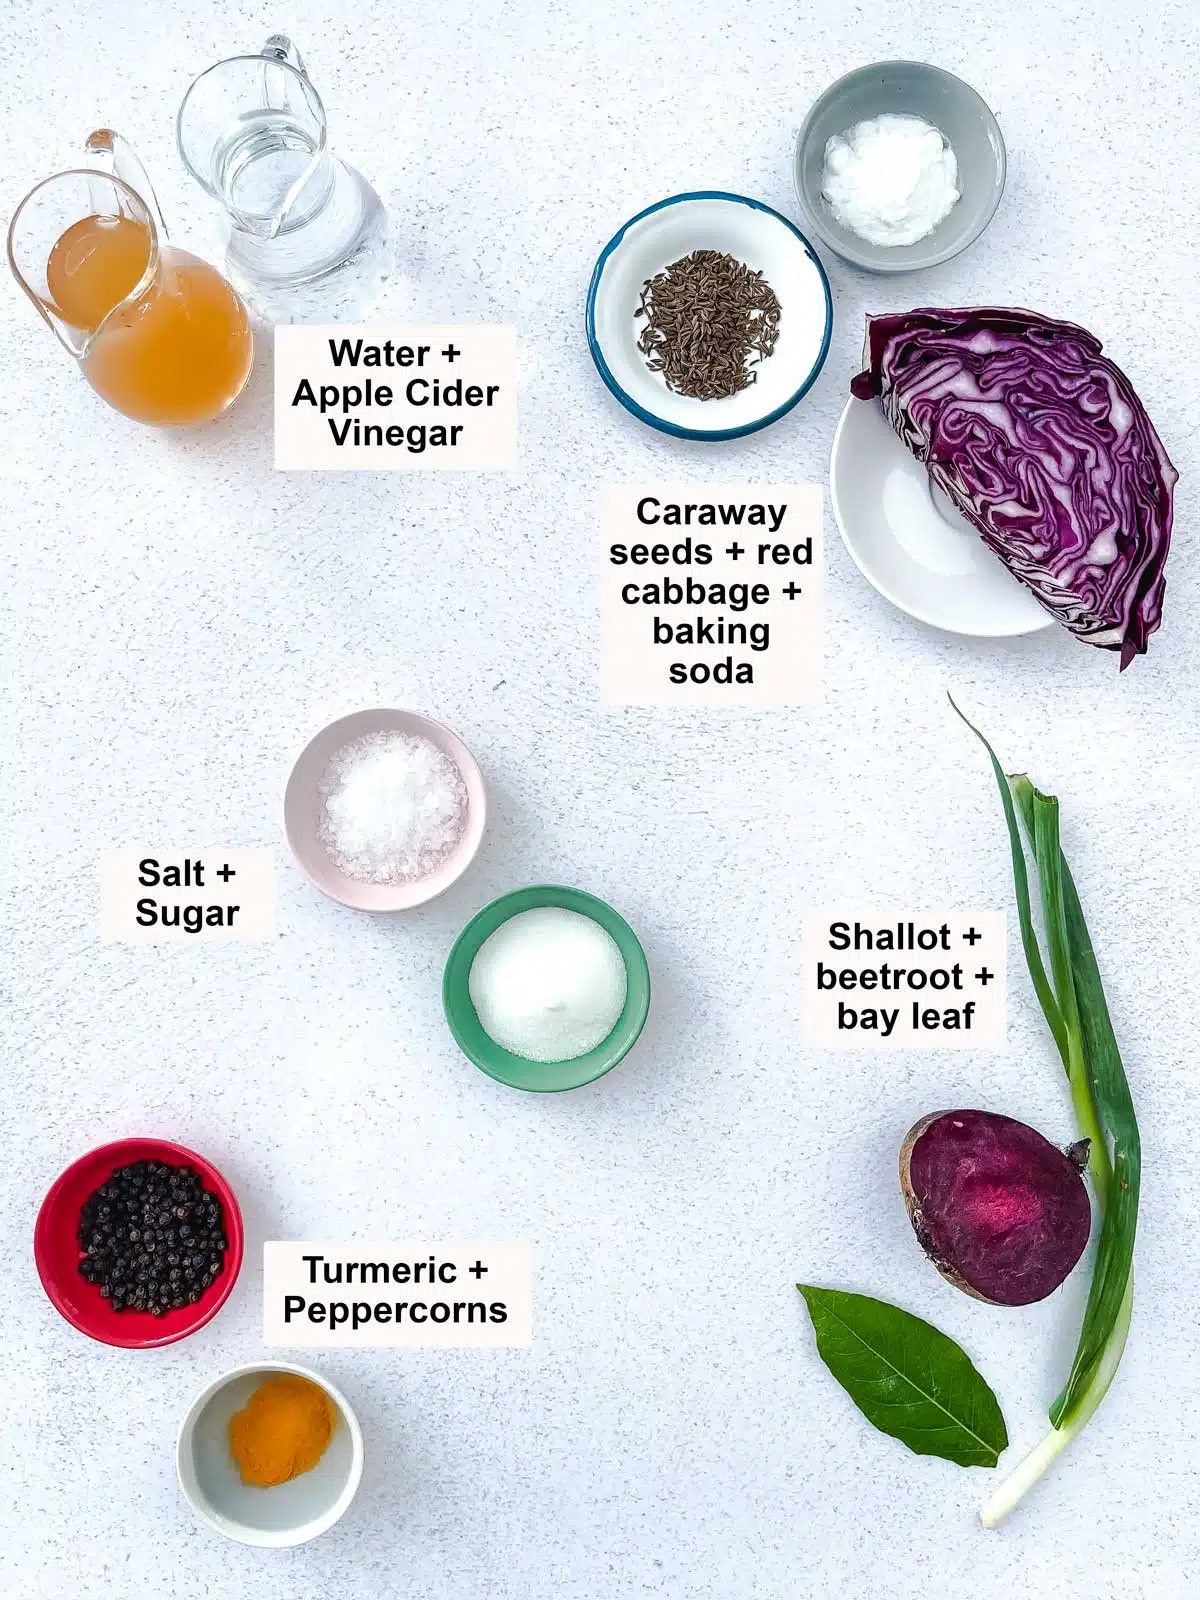
- Apple cider vinegar – The main ingredient in the pickling solution, this imparts lots of flavour into the eggs too.
- Salt – Added for flavour but it also inhibits the growth of bacteria.
- Sugar – Mostly helps to reduce the sourness of the vinegar but is also a natural preservative.
- Various natural colours and flavours – These include turmeric and peppercorns, caraway seeds and red cabbage, as well as beetroot, shallots, baking soda, and bay leaf.
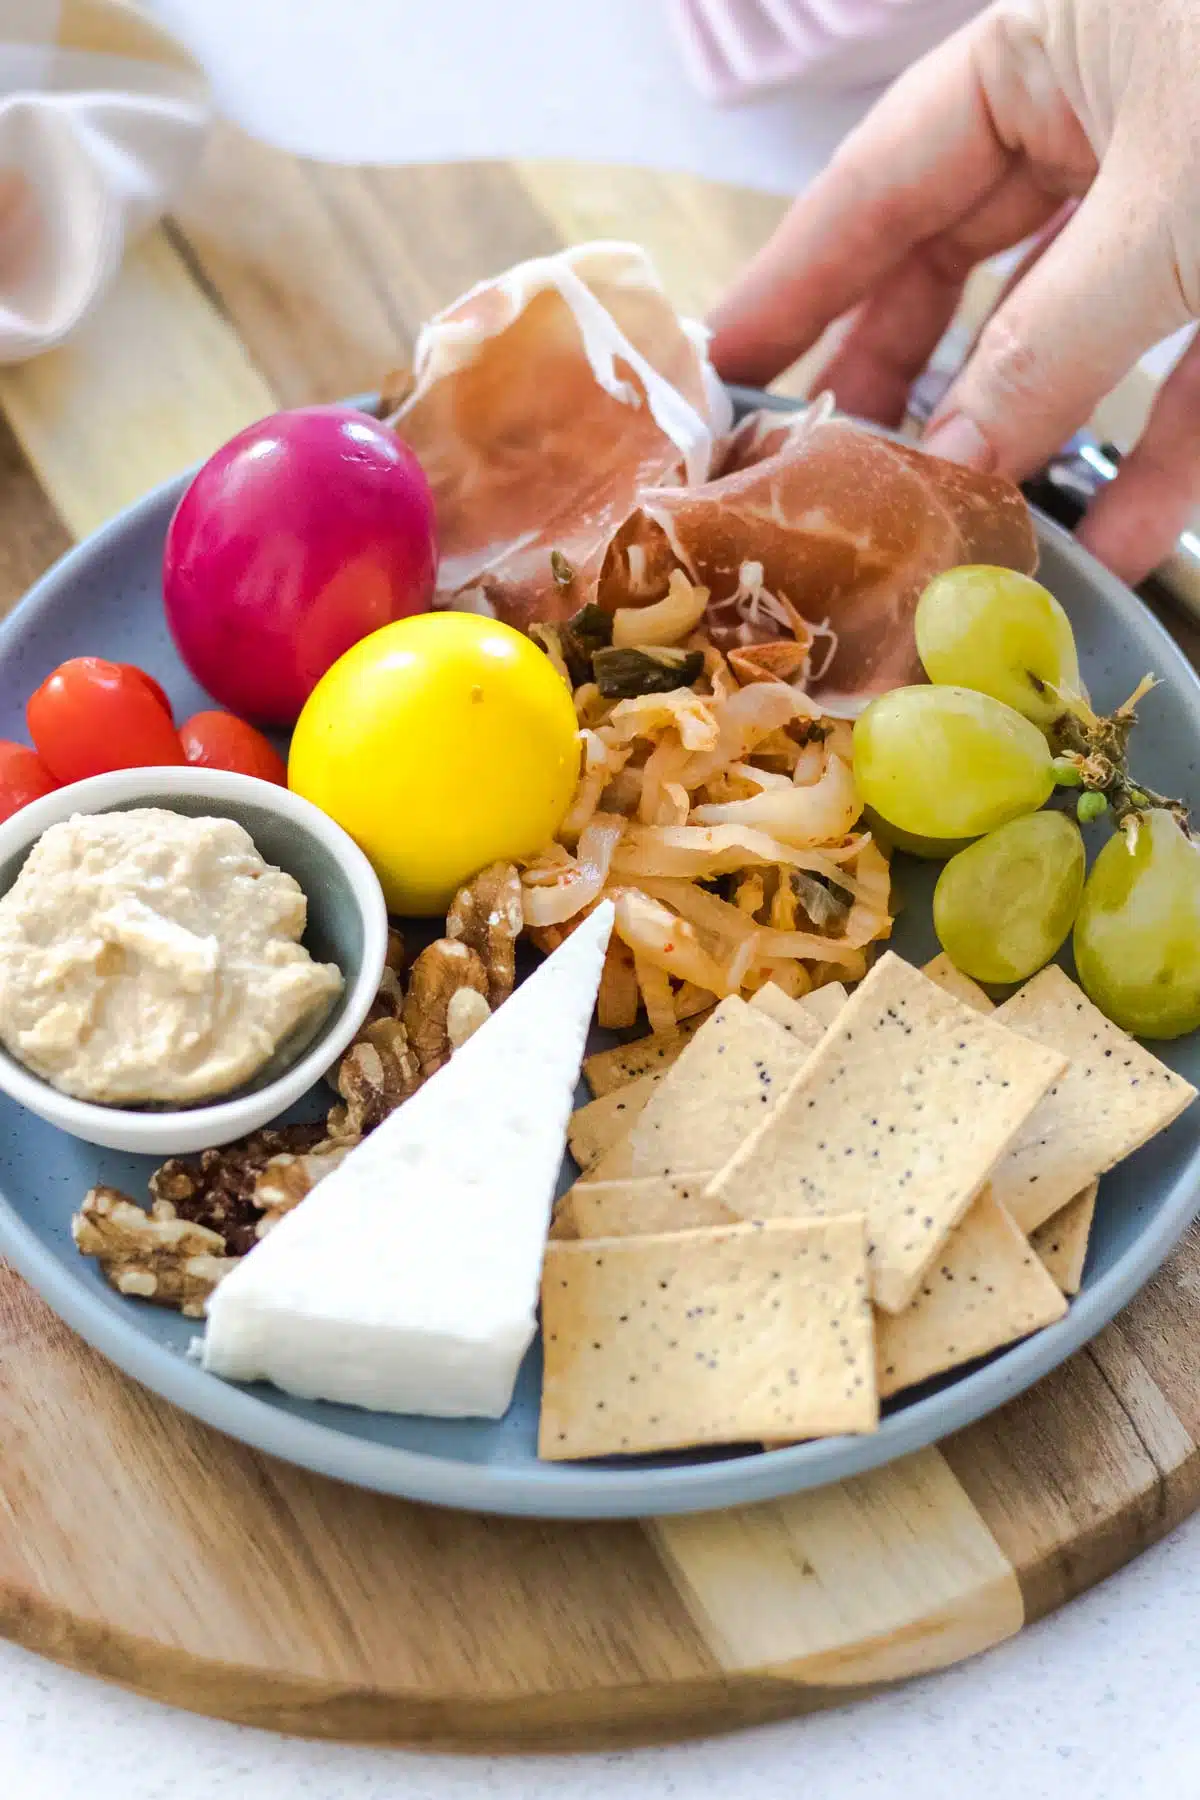
Once made these pickled eggs can be kept in the fridge for up to one week. They’re great as snacks, excellent as part of a grazing board, and equally delicious on toast for breakfast.
Substitutions And Variations
Don’t want bright pink or purple eggs? The natural colourings included in the recipe can be omitted if preferred. Simply use the base ingredients (eggs, vinegar, water, sugar and salt) and add in any spices you’d like. Peppercorns and coriander seed are always great basics.
The eggs should still be left overnight so they take on the flavour of the pickling liquid and have time to pickle.
How To Make These Homemade Pickled Eggs
Each batch here needs to be made separately so that you have the opportunity to add your colours and flavours. You can either make each batch one at a time or if you have three small saucepans – you can have them all on the go at once.


- Cook eggs to a hard boil consistency then peel. I did mine in the instant pot for 9 minutes. Stovetop is also fine.
- Take 3 x 1-litre / 2-pint jars and put 4 eggs in each then set aside.
- For the yellow eggs bring 1 cup of apple cider vinegar, 1 cup of water, 2 teaspoons of salt, and 2 teaspoons of sugar to a boil in a small saucepan. Add in the turmeric and peppercorns. Mix well to combine. Remove from the heat, allow to cool, then pour over the eggs in one of the jars.
- For the pink eggs bring 1 cup of apple cider vinegar, 1 cup of water, 2 teaspoons of salt, and 2 teaspoons of sugar to a boil in a small saucepan. Add in the chopped beetroot, shallots, and bay leaf. Bring back to the boil then remove from the heat, allow to cool, then pour over the eggs in the second jar.
- For the purple eggs bring 1 cup of apple cider vinegar, 1 cup of water, 2 teaspoons of salt, and 2 teaspoons of sugar to a boil in a small saucepan. Add in the chopped red cabbage and caraway seeds. Bring back to the boil then remove from the heat, allow to cool, then pour over the eggs in the second jar.
- Put lids on all the jars and place in the fridge overnight.
- Serve from the next day and beyond.
These are best served several days after making. It gives the eggs time to take on more of the flavours in the jar. That being said – I rarely wait that long and generally start eating them the next day!
Tips For Success With This Recipe
Don’t be tempted to make this last minute or the eggs won’t have taken on enough colour. Allow them time to sit in their pickling liquids overnight so they’re both vibrant and delicious.
Storing
Store pickled eggs in their pickling liquid in an airtight container – such as a jar, in the fridge. These are best enjoyed within a week of being made for optimal flavour and texture. Always ensure the eggs remain covered by the liquid, use clean utensils for removal from the jar, and avoid reusing the brine to make a new batch.
Homemade Pickled Eggs FAQs
The longer the eggs sit in the pickling solution the more flavour they take on. A batch as small as this is usually gone in a week or two however, if the eggs are kept under the liquid in a well-sealed jar they can keep for up to a month or more. I do find the longer you store them the more rubbery they become so I will tend to eat them up by the 2 week mark.
Yes! The dyes for these eggs come from vegetables and spices so they’re perfectly safe to eat.
The combination of vinegar and a little sugar in the pickling solution makes these homemade pickled eggs deliciously sweet and sour. You still get the lovely creaminess from the egg yolk too. The perfect snack!
More Preserving Ideas
Did you make this recipe?
If you try this recipe, I’d love to know. Leave a comment, rate it, and remember to tag @wholenaturalkitchen in your pics or reels on Instagram, Facebook or TikTok!

Homemade Pickled Eggs
Ingredients
- 12 eggs
- 3 cups apple cider vinegar
- 3 cups water
- 2 Tbsp salt
- 2 Tbsp sugar
For the yellow eggs
- ¼ tsp turmeric
- 1 tsp peppercorns
For the pink eggs
- ½ medium beetroot, chopped
- 2 shallots/spring onions, chopped
- 1 bay leaf (2 if they're very small)
For the purple eggs
- 1 cup red cabbage, chopped
- 1 tsp caraway seeds
- 1 tsp baking soda
Instructions
- Cook eggs to a hard boil consistency then peel. I did mine in the instant pot for 9 minutes. Stovetop is also fine.
- Take 3 roughly 1-litre/2-pint jars and put 4 eggs in each then set aside.
For the yellow eggs
- In a small saucepan bring 1 cup of apple cider vinegar, 1 cup of water, 2 teaspoons of salt, and 2 teaspoons of sugar to a boil.
- Add in the turmeric and peppercorns and mix well to combine.
- Remove from the heat and allow to cool for 5 – 10 mins, then pour over the eggs in one of the jars. Give the jar a swirl to make sure all the eggs are well coated, place a lid on it and put it in the fridge overnight.
For the pink eggs
- In a small saucepan bring 1 cup of apple cider vinegar, 1 cup of water, 2 teaspoons of salt, and 2 teaspoons of sugar to a boil.
- Add in the chopped beetroot, shallots, and bay leaf. Bring back to the boil then remove from the heat.
- Allow to cool for 5 – 10 mins, then pour over the eggs in the second jar. Give the jar a swirl to make sure all the eggs are well coated, place a lid on it and put it in the fridge overnight.
For the purple eggs
- In a small saucepan bring 1 cup of apple cider vinegar, 1 cup of water, 2 teaspoons of salt, and 2 teaspoons of sugar to a boil.
- Add in the chopped red cabbage and caraway seeds. Bring back to the boil then remove from the heat.
- Allow to cool for 5 – 10 mins, then pour over the eggs in the third jar. Add in ½ a teaspoon of baking soda, let the fizz settle, then add in the other ½. Once the fizz has completely settled, give the jar a swirl to make sure all the eggs are well coated, place a lid on it and put it in the fridge overnight.