How To Make Quick Pickled Radishes

Quick Pickled Radishes bring lots of vibrant color, and tangy flavor to your plate. They’re crisp, and delicious morsels that are quick and easy to make and guaranteed to become a staple in your kitchen.

Key Ingredients
A quick pickle recipe like this is a great way to use up a lot of radishes at once. The best part is its so simple you’ll likely already have all the brining ingredients in your pantry. The mustard seeds simply add flavour so if you don’t have them, choose another whole spice you enjoy.
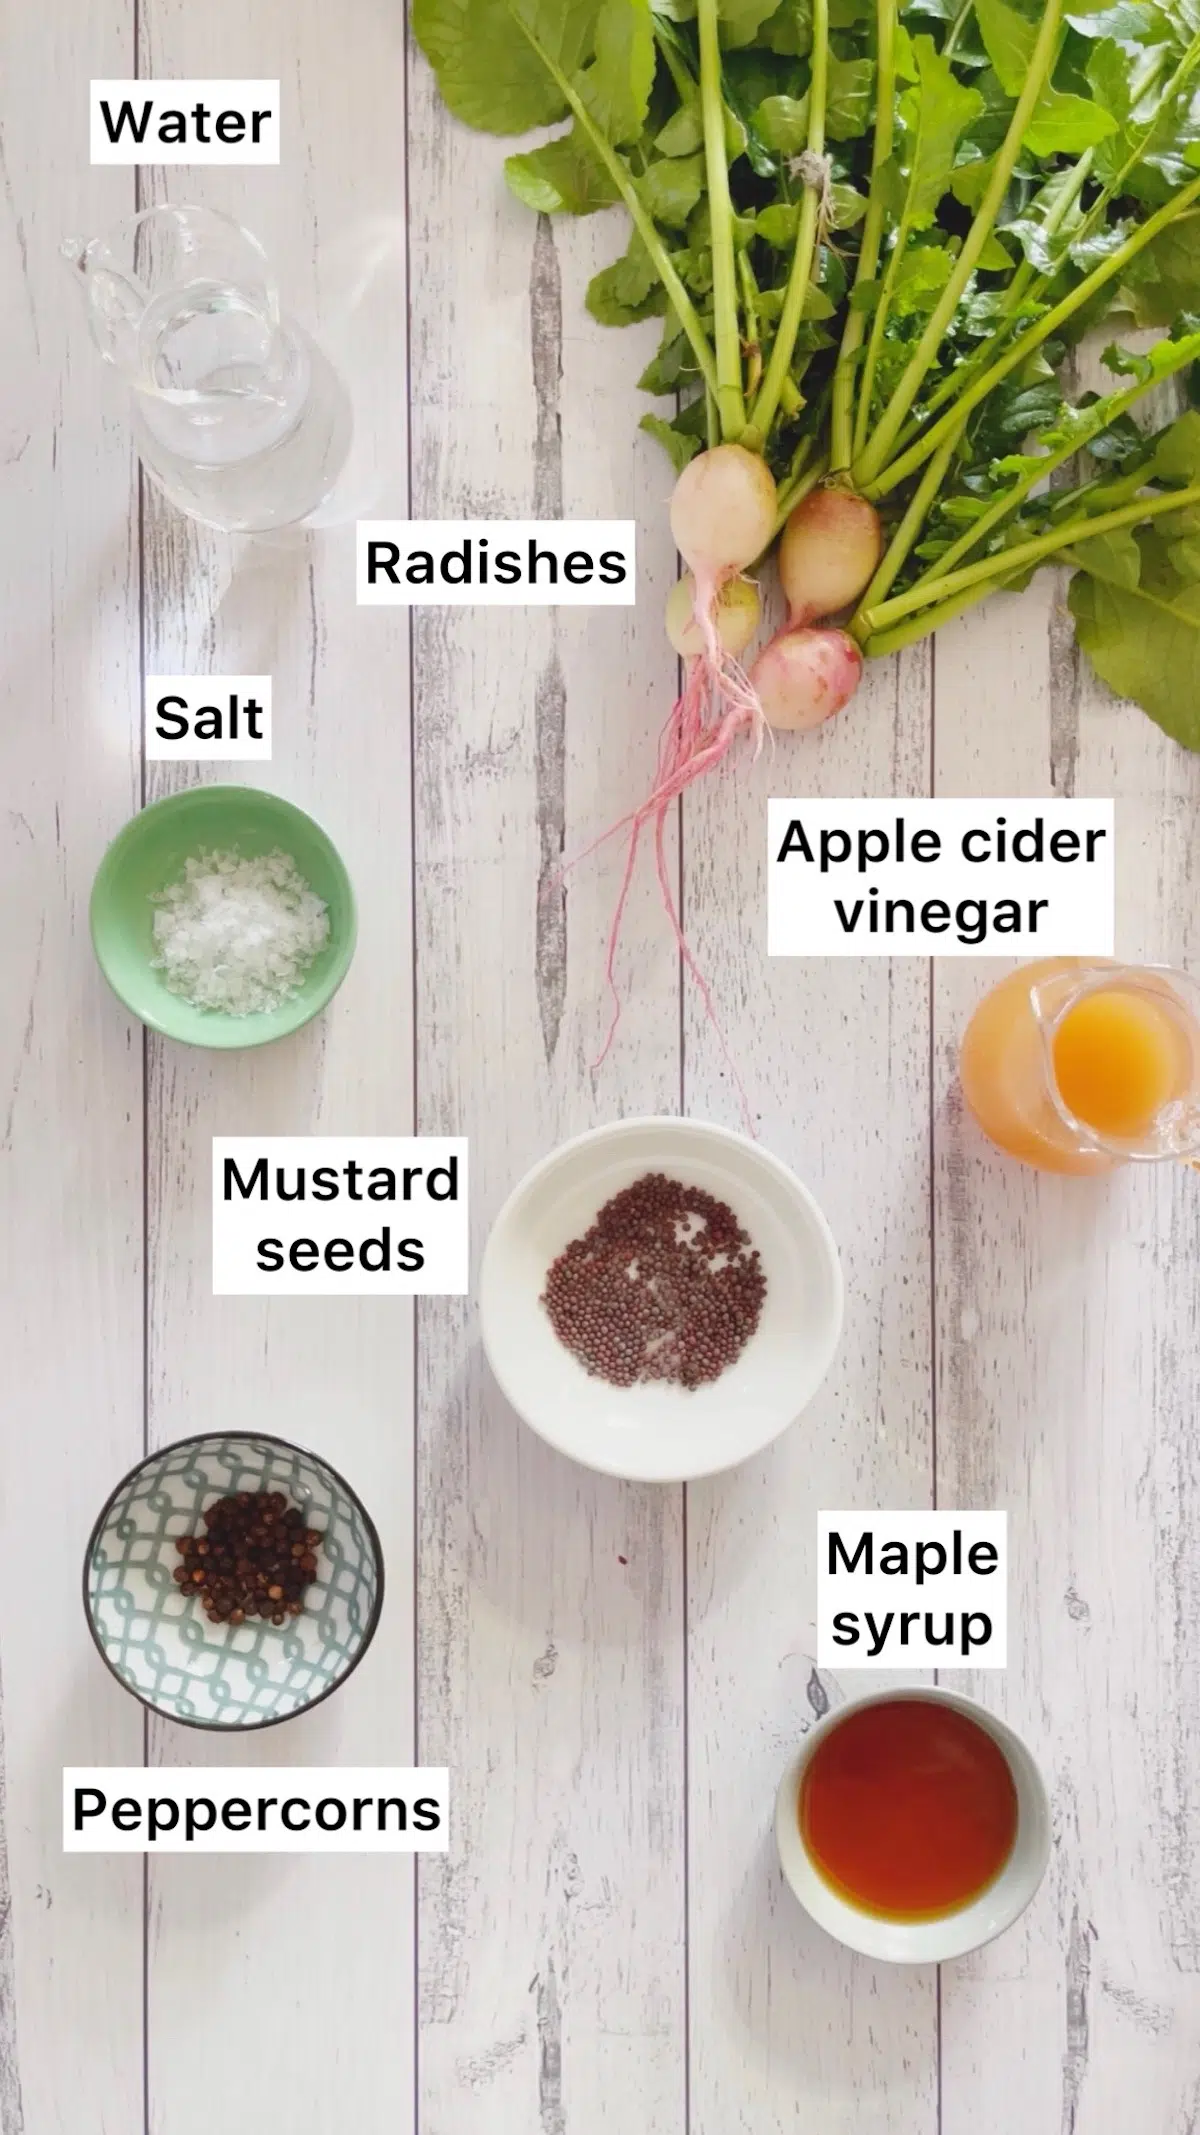
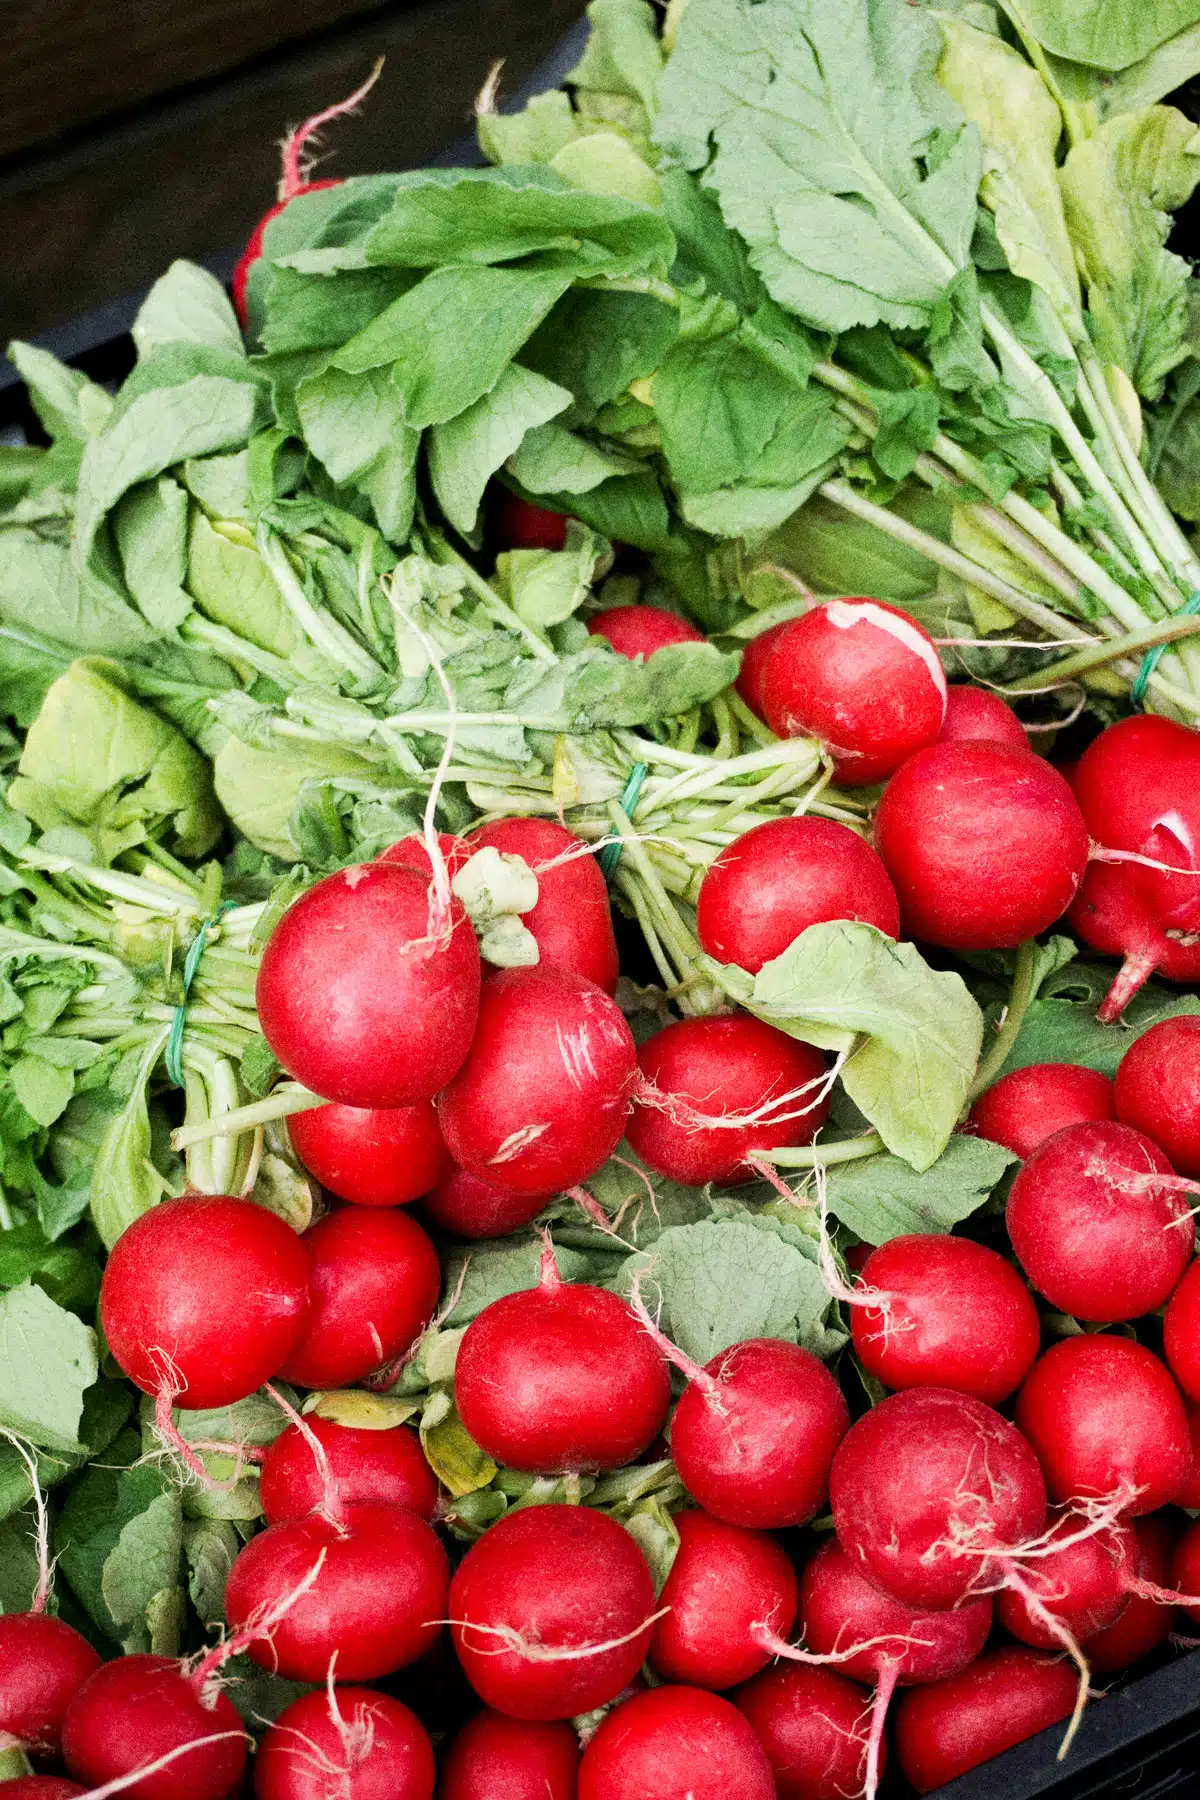
- Fresh radishes – Any kind will do, I used French breakfast radishes in this recipe, but have also made it with watermelon radishes, white radishes, and small black radishes. The little red ones found in most supermarkets are perfect too.
- Apple cider vinegar – This is my preferred vinegar, but most will work well. The only one to avoid would be balsamic vinegar.
- Maple syrup – adds a little sweetness to round out the flavour but if you would prefer yours very tart, omit it.
- Mustard seeds & black peppercorns – These add lots of flavour during the pickling process.
- Salt – This helps to protect against spoilage, but also ensures the radishes stay crunchy.
Don’t be limited by the pickling spices I’ve used here. You can use any combination you like. For lots of extra flavor try a bay leaf, chili flakes, a whole chili pepper or even a garlic clove.
Substitutions And Variations
Swap the radishes for red onions to make quick pickled onions. Both sliced radishes and onions make great quick pickles!
Add red pepper flakes to your spice mix if you’d like your pickling liquid to have a bit of a kick.
White vinegar, white wine vinegar, rice vinegar and red wine vinegar will all work well in this recipe.
How To Make This Quick Pickled Radish Recipe
These easy pickled radishes are quick to make, and the brine infuses the radishes with flavor almost instantly. The acid from the vinegar softens the peppery edge of the radishes while the small amount of salt and sweetener help to balance the overall acidity. As the radishes cool in the brine, they absorb all these delicious flavours turning this humble root vegetable into a zesty, crunchy condiment to complement any meal.
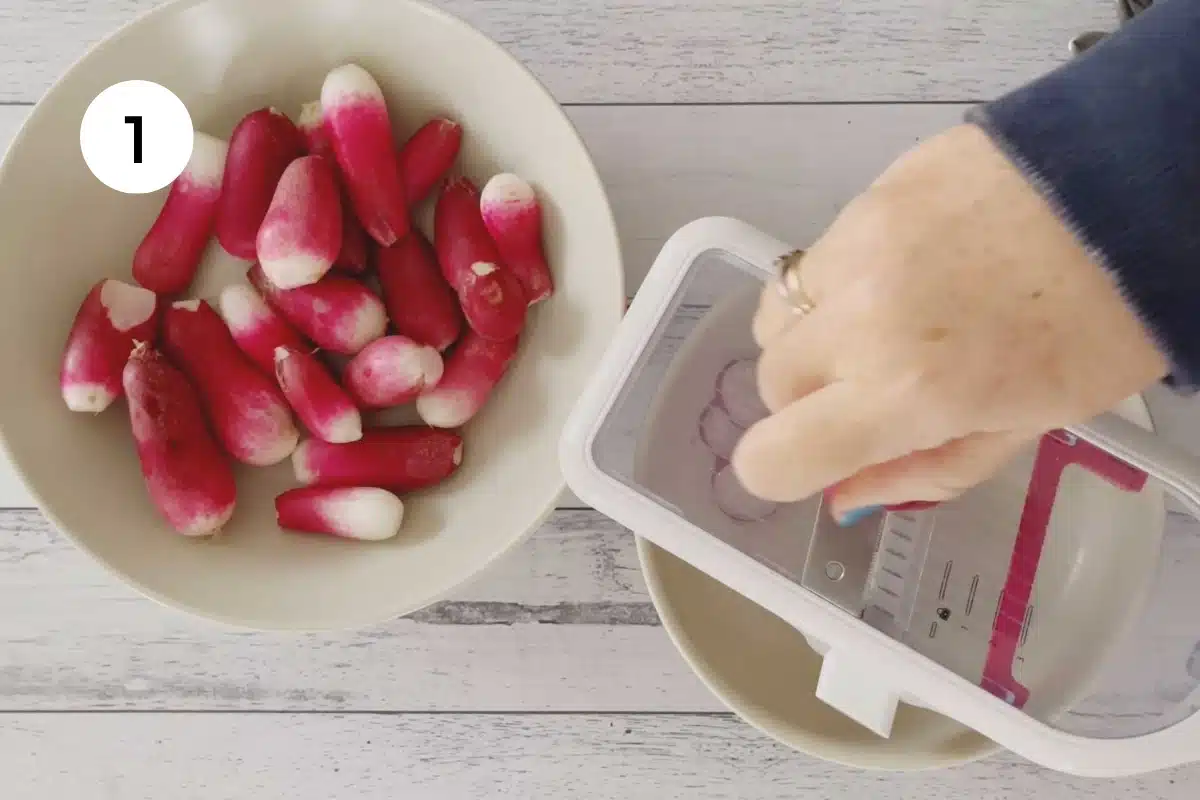

- Remove the green tops from the bunch of radishes and discard, then wash the radish bulbs well. These can go to the compost, or you can add them to salads or make pesto with them.
- Slice the radishes with a very sharp knife or a mandolin so the slices are uniform. Don’t make them too thin they’ll lose their crunch.
- Make the pickling solution by boiling the apple cider vinegar, water, maple syrup, and salt in a small saucepan over a low to medium heat.
- Take the pot off the heat once done and let it cool for a couple of minutes.
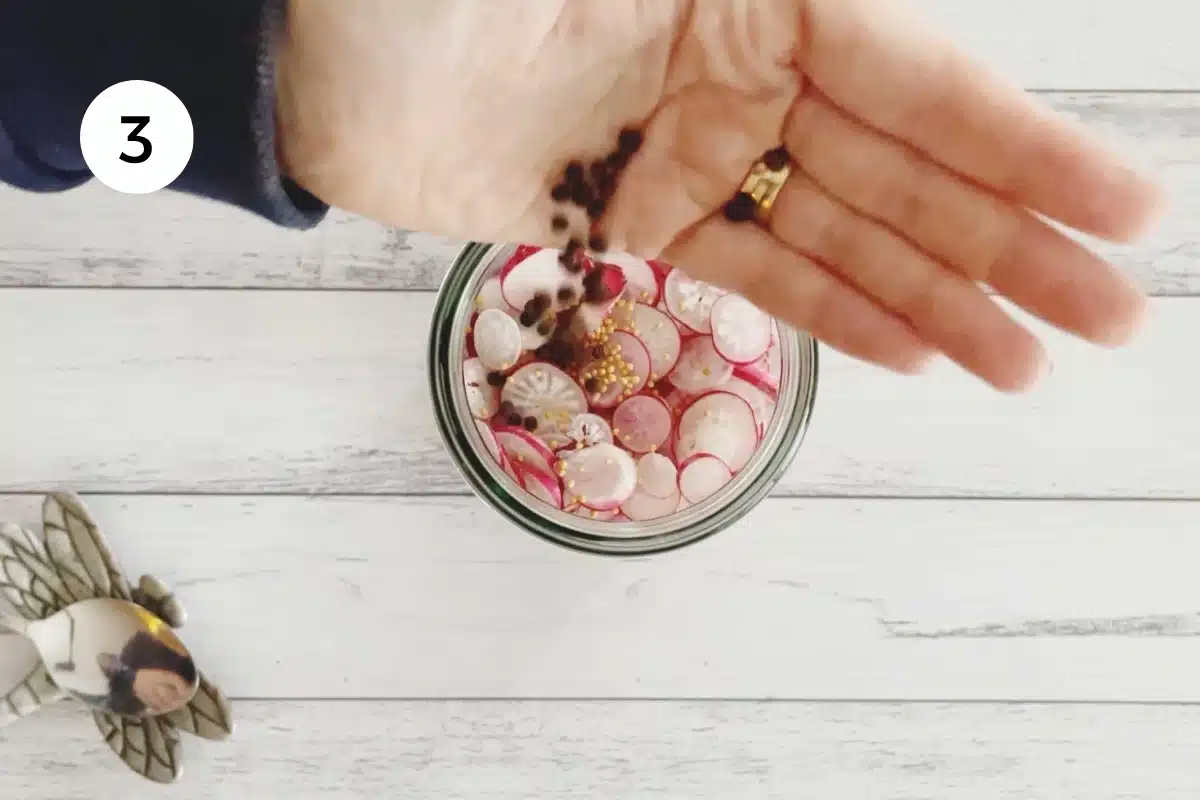
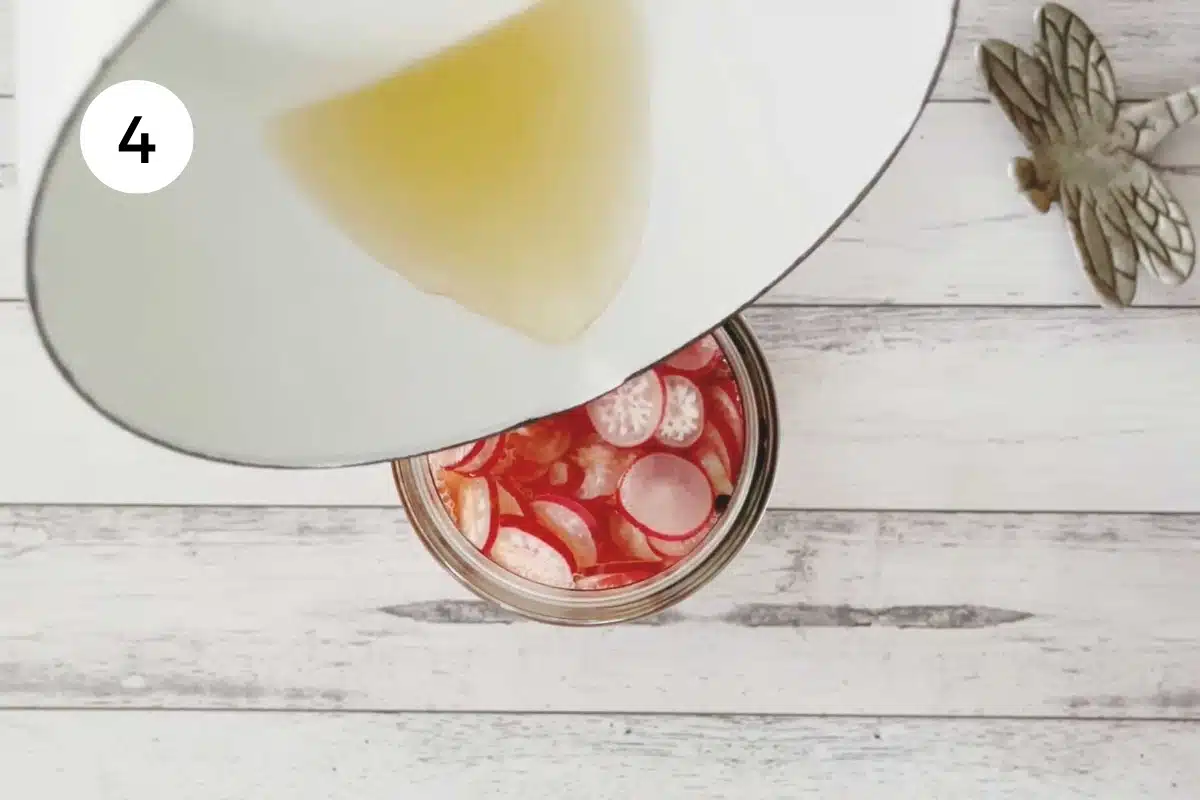
- Add prepared radishes to a jar (mine was 1-litre / 2-pint mason jar), then add the mustard seeds and peppercorns (or your chosen spices) on top.
- Pour over the hot liquid and let sit on the bench to cool at room temperature for 10 minutes if it’s still very hot.
- Put in the fridge and leave for a couple of days before digging in. This just helps all the flavours combine. If you can’t wait though – you can start eating them the next day.
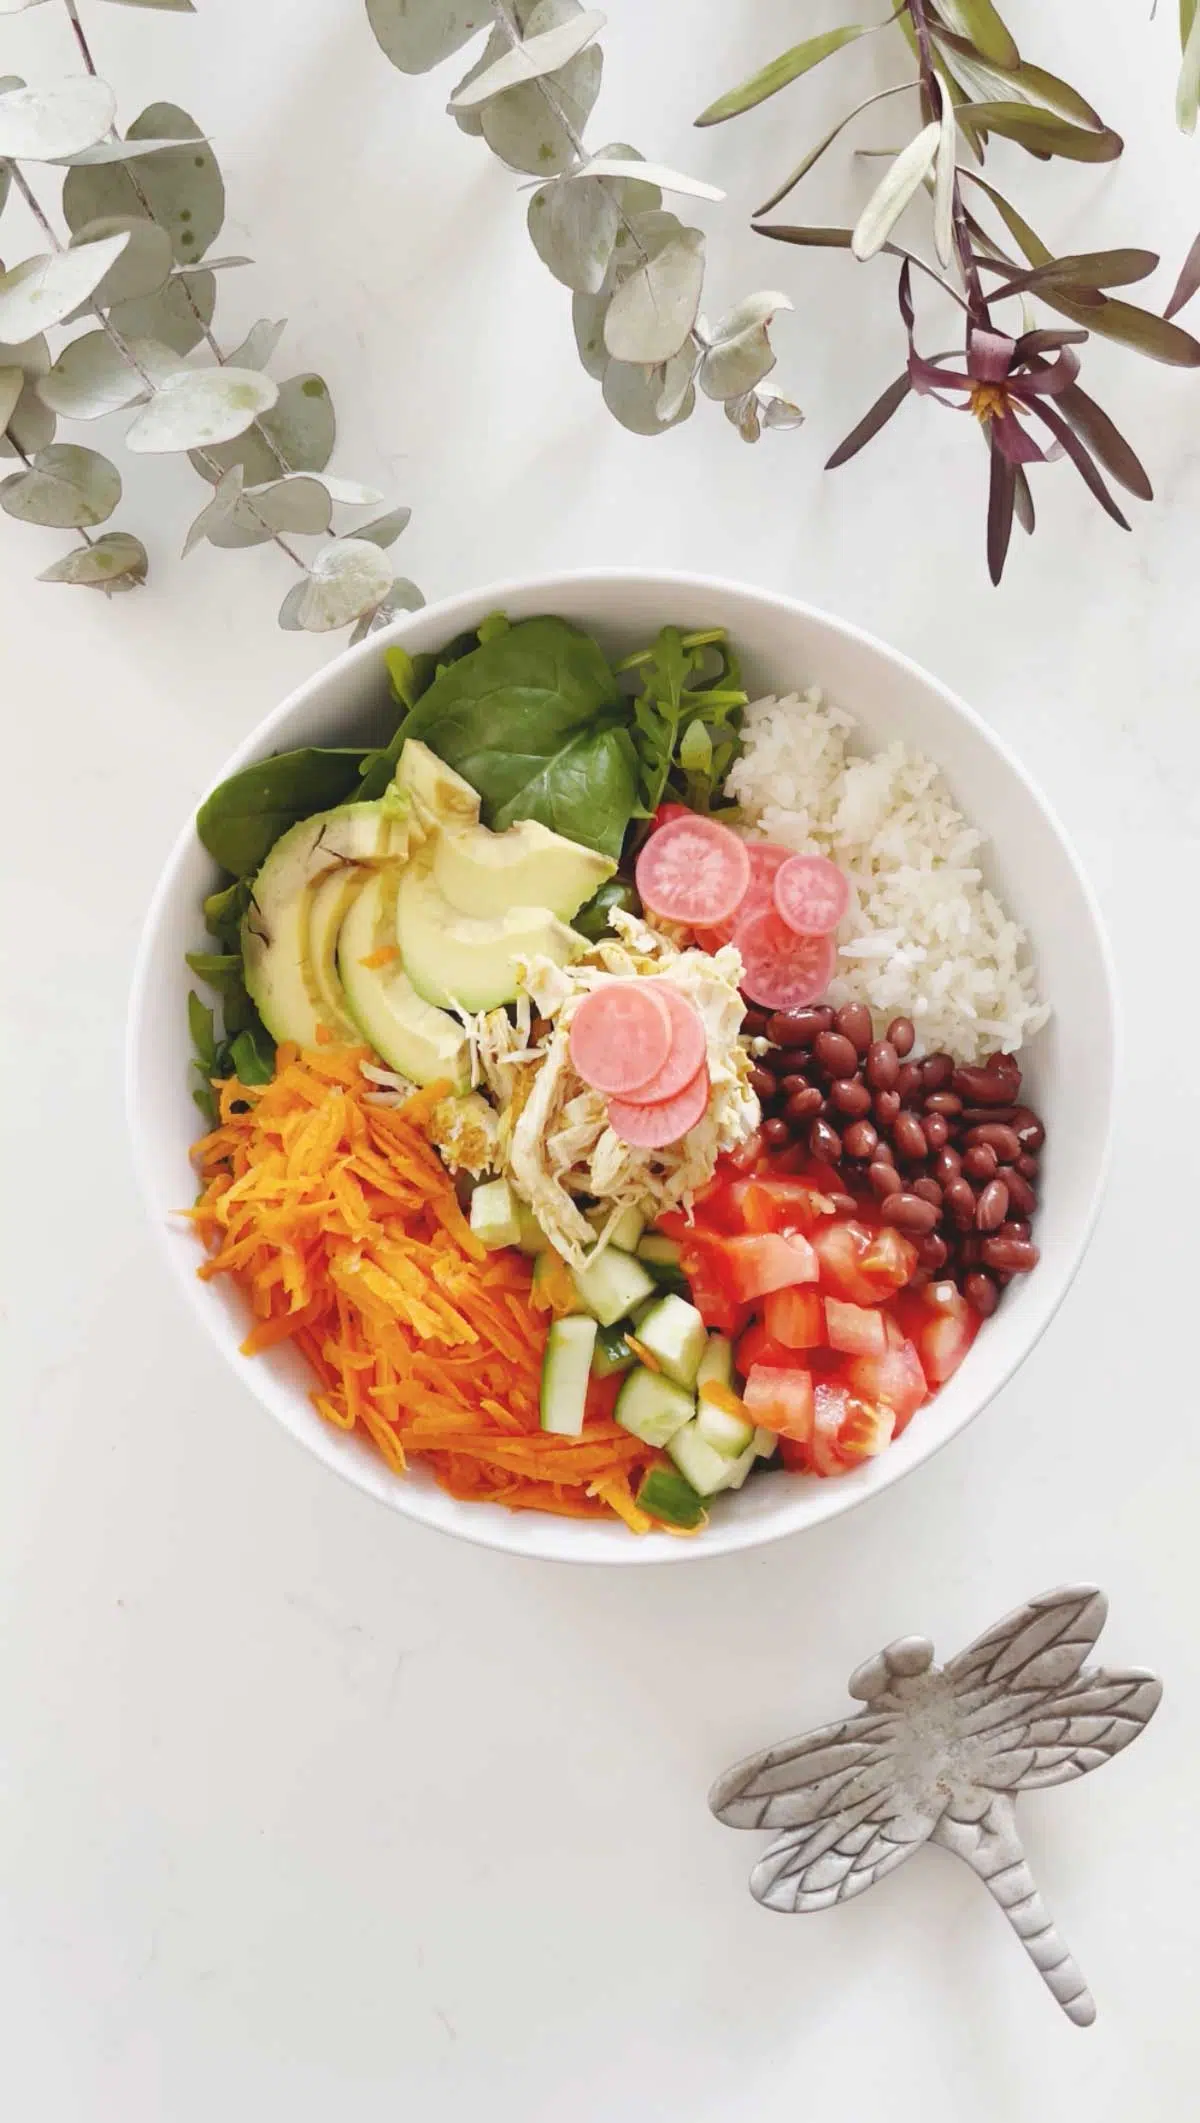
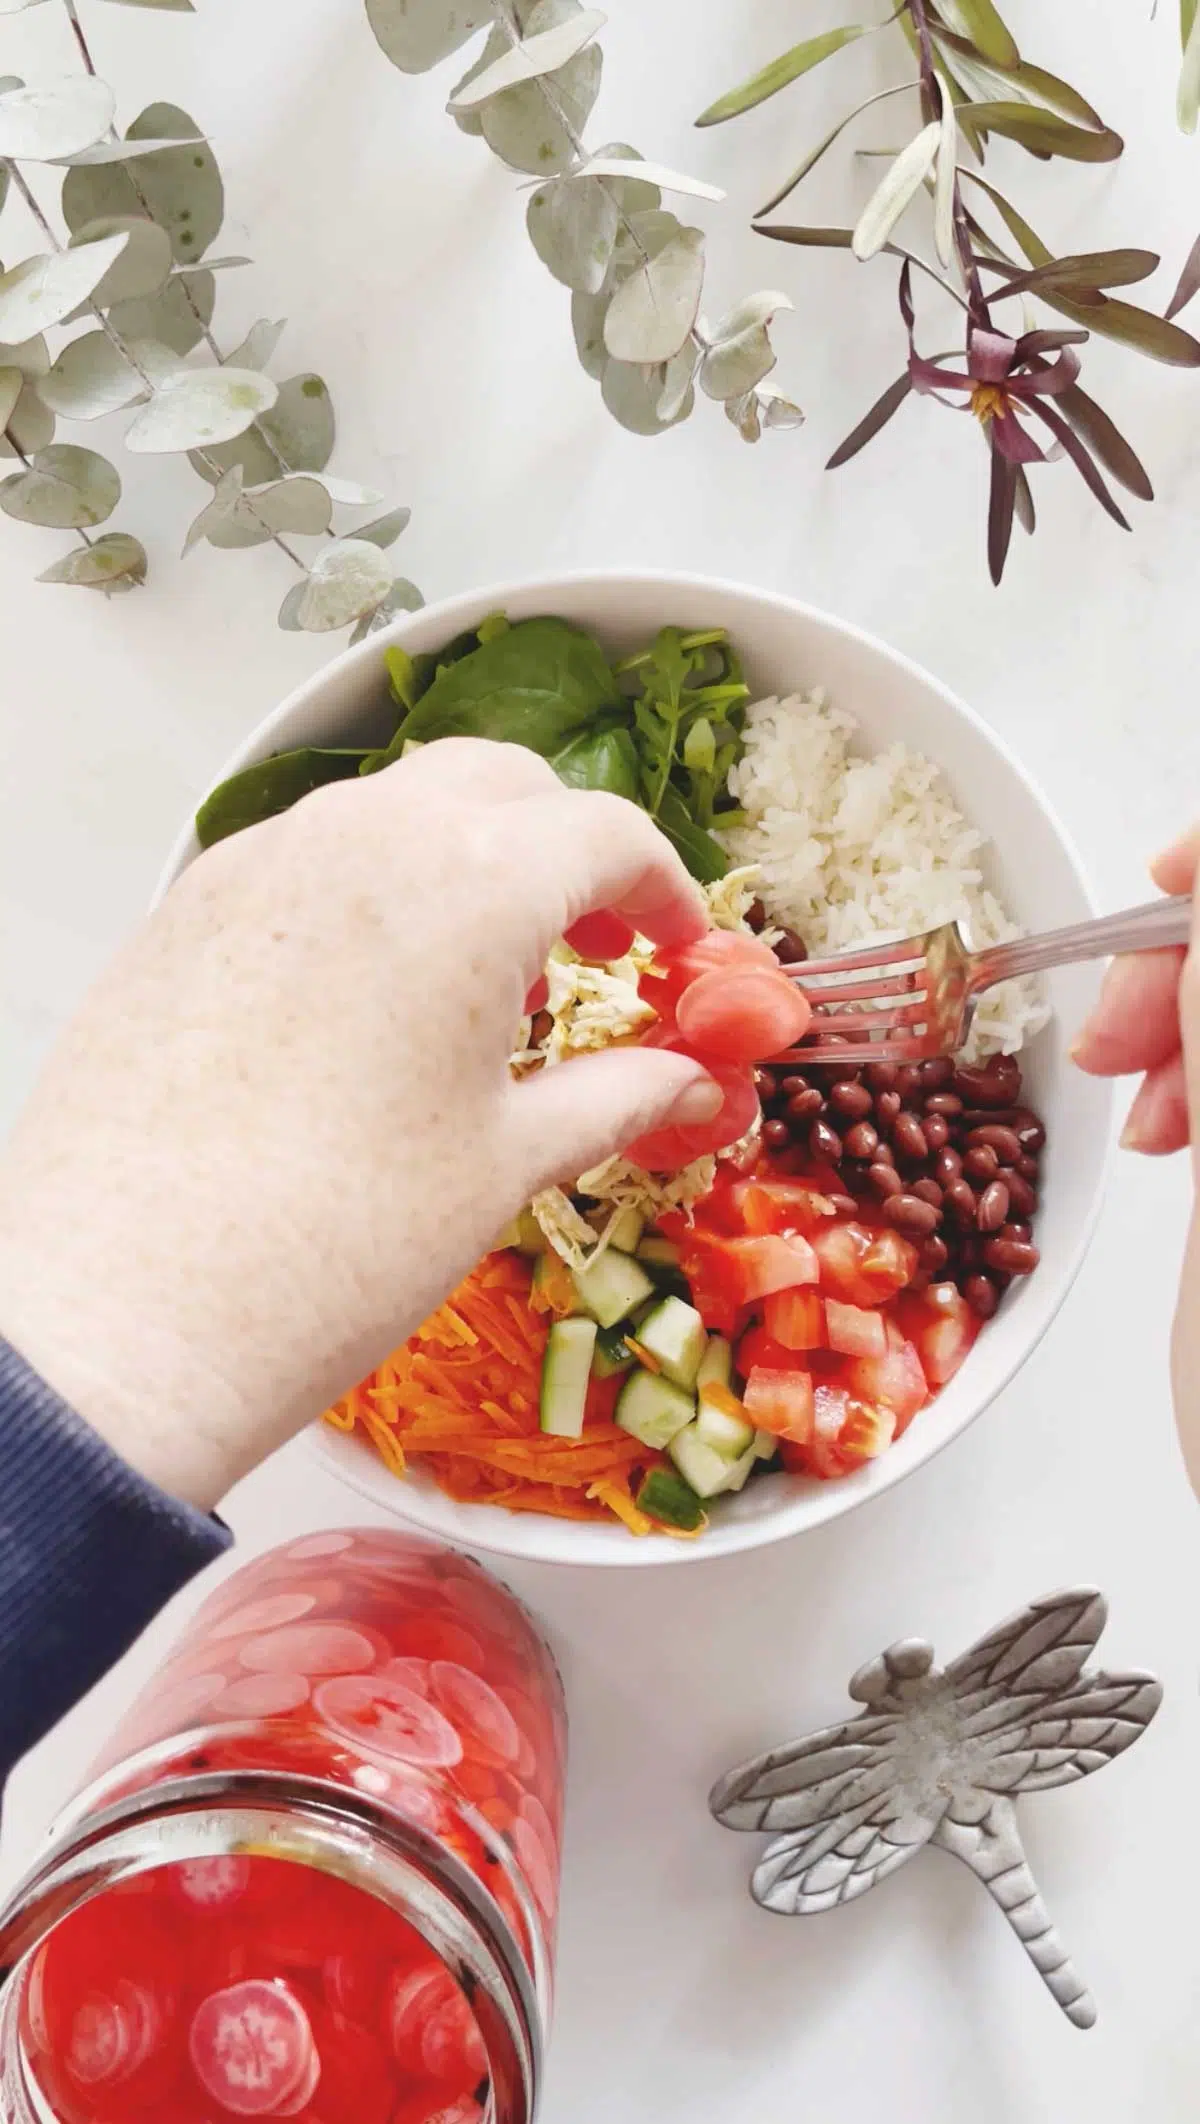
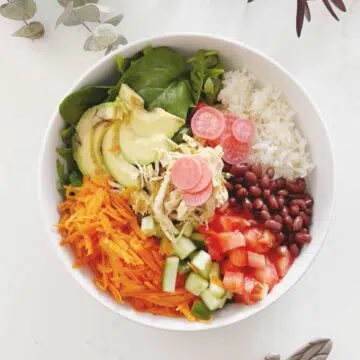
These are great served over avocado toast, on top of salads, on Guacamole Toast, in grain bowls, on Mushroom Tacos, or even as part of a Charcuterie Board or a simple cheese board. They’re perfect anywhere you’d like to add a bit of crunch and a pop of color.
A Note On Canning
This recipe is not suitable for canning, as the acidity is far too low. Brine requirements for shelf stable pickles are much more stringent to ensure bacterial growth is kept at bay. Once made, these pickles should be kept in the fridge and consumed within a month or two.
Tips For Success With This Recipe
For best results, use fresh, firm radishes with unblemished skin. A mandolin is also a great tool to help with cutting uniform slices, which ensures even pickling. It’s also worth noting that small to medium-sized radishes are best for this recipe. They have the most flavour and are much easier to slice and get into jars.
There is no need to sterilise your jar but do wash it in very hot soapy water then rinse. Always using a spotlessly clean jar will prevent any spoilage from occurring.
Ensure all radishes are fully submerged in the brine, as any radishes exposed to the air may not pickle correctly and could spoil.
Storing
Store quick pickled radishes in the fridge in their sealed jar. They will keep this way for up to two weeks, though they are best enjoyed within the first week when their texture is at its peak. The radishes will soften over time, and the flavor will mellow.
Always make sure you’re using a clean utensil to remove them from the jar to maintain freshness and again to reduce spoilage.
Quick Pickled Radishes FAQs
They’re best consumed within a month or two so making small batches is best.
No, this is essential. As with the vinegar it helps keep the pickles free of bacteria but also keeps the radishes crunchy.
Yes. Maple syrup is really only in this recipe to add flavour and a touch of sweetness to balance the acidity. As such, if you want to omit it you can.
More Preserving Recipes
Did you make this recipe?
If you try this recipe, I’d love to know. Leave a comment, rate it, and remember to tag @wholenaturalkitchen in your pics or reels on Instagram, Facebook or TikTok!
How To Make Quick Pickled Radishes
Equipment
- 1 very clean jar (mine was 1-litre / 2-pints)
Ingredients
- 2 bunches small radishes (Once cut I had 2 cups filled to the brim).
- 1.5 cups apple cider vinegar
- 1.5 cups water
- 1 Tbsp maple syrup
- 2.5 tsp salt
- 1-2 tsp mustard seeds (yellow are great)
- 1 tsp whole peppercorns
Instructions
- Thoroughly wash and dry the radishes to ensure they're free of any dirt. Cut off the green tops, trim the bottoms and discard.
- Thinly slice the radishes with a mandolin or by hand. Mine were a couple of mm thick (~⅛ th of an inch or a touch less). Don't make them paper thin or they will lose all crunch.
- In a small saucepan, add the apple cider vinegar, water, maple syrup, and salt and bring to a quick boil. Remove from the heat straight away and let it cool for a couple of minutes.
- Add radish slices to a jar then add the mustard seeds and peppercorns (or your chosen spices) on top. The jar I used was 1-litre / 2-pints.
- Pour the brine over the radishes and let the jar sit on the bench to cool for 10 minutes if the liquid is still very hot.
- Put a lid on and place in the fridge. Leave it for a couple of days to allow the flavours to meld together, then dig in! If you're impatient like me you can just start munching on them the next day too.