How To Make Honey Fermented Fruit At Home

Honey Fermented Fruit offers a unique twist on preserving seasonal produce, while further enhancing its flavor. Fruit fermentation is also one of the simplest fermentation projects to experiment with in your kitchen if you’re new to fermenting overall. There’s no need for special equipment, a starter culture or encyclopaedic knowledge of fermentation. All you’ll need is a jar, some fruit and honey.


What Is A Wild Ferment?
This simply means a fermentation project you’ve created at home that relies on naturally occurring bacteria and yeast in your environment to ferment the food. No commercial yeast or bacterial strains are added to a wild ferment, which can mean it takes longer, but the outcome is worth it. Wild fermentation produces a product with a more varied and complex flavor profile.
Key Ingredients
Depending on the fermentation method used, fruit ferments can be far simpler and less time consuming than vegetable fermentation, which is often what attracts people to them. And a honey ferment is the best of them all. It requires minimal ingredients, minimal equipment, and little time.

- Raw honey – it must be raw to ensure fermentation occurs. Check the jar closely as honey labelling can be a little confusing. See the ‘Does It Matter What Type Of Honey You Use?’ section below for things to look out for.
- Ripe fruit – I’ve used nectarines for my ferment. Don’t be limited by this though. Try any fruit you’d like or see the ‘What Fruit To Ferment’ section below for some ideas.
Fermenting is an excellent way to preserve fruit at its peak ripeness, extending its availability beyond its typical season. Tipping some of this honey and a piece or two of nectarine over your breakfast mid-winter will give you a gorgeous little taste of summer to warm your day.
Substitutions And Variations
There are other ways to ferment fruit if you want to experiment with a few methods. Another super simple one is just using water to make a fruit kvass. This is a simple process that doesn’t require the use of specialty grains like water kefir, or a scoby like kombucha. You just toss chopped fruit into water and let the wild yeast around you do the rest over the course of a few days. I tend to use berries or stone fruit for a fruit kvass.
Other ways to ferment fruit include dry salting or brining in a salt/water mix. I will admit to not loving these methods with fruit. I like to enhance their naturally sweet flavours rather than remove that.
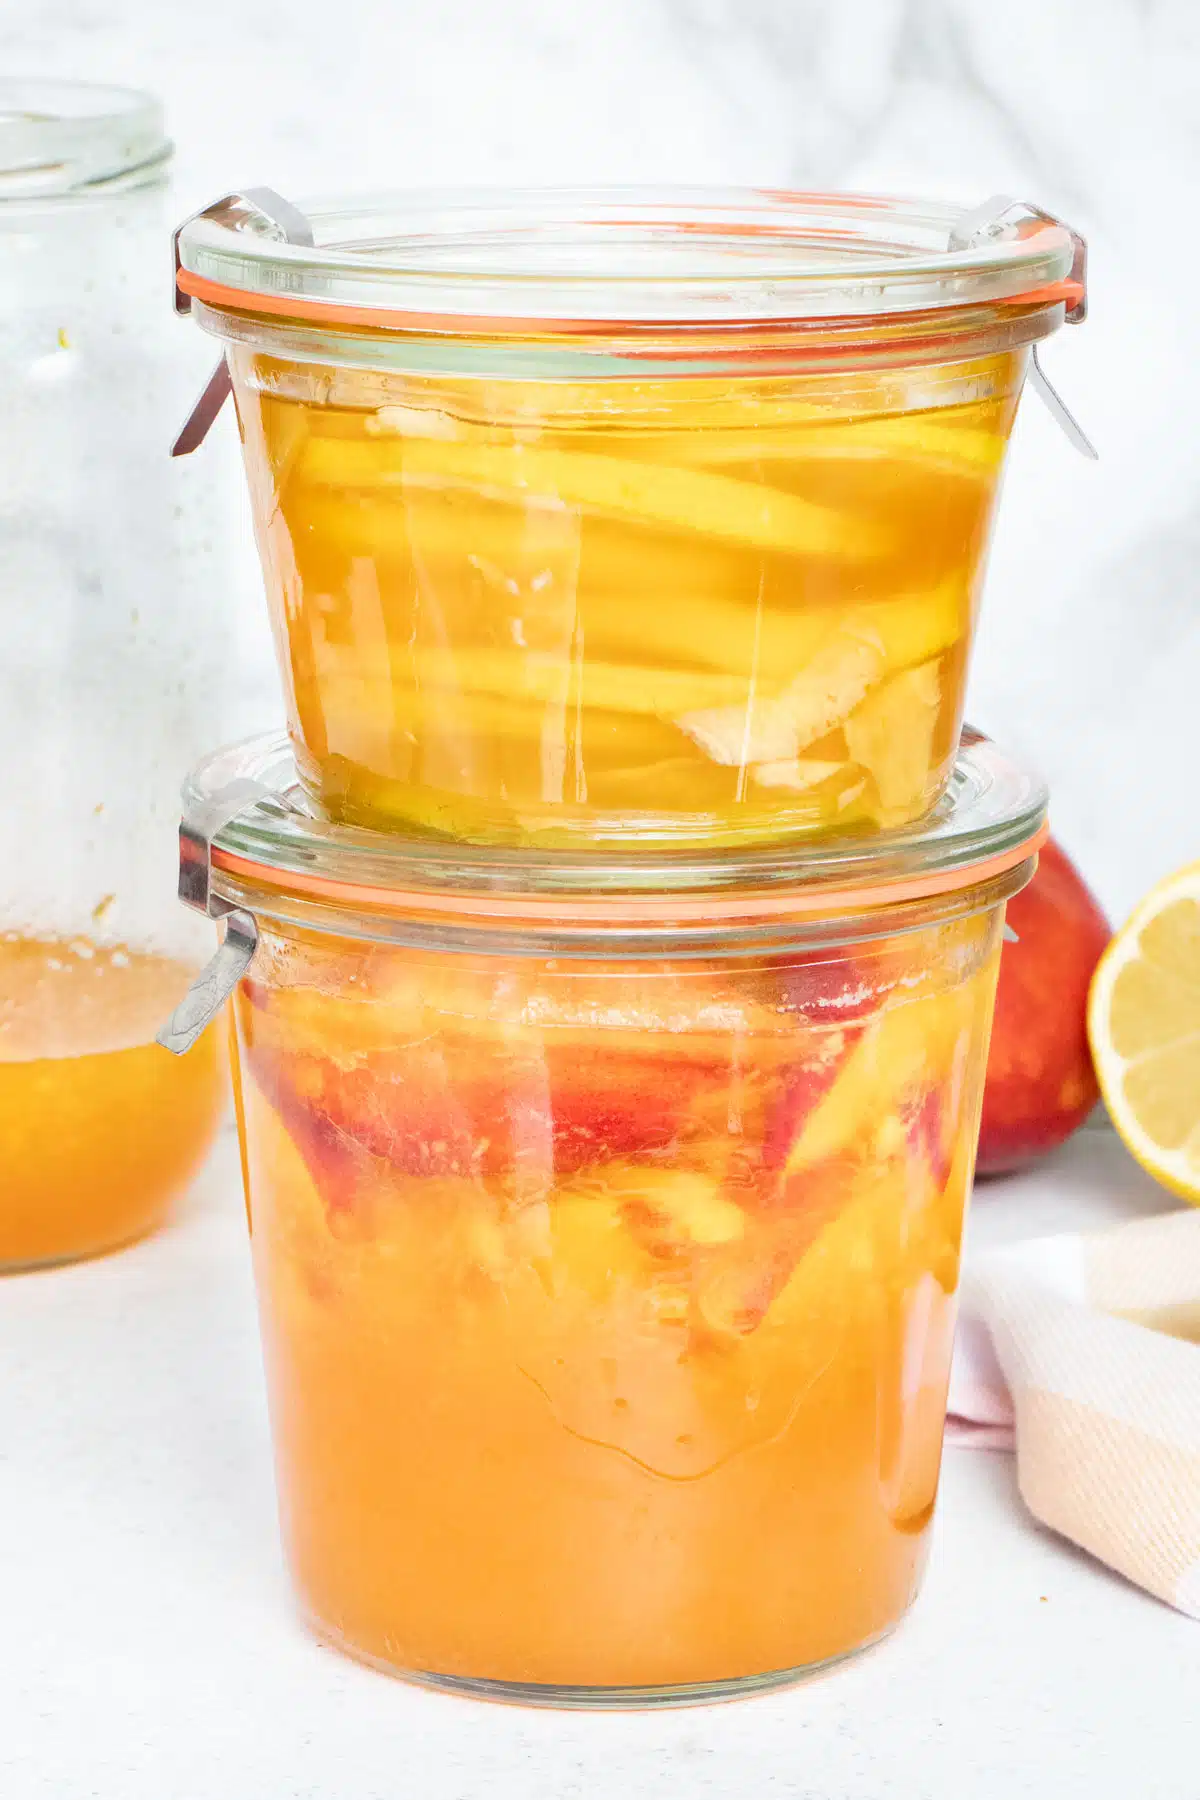
Make it a lemon and ginger fermented honey:
- Thoroughly wash lemons to ensure all residue is removed from the skins.
- Slice lemons (roughly ⅛ of an inch or a couple of millimetres thick).
- Peel a 1-inch (2.5cm) piece of ginger then slice half and grate the other half.
- Pour a little raw honey into the bottom of the jar, add a few slices of lemon, some of the ginger then pour over more honey. Keep layering until you’ve finished the lemon and ginger then finish with honey on the top. Do make sure the lemon is completely covered in the honey.
- Leave to ferment on the bench for a week in a cool, dark place then move to the fridge for longer storage.
This ferment gives you a great little remedy to have on hand that will get you through winter! I make it in a smaller jar and fill to the top because it never bubbles over. No need for the extra headroom so use up all that space!

How To Make Honey Fermented Fruit
Honey fermentation, sometimes referred to as honey preservation, involves covering fruit in raw honey and allowing naturally occurring yeasts and bacteria in the honey and on the fruit skin to ferment the honey’s sugars. This creates a honey that has been infused with the flavour of the fruit while the breaks down a little, softens, and takes on the honey flavour.


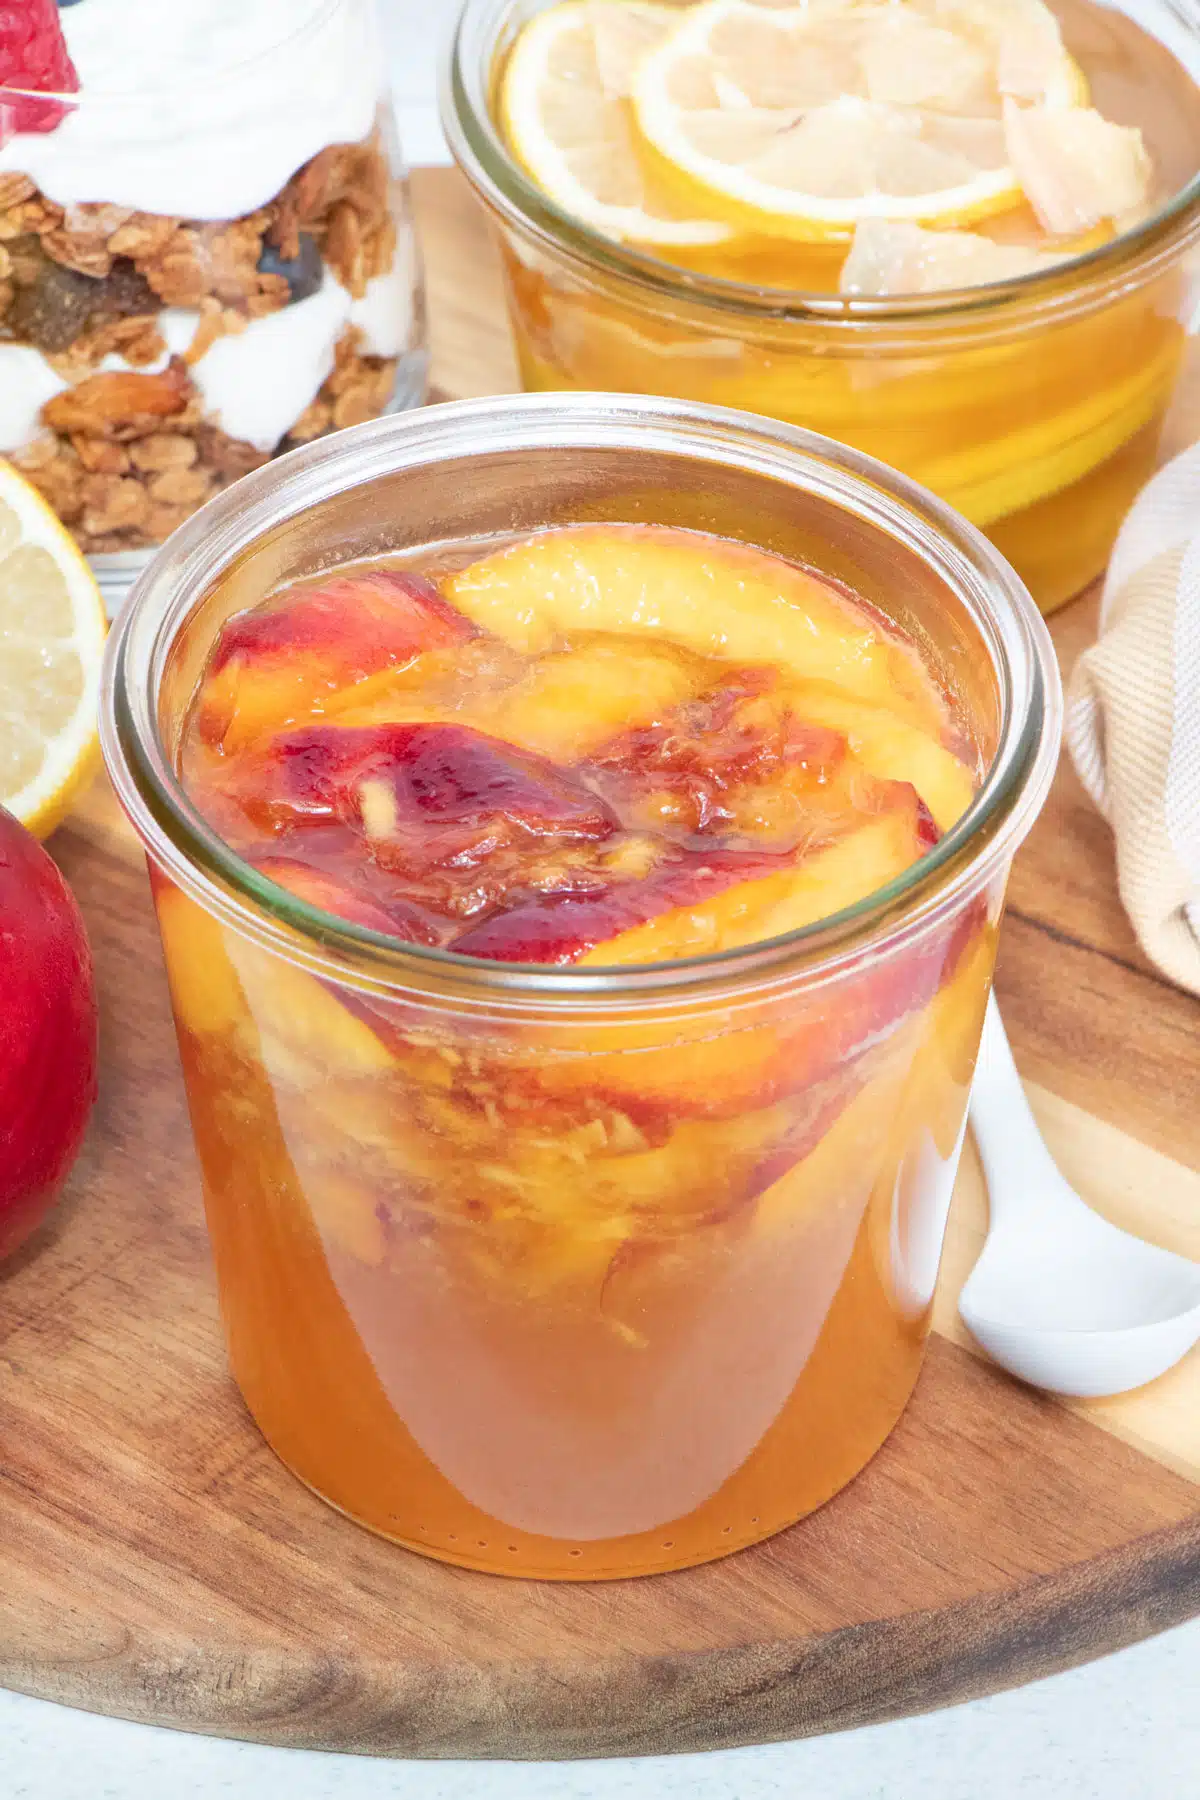
- Thoroughly wash 2-3 nectarines, de-seed, and cut into medium-sized wedges.
- Add the fresh fruit into a 1.5 pint/750ml jar so it’s roughly half full.
- Pour over the raw honey until it just covers the fruit and give it a gentle stir with a clean chopstick or spoon. This will help get the honey into all the little spaces in the jar.
- Add a little more honey on top to finish ensuring the jar is no more than 3/4 full. This is important as it leaves enough room for fermentation to occur at which time the honey may become frothy and bubble up.
- Store the jars in a cool, dark place to ferment at room temperature for 5-7 days. It’s ready when the nectarines look soft and are completely submerged in the honey. You’ll see that the honey has also become very liquid and will slosh around like water.
- When fermentation is complete, move the jar to the fridge to extend the shelf life.
During the initial stages of fermentation, some bubbling and pressure buildup may occur. To address this, “burp” the jars daily for the first few days by briefly opening it to release the accumulated gases. I also stir the mix with a clean chopstick at this point. I find with fruit like nectarines and peaches I rarely get a batch that bubbles wildly. The fermentation is always quite subtle with very small bubbles showing around the edges of the jar. Even so, leaving plenty of headroom in the jar will ensure there is enough space for the mixture to bubble and expand should that occur. It’s always better to be safe than sorry where ferments are concerned.
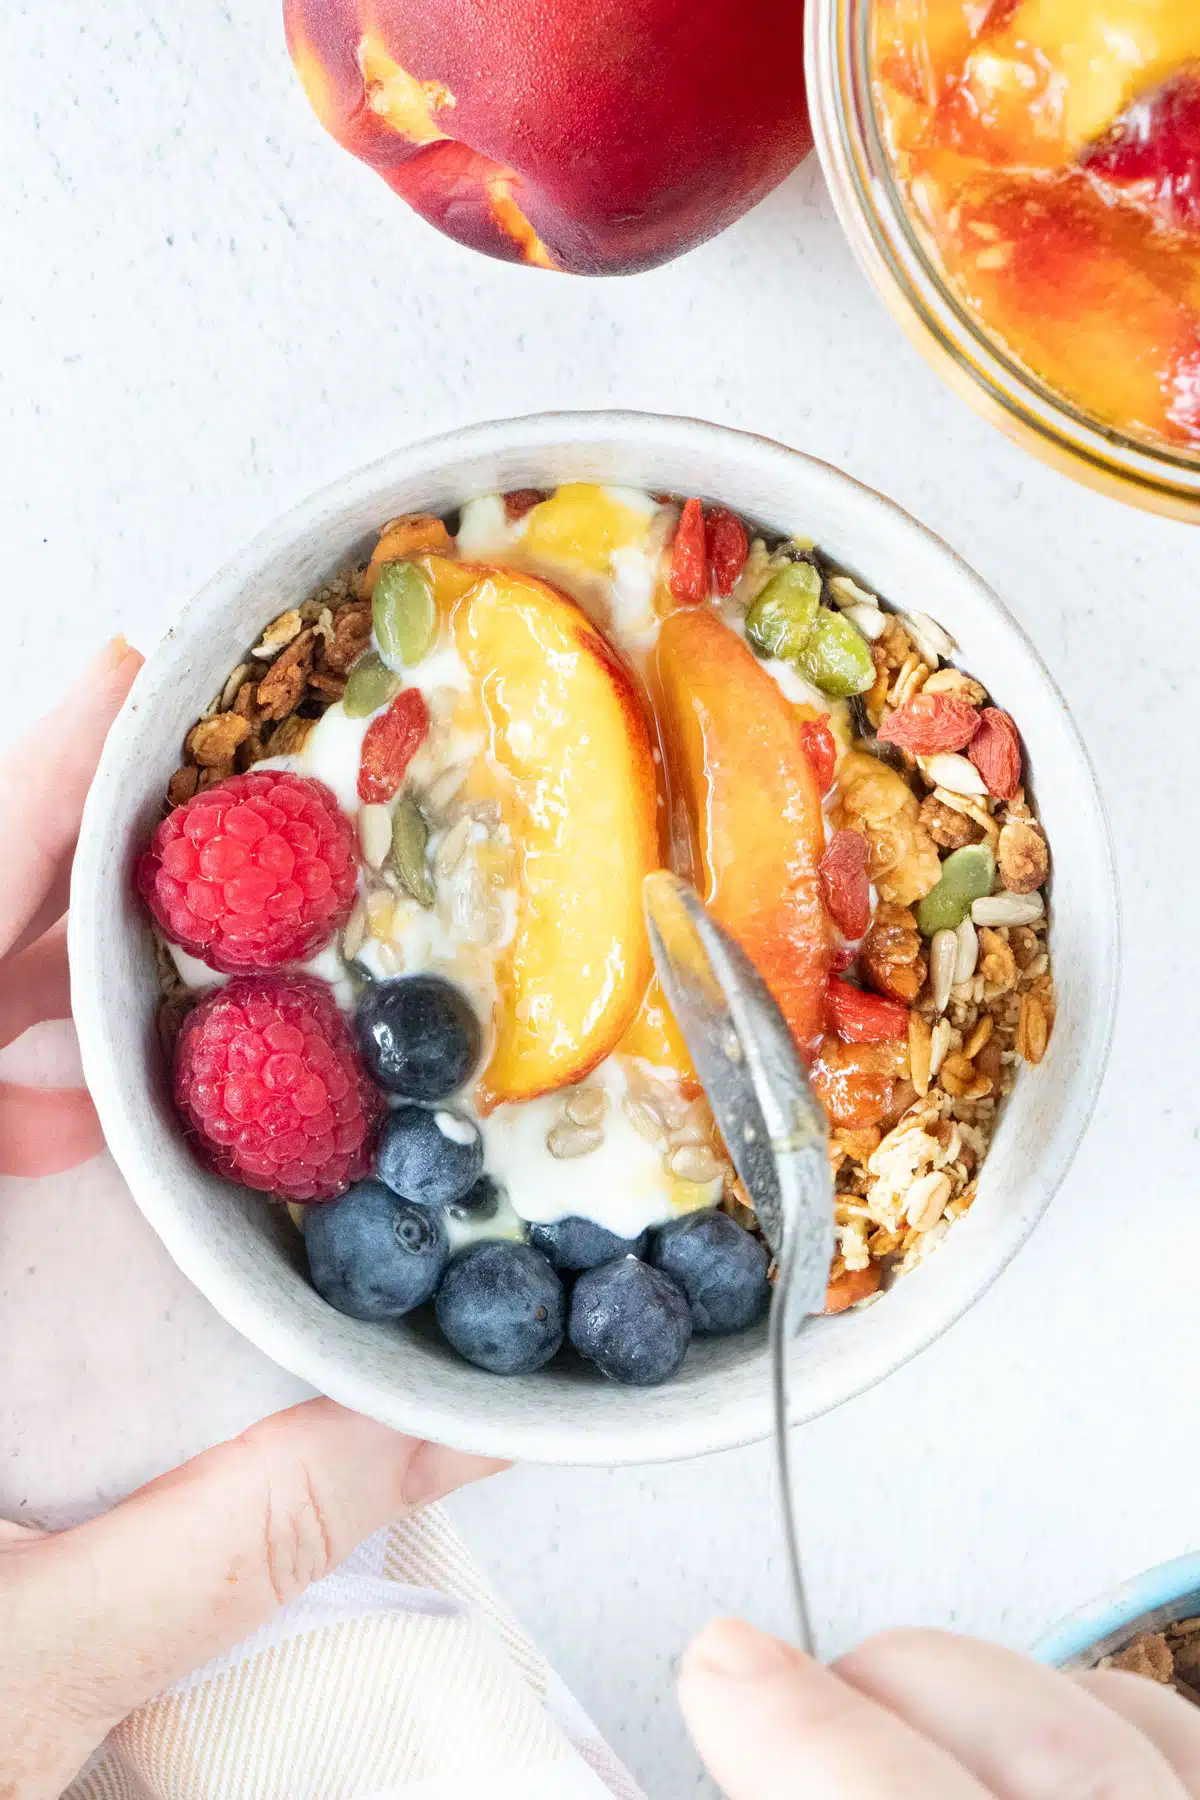
How To Use Honey Fermented Fruit
Ferment fruit goes with just about everything, sweet or savoury! The honey’s natural sweetness is tempered by the fermentation process, resulting in a complex, very distinct taste. It still has a notable sweetness, but it takes on the flavour of the fruit too. And some of the colour depending on the fruit used.
Add a piece of your favourite cheese to a slice of sourdough bread then add some of the fruit and honey on top. Add to yoghurt, granola or drizzle it all over a bowl of ice cream. Use some of the fruit-infused honey in a salad dressing and serve some of the fruit on top. Having it straight from the jar is just as delicious!

What Fruit Can You Ferment In Honey?
While I haven’t tried fermenting every single fruit, I believe most juicy fruits will work well. Something like banana, as an example, wouldn’t, given it won’t release much if any liquid. That said – you can let your imagination guide you with many others. Summer stone fruits are especially good as honey ferments and my favourites would have to be yellow nectarines, peaches and apricots. In autumn and winter, I like to ferment lemon slices with a little ginger to use as part of my food as medicine toolbox. Though persimmon and quince are also delicious! In spring, pineapple or strawberries are what I reach for.
Tips For Success With This Recipe
Fermentation can occur rapidly in hot and humid weather, and you may find your ferment really bubbles up. To avoid liquid spilling out don’t skip on ‘burping’ your jar a few times a day. Particularly on days 2 and 3 if its needed.
Always sit jars of active ferments in a bowl. There is nothing worse than going to check on them in the morning only to find the contents have bubbled up and over the rim… and right down your shelf, over books or into cupboards. The bowl will catch any of that if it occurs.
If you want your ferment to remain quite sweet, don’t make huge jars. Just make enough to consume over the next few months. I keep it to roughly pint size (500ml). If making very big batches that sit for months or years, your ferment will become much less sweet. When fruit is fermented in honey, much like garlic, it will start to release liquid. This liquid dilutes the honey, and natural yeasts consume and ferment the sugar it contains. Over time this will start to make a very mildly alcoholic concoction called a melomel – an ancient alcoholic beverage that’s basically a fruit honey wine and occurs because natural fermentation continues the longer the jar of honey and fruit (plus the liquid) sits.
Using clean jars is also VERY important. I don’t sterilise the jars I use but I do rinse them under boiling hot water before adding the ingredients in. The spoon or chopstick you use must also be spotless.
Does It Matter What Type Of Honey You Use?
Yes, it must be raw honey to ensure fermentation occurs. Honey labelling is incredibly confusing at times and spotting raw honey isn’t always as easy as it seems. It could say raw, unfiltered, organic, or pure and that’s before you even get to the variety of honey.
- Raw honey is unpasteurized and unfiltered, which means it retains the bacteria and yeasts needed to kickstart the fermentation process.
- Unfiltered honey is honey that still contains particles that get into the honey while it’s being made. This includes things like pollen and wax. This type of honey is usually, but not always, raw – so before buying, pay close attention to the label. It should say raw and unfiltered. If it simply says unfiltered, it may not be raw.
- Organic honey is not necessarily raw, unfiltered or unpasteurised. The organic label just means the bees have produced honey from the nectar of organic plants.
- Pure honey is filtered to remove any debris, like bits of bees and pollen, but yeast and bacteria often get removed too. It’s also warmed to make the filtration process simpler as this thins the honey. Heating means this type of honey isn’t raw.
Storing
The fruit should be fully submerged in the honey to prevent mould growth. After the initial fermentation period of one week, the jars can be moved to the fridge for longer-term storage. Refrigeration slows down the fermentation process significantly, but it doesn’t stop it completely. Properly stored honey-fermented fruit can last for several months, although the flavor and texture may continue to evolve over time. Fruit flies love this ferment too – which is another good reason to keep it in the fridge!
Honey Fermented Fruit FAQ
Yes! The fruit should be fully submerged in the honey to prevent mould growth and after the initial fermentation, move the jars to the fridge for longer-term storage
Fermented honey contains negligible amounts of alcohol initially, though this will increase the longer the ferment sits. Honey, liquid and fruit can eventually ferment into an ancient style of mead (honey wine) known as a melomel.
Serve with yogurt and granola, use in a salad dressing, add to peanut butter on toast or just enjoy as a snack.
More Fermentation Recipes
Did you make this recipe?
If you try this recipe, I’d love to know. Leave a comment, rate it, and remember to tag @wholenaturalkitchen in your pics or reels on Instagram, Facebook or TikTok!

How To Make Honey Fermented Fruit At Home
Equipment
- 1 1.5 pint/750ml jar
Ingredients
- 10 ounces honey (300ml) or more as needed.
- 2-3 nectarines (or any fruit of your choice)
Instructions
- Thoroughly wash 2-3 nectarines (or your fruit of choice), de-seed, and cut into medium-sized wedges. I go for roughly 4-5 wedges for each half of the nectarine.
- Add the fresh fruit into a 1.5 pint/750ml jar so it’s roughly half full. Use a 1 pint/500ml jar for a smaller batch.
- Pour over the raw honey until it just covers the fruit. Give the honey a couple of minutes to make its way through the nectarine wedges to the bottom of the jar. Once it has, give it a gentle stir with a clean chopstick or spoon. This will help get the honey into all the little spaces in the jar.
- Add a little more honey on top to finish ensuring the jar is no more than 3/4 full. This is important as it leaves enough room for fermentation to occur at which time the honey may become frothy and bubble up.
- Store the jars in a cool, dark place to ferment at room temperature for 5-7 days. “Burp” the jars daily for the first few days by briefly opening and closing the lid to release the accumulated gases. It’s ready when the nectarines look soft and are completely submerged in the honey. You’ll see that the honey has also become very liquid and will slosh around like water.
- When fermentation is complete, move the jar to the fridge to extend the shelf life.
- Enjoy with yogurt and granola, add to tea or salad dressing, or add a little to your morning toast.
Can I use limes for the honey ferment instead of lemons? Thanks
Hi Maria, yes lime in honey is delicious!