Thick And Creamy Instant Pot Greek Yogurt

This easy Instant Pot Greek Yogurt recipe will have you enjoying creamy, homemade Greek yogurt in no time. The set and forget yogurt function on the Instant Pot not only speeds up the process, it also allows for precise temperature control and timing.
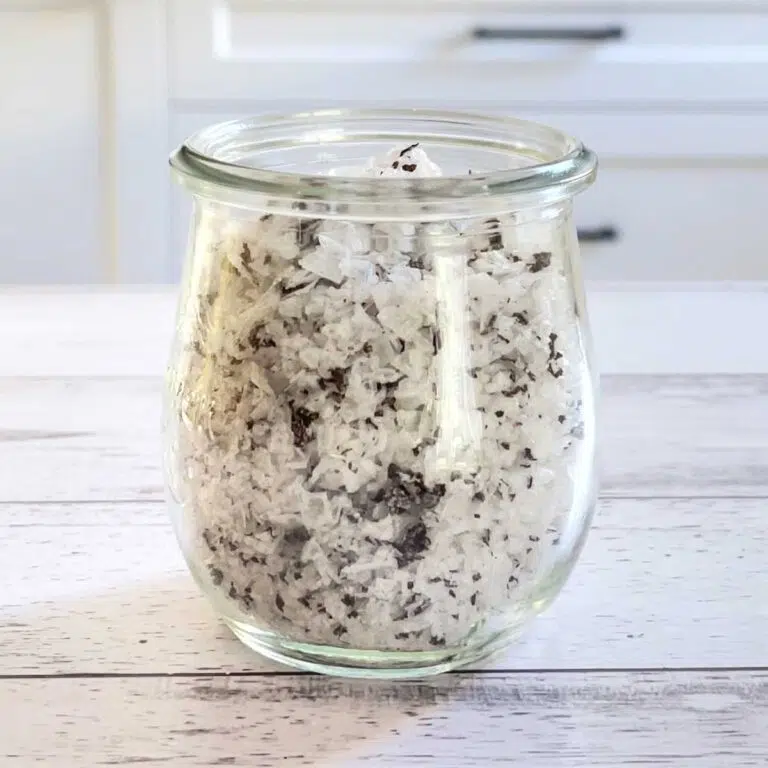
The result is a a creamy, tangy yogurt that rivals store-bought brands. It’s perfect as a base for Yogurt Marinated Chicken, a Greek Yogurt Ranch Dressing, or to dollop into things like this Peach Smoothie.


Recipe Overview: Instant Pot Greek Yogurt
What Are The Best Ingredients For Thick Greek Yogurt?
There is lots to love about having your own homemade yogurt. Instant pot yogurt recipes can be made cheaply and easily too, given they only require two very simple ingredients – whole milk and a little of your existing Greek yogurt. Once made your yogurt also produces whey. This is something worth saving, because it can be used as a starter culture for many other fermentation projects.
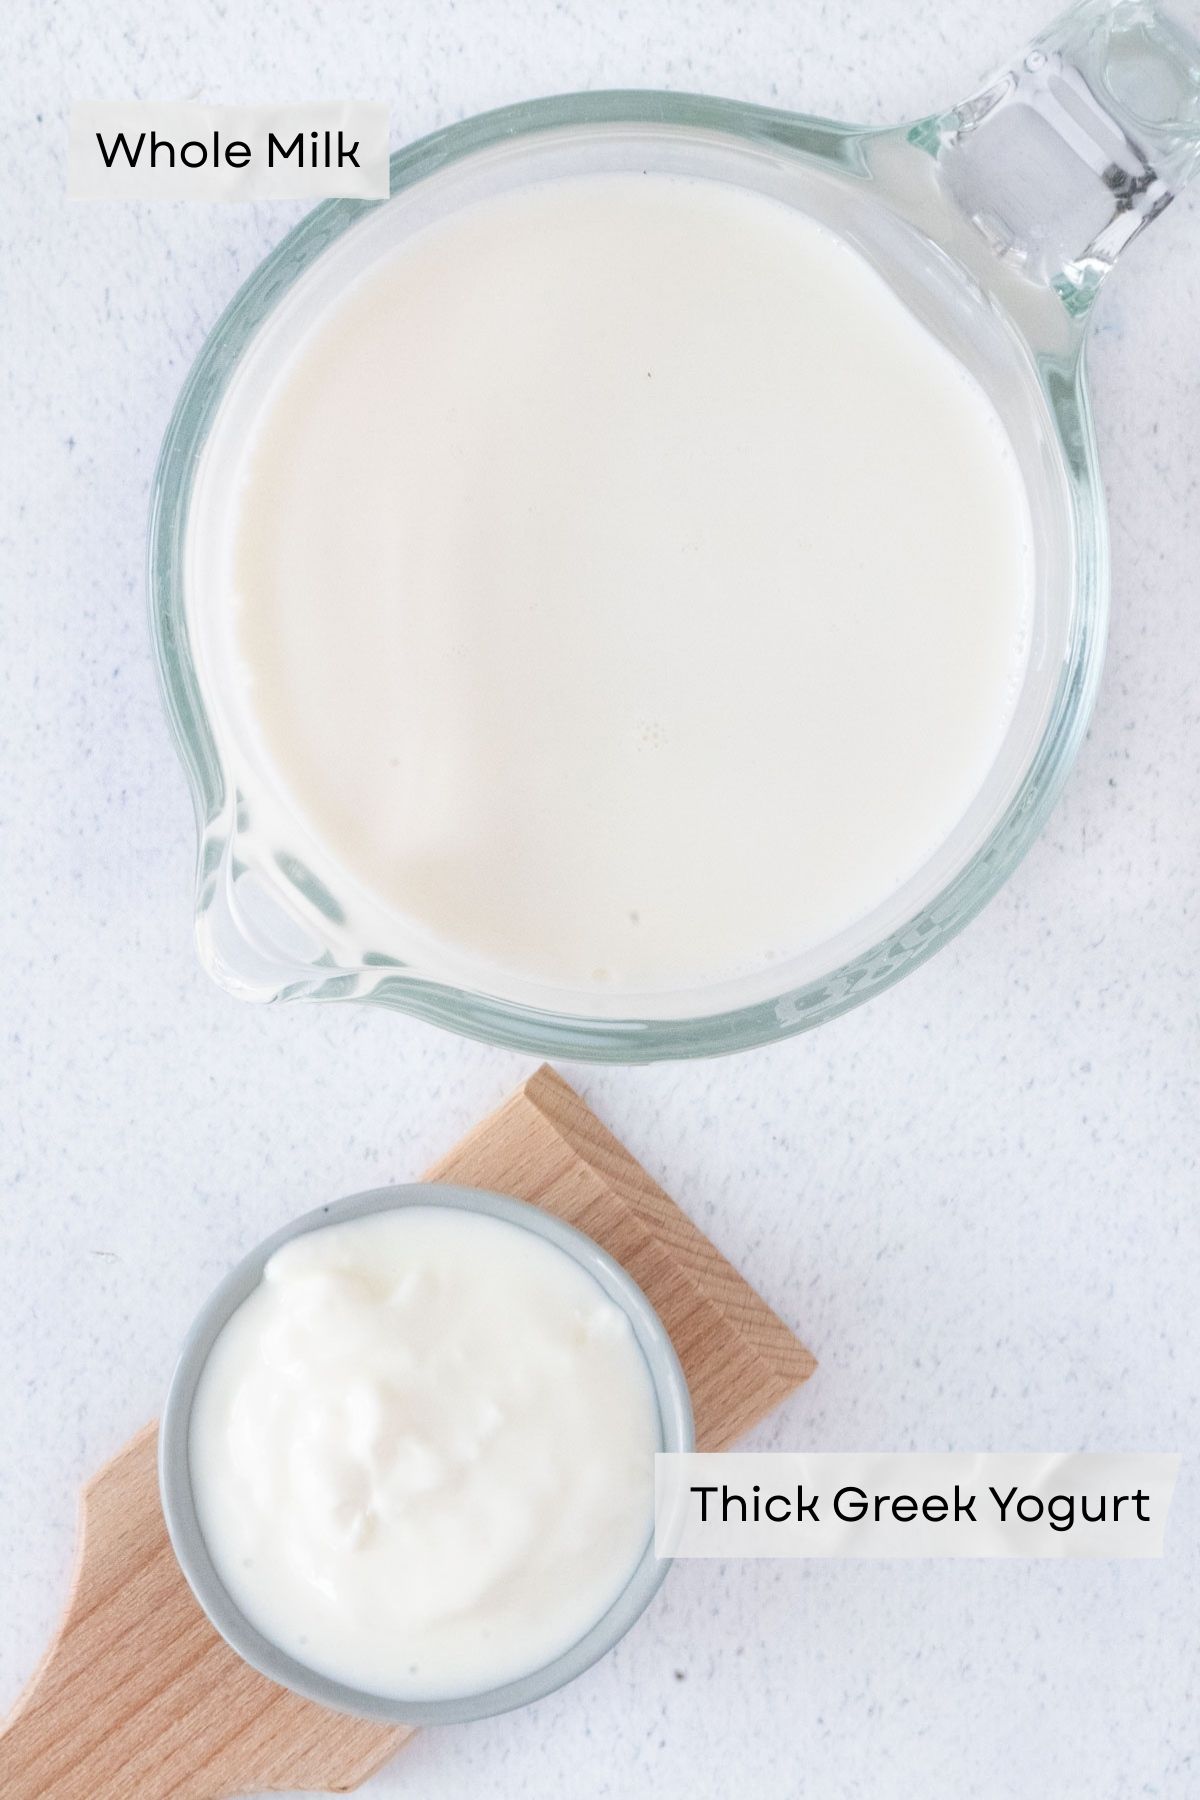
- Whole milk – any you like is fine, but I go for one that is rich in protein and has a slightly higher fat content. This combination results in a very luscious yogurt.
- Thick Greek yogurt – this recipe assumes you have some on hand, and only two tablespoons are required. If you do need to buy one, any variety from your local grocery store is fine. Look for a plain yogurt with a high fat content that has live cultures, or active cultures on the ingredient list.
Optional extras could be things like vanilla extract or a scraped vanilla bean. However, I think it’s best to start with a plain yoghurt and add your flavours once it’s ready. If you do add flavours or sweeteners once the yogurt is ready, always keep a small jar of plain yoghurt too. A dollop of plain yoghurt can be very helpful for a dish! Plus, you’ll want some plain to start your next batch.
Substitutions And Variations
Use a high protein whole milk for a higher protein Greek yoghurt.
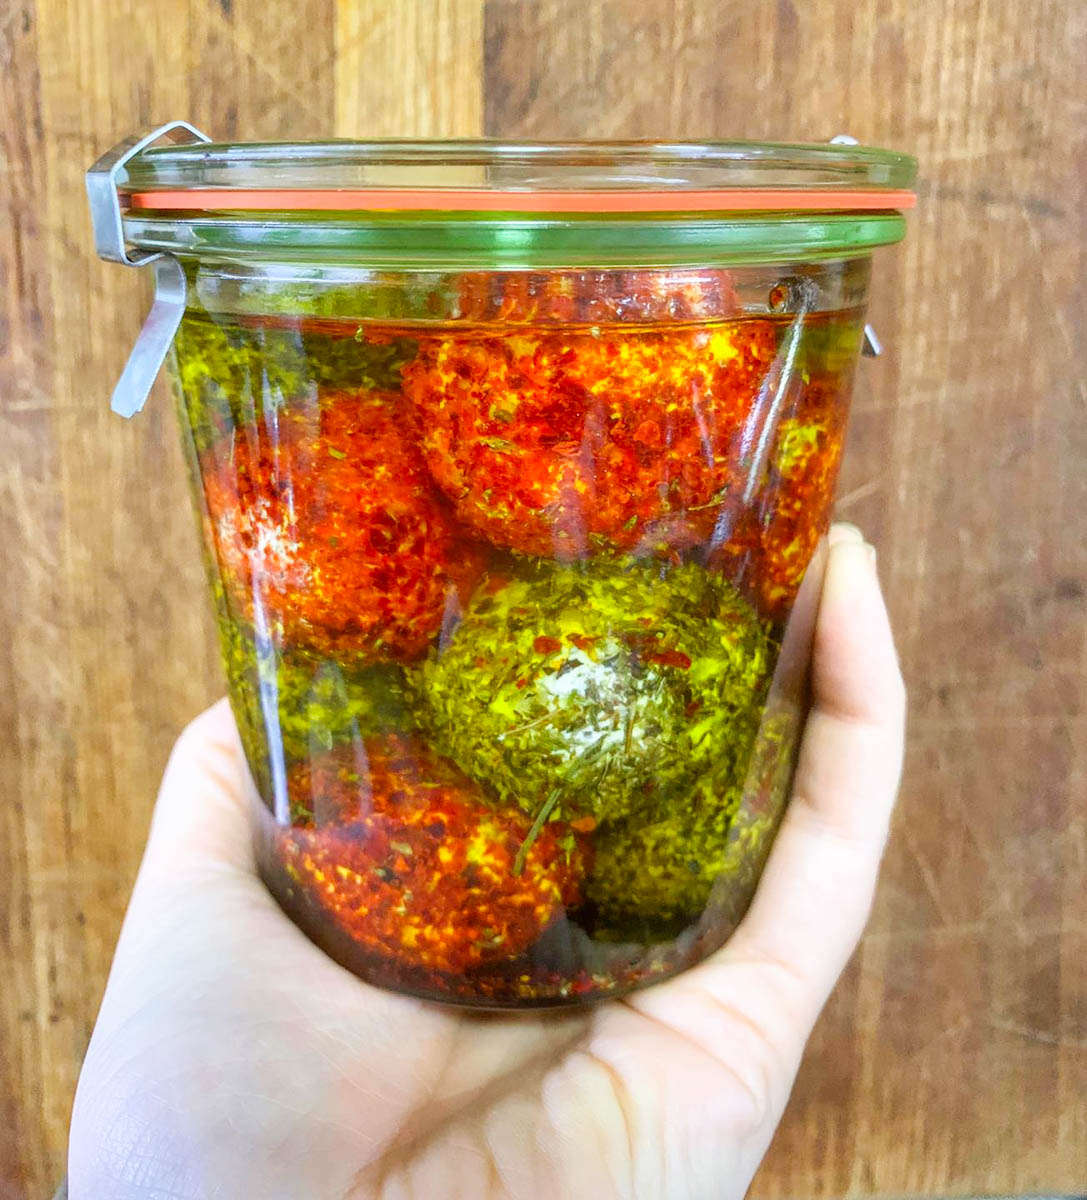
You can make labneh by leaving the yogurt to strain overnight. Labneh is essentially a yogurt cheese. It’s produced by leaving Greek yogurt to strain for a longer period of time and what results is something thick enough to spread on toast. You can even leave it to become very thick, roll it into balls, roll those in chopped herbs then store in a jar covered in olive oil. This makes a delicious appetizer when served with some crackers or toasted bread.
To make a lower fat Greek yogurt, replace the whole milk with skim or light milk. Just note that the end result will not be as thick and creamy and the recipe will yield a little less yogurt overall. Lite or skim milk will produce a thinner yogurt due to its lower fat content. The amount of fat in the milk affects the yogurt’s thickness and creaminess and also impacts the volume produced. As such, skim milk yogurt can benefit from longer straining times to improve thickness. Rather than the 1-2 hours outlined in the recipe, I suggest leaving it to strain overnight.
How To Make Greek Yogurt In The Instant Pot
The Instant Pot simplifies the process of yogurt making by requiring minimal hands-on time. There are a few steps involved, though none are difficult or time consuming. It’s worth the time it takes though, as what’s produced, in my opinion, is far superior to store-bought yogurt. The final product is thicker, tangier and creamier too.
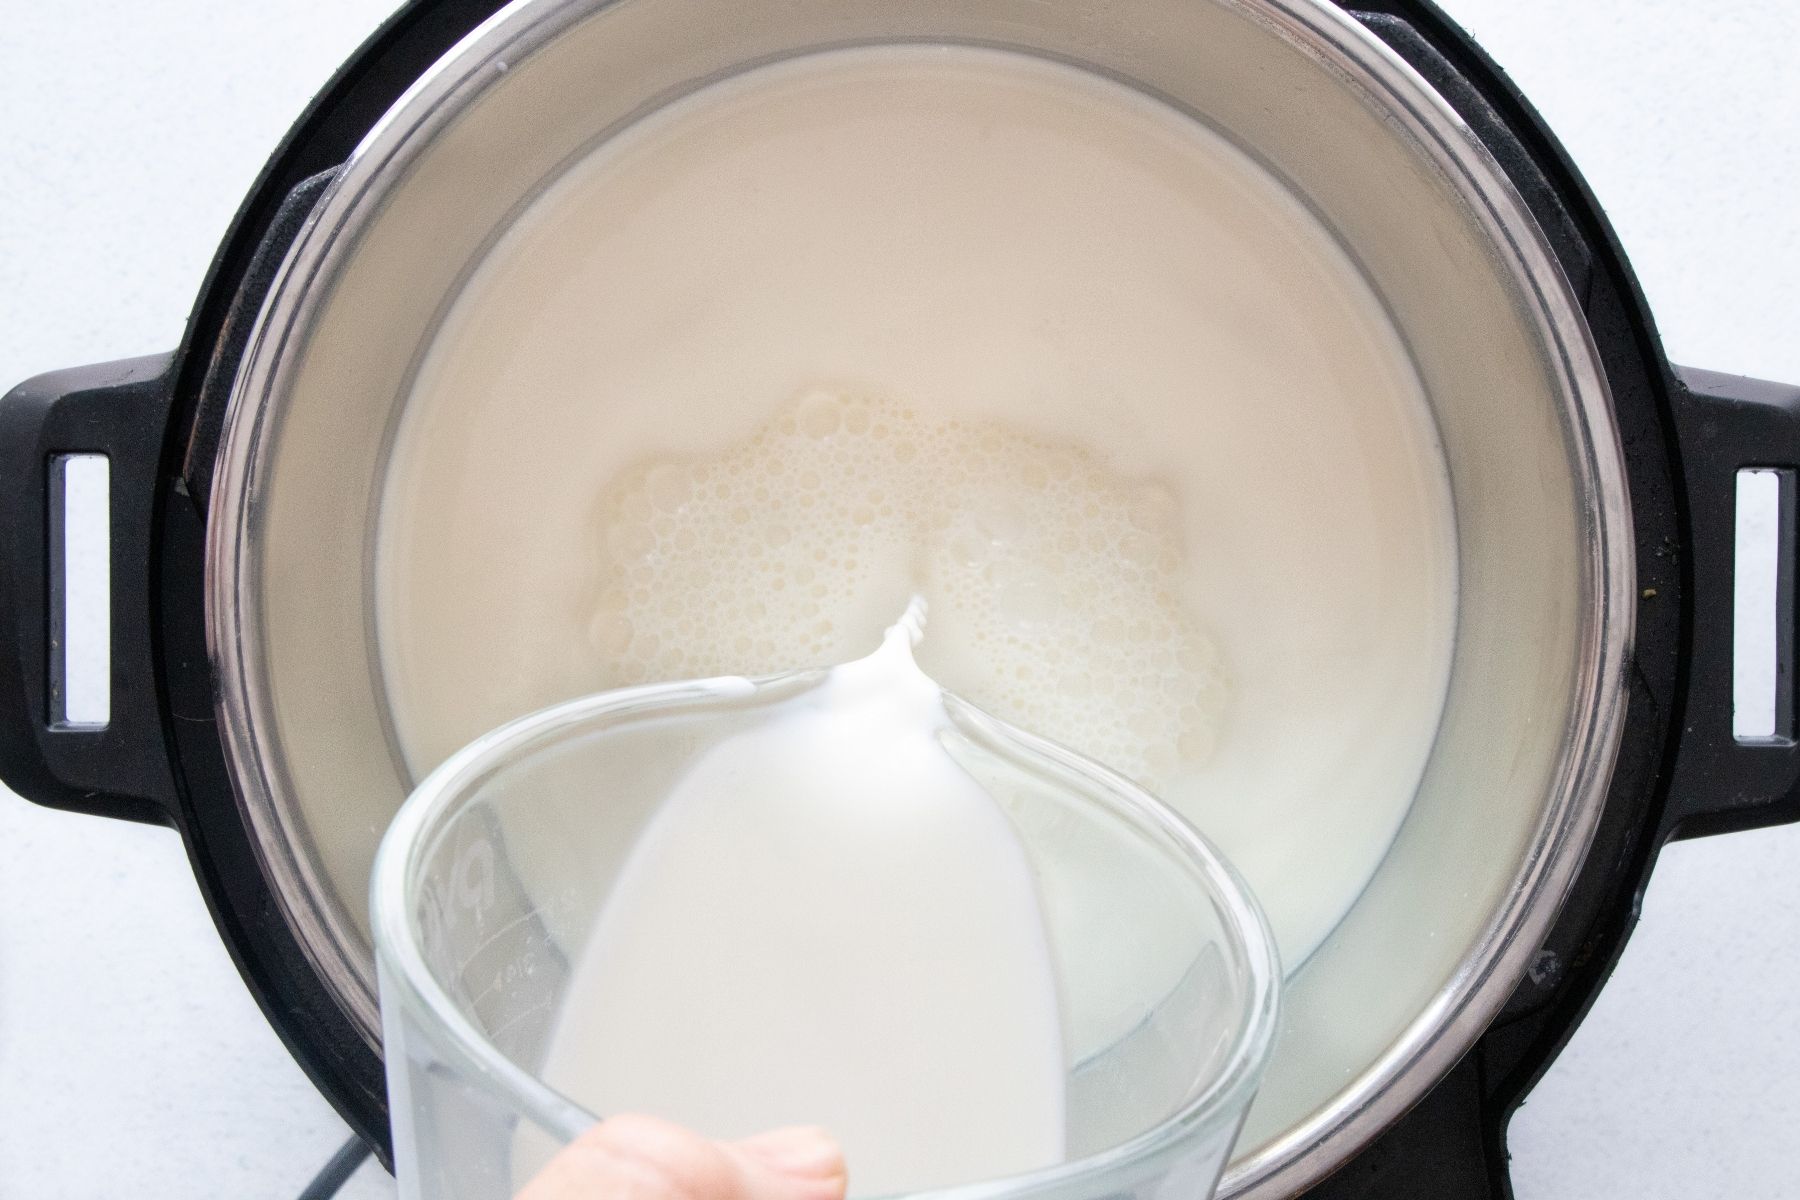
- Step 1: Pour 2 litres/half a gallon of milk into the instant pot and secure the lid.
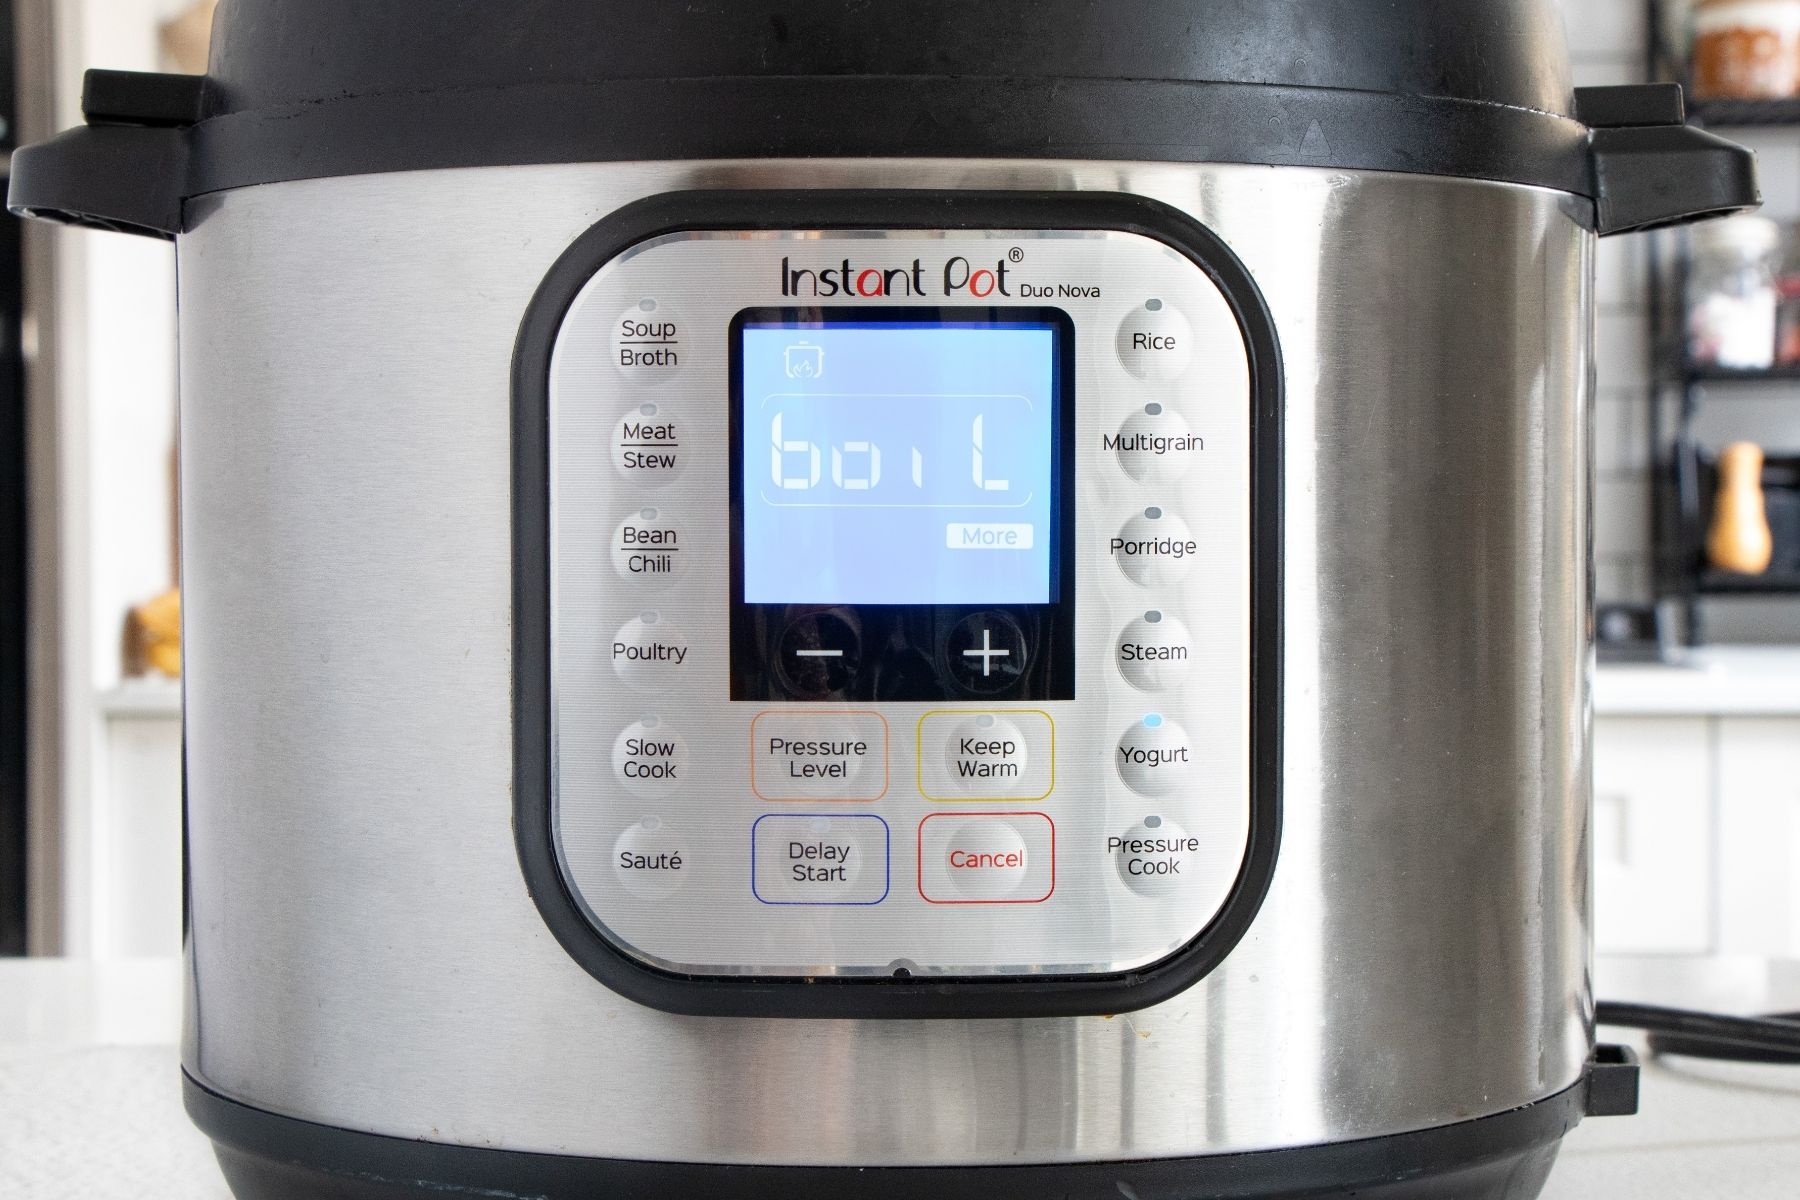
- Step 2: Depending on your instant pot either press the yogurt button twice or hold it down until ‘boil’ appears. The milk will now heat, which takes roughly 25-30 minutes.
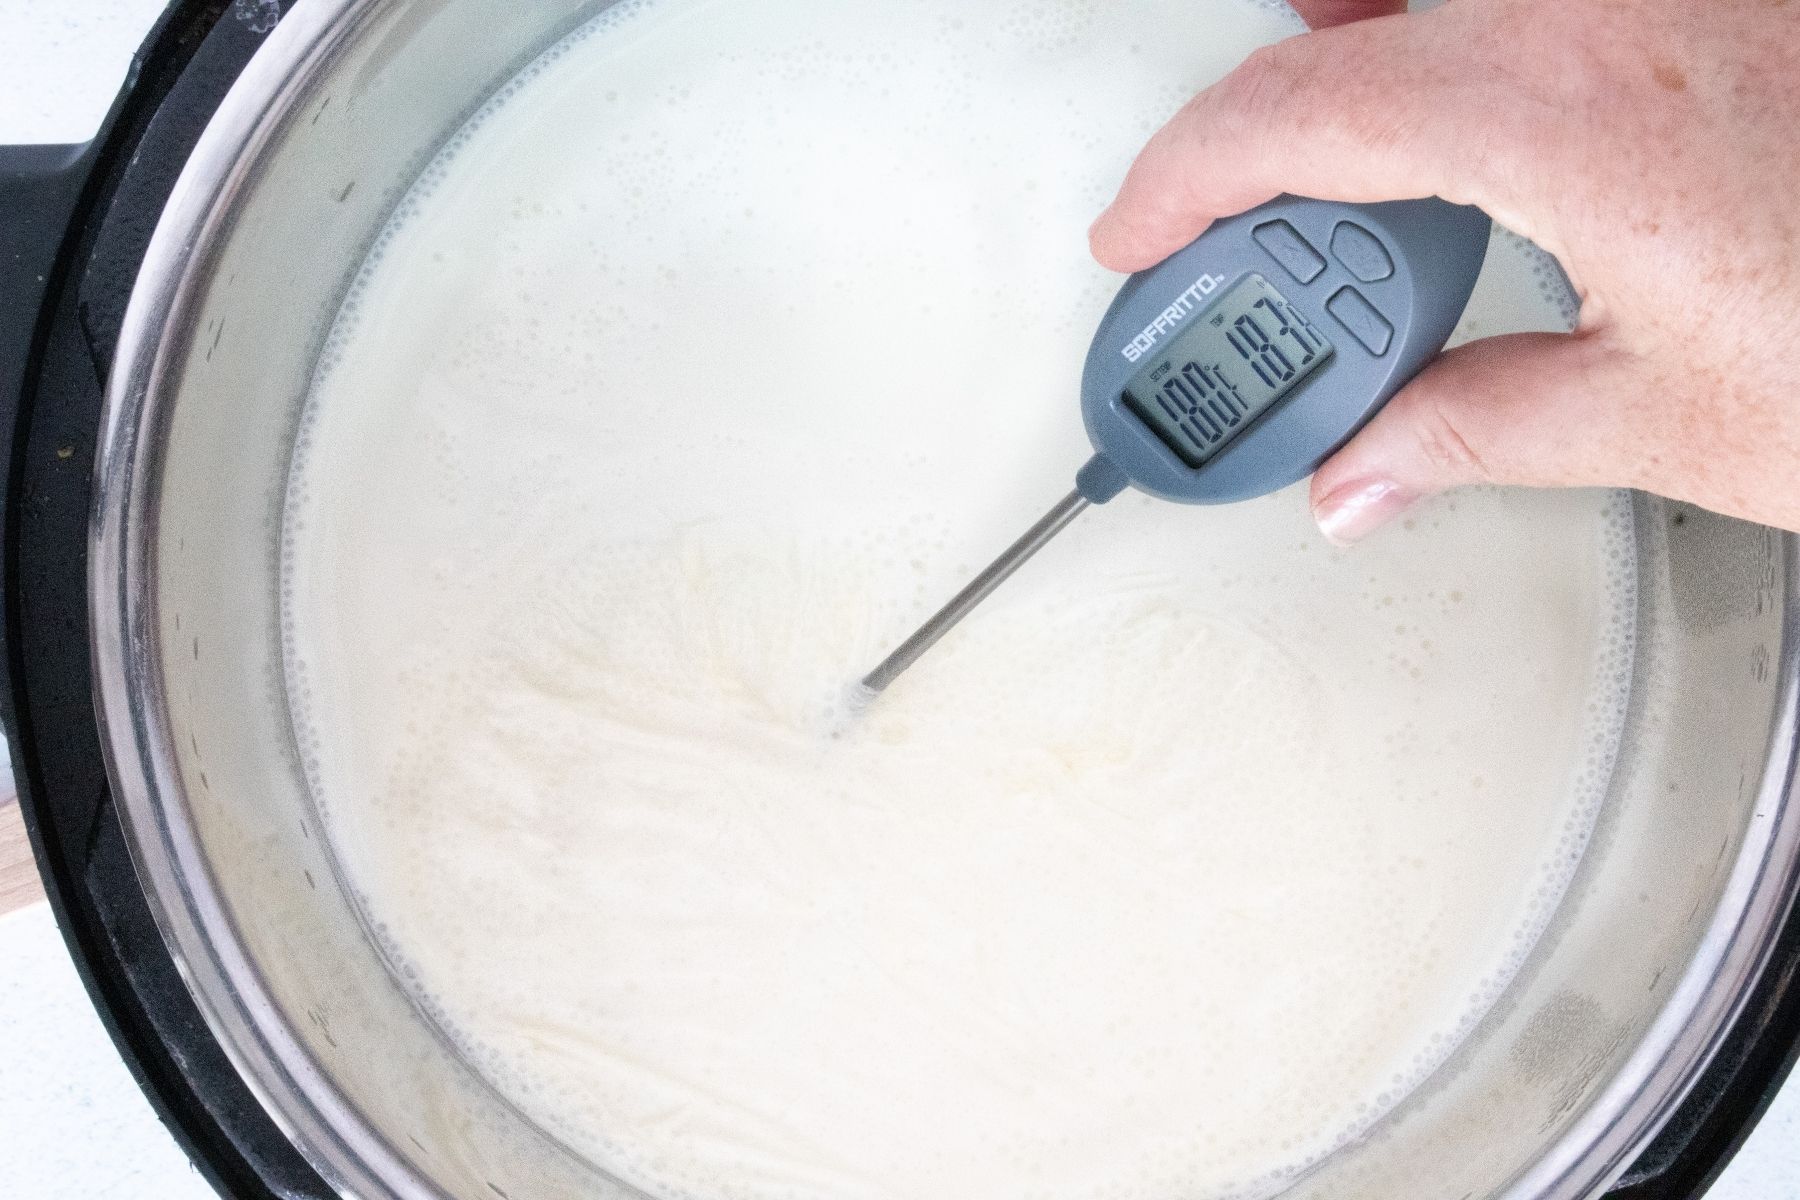
- Step 3: Once the instant pot beeps, press cancel, remove the lid and check the temperature of the milk straight away with a food thermometer. It needs to be between 180ºF-190ºF (80º-90ºC). Set aside to cool.
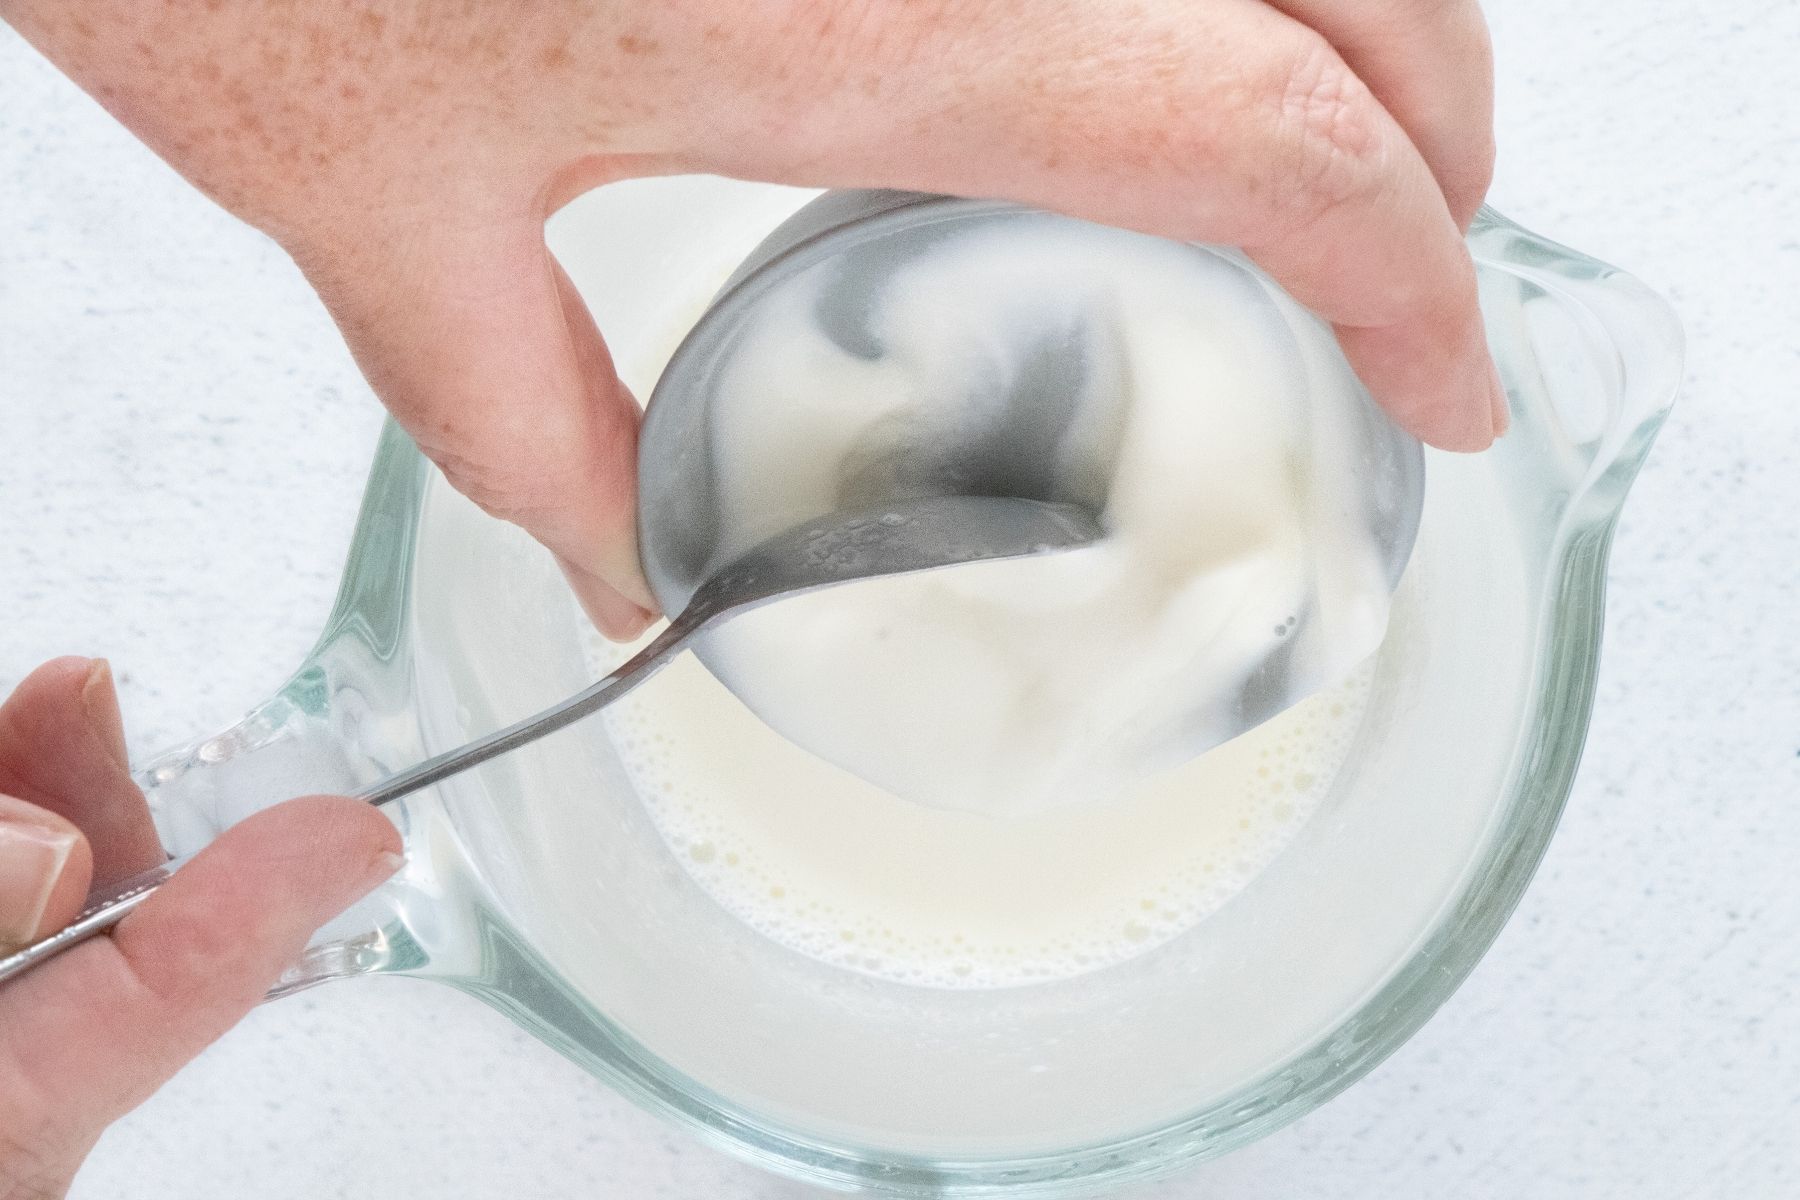
- Step 4: Once the milk cools to 115ºF (45ºC), remove half a cup and add it to a jug with 2 heaped tablespoons of Greek yogurt. Whisk together to form your starter mixture, then pour back into the pot with the rest of the milk.
- Step 5: Put the inner pot back into the instant pot, put the lid on and switch it on.
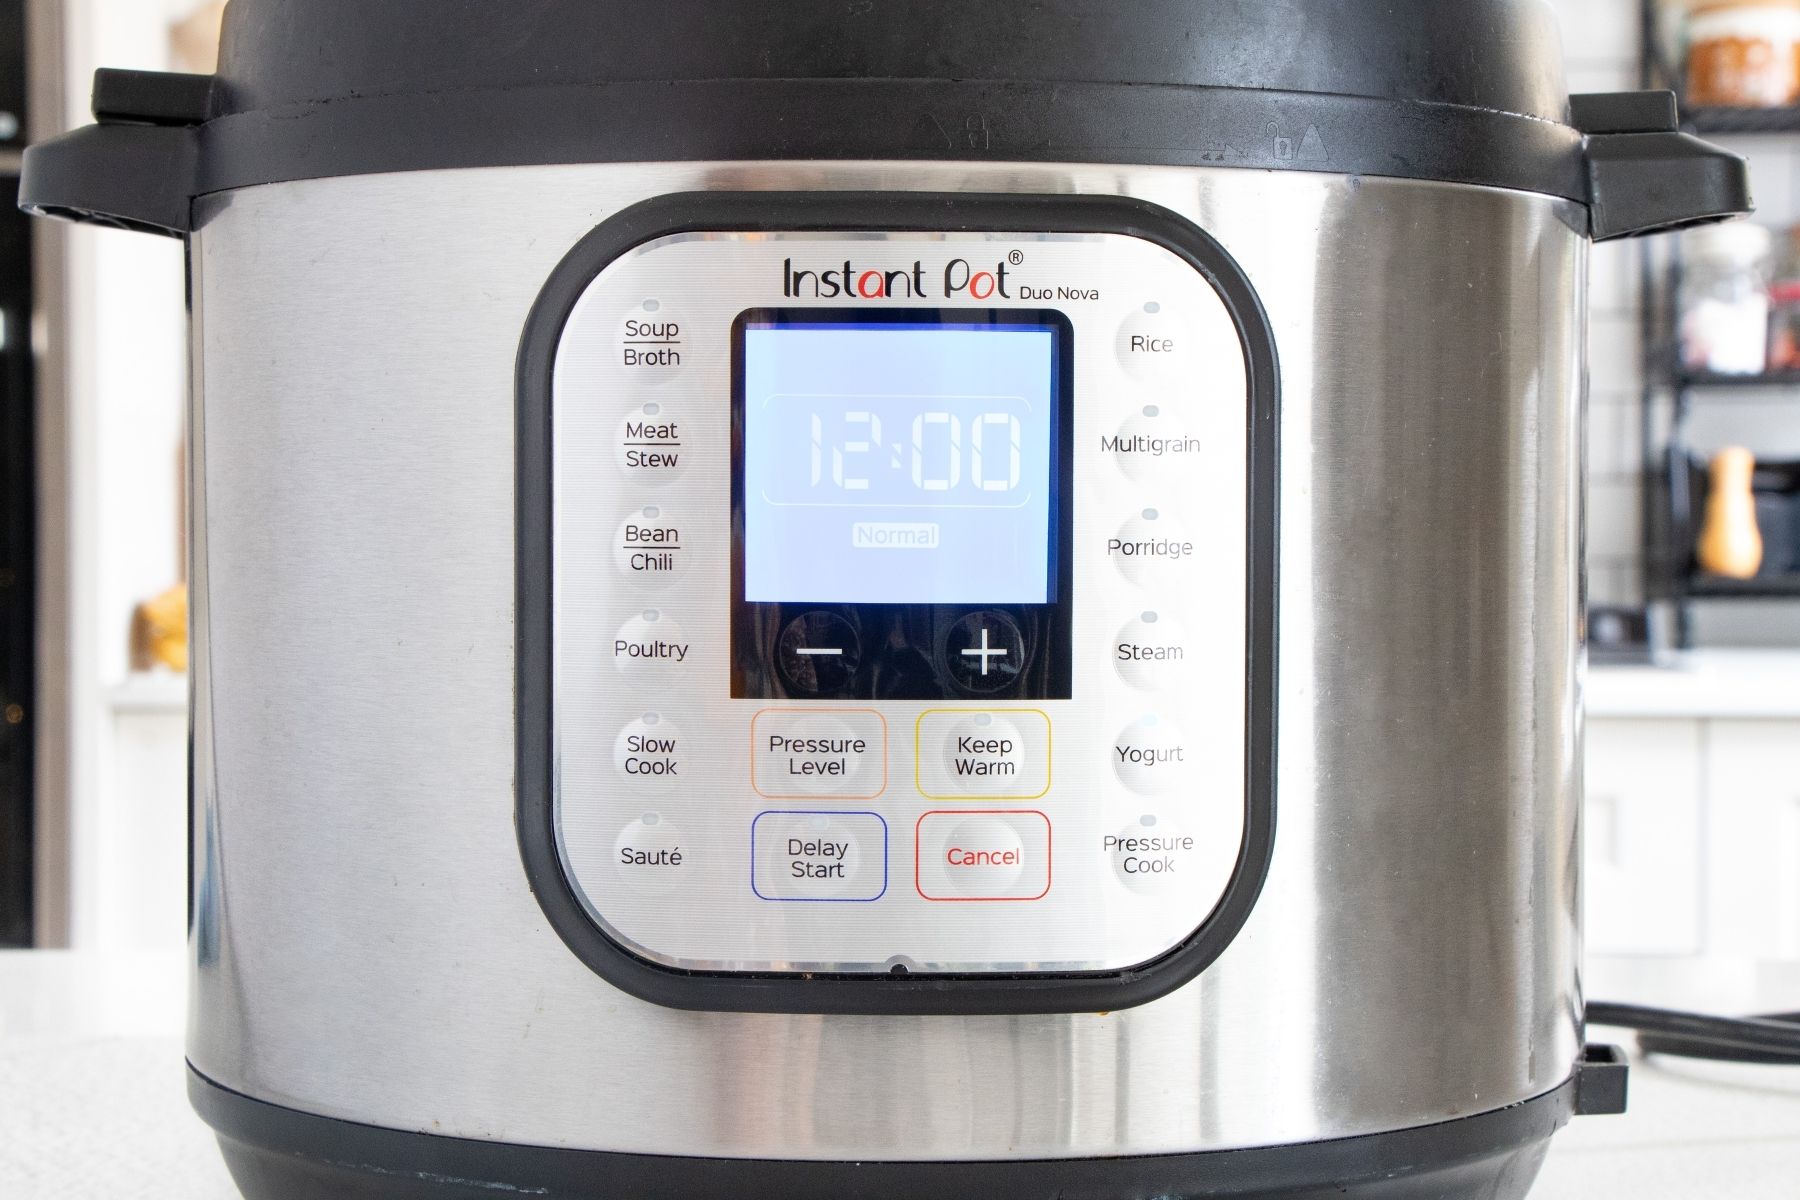
- Step 6: Press the yogurt button once or until ‘yogurt normal’ appears. Press the + or – button until the time says 12 then leave the yogurt to ferment.
If you like your yogurt very tangy, I recommend upping the fermentation time to 14 hours. This will make the flavour very sharp and tart.
How Long Does Greek Yogurt Need To Strain?
For standard Greek yogurt – strain for 1-2 hours; for a thick spreadable labneh style, strain overnight (8+ hours). Once straining is done you can decant yogurt into jars and keep in the fridge.
- Step 1: Once the instant pot beeps the yogurt is ready. It’s thin and lumpy at this point so straining is essential.
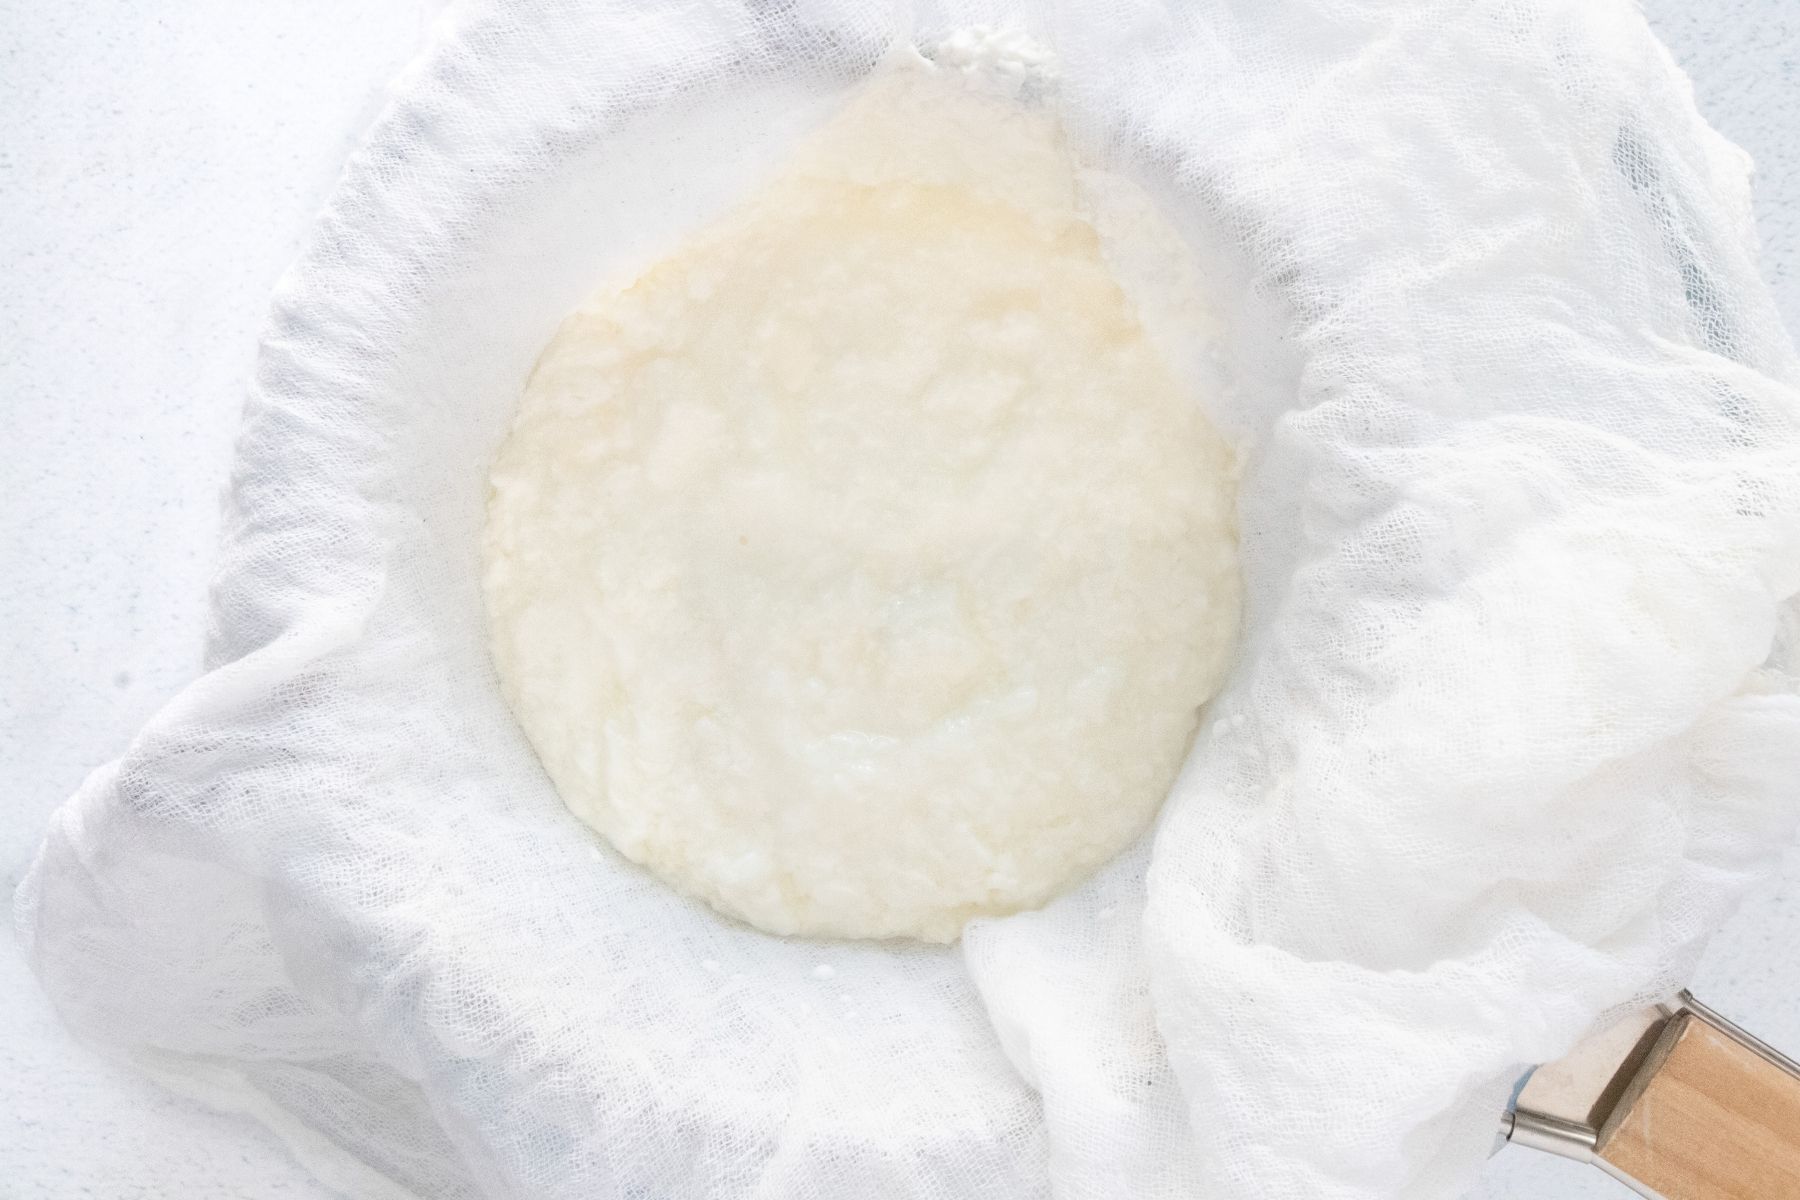
- Step 2: Line a strainer with one to two layers of cheesecloth and sit it over a deep bowl. Pour the yogurt in, fold it over so the top is covered and place in the fridge for 1 – 2 hours to thicken.
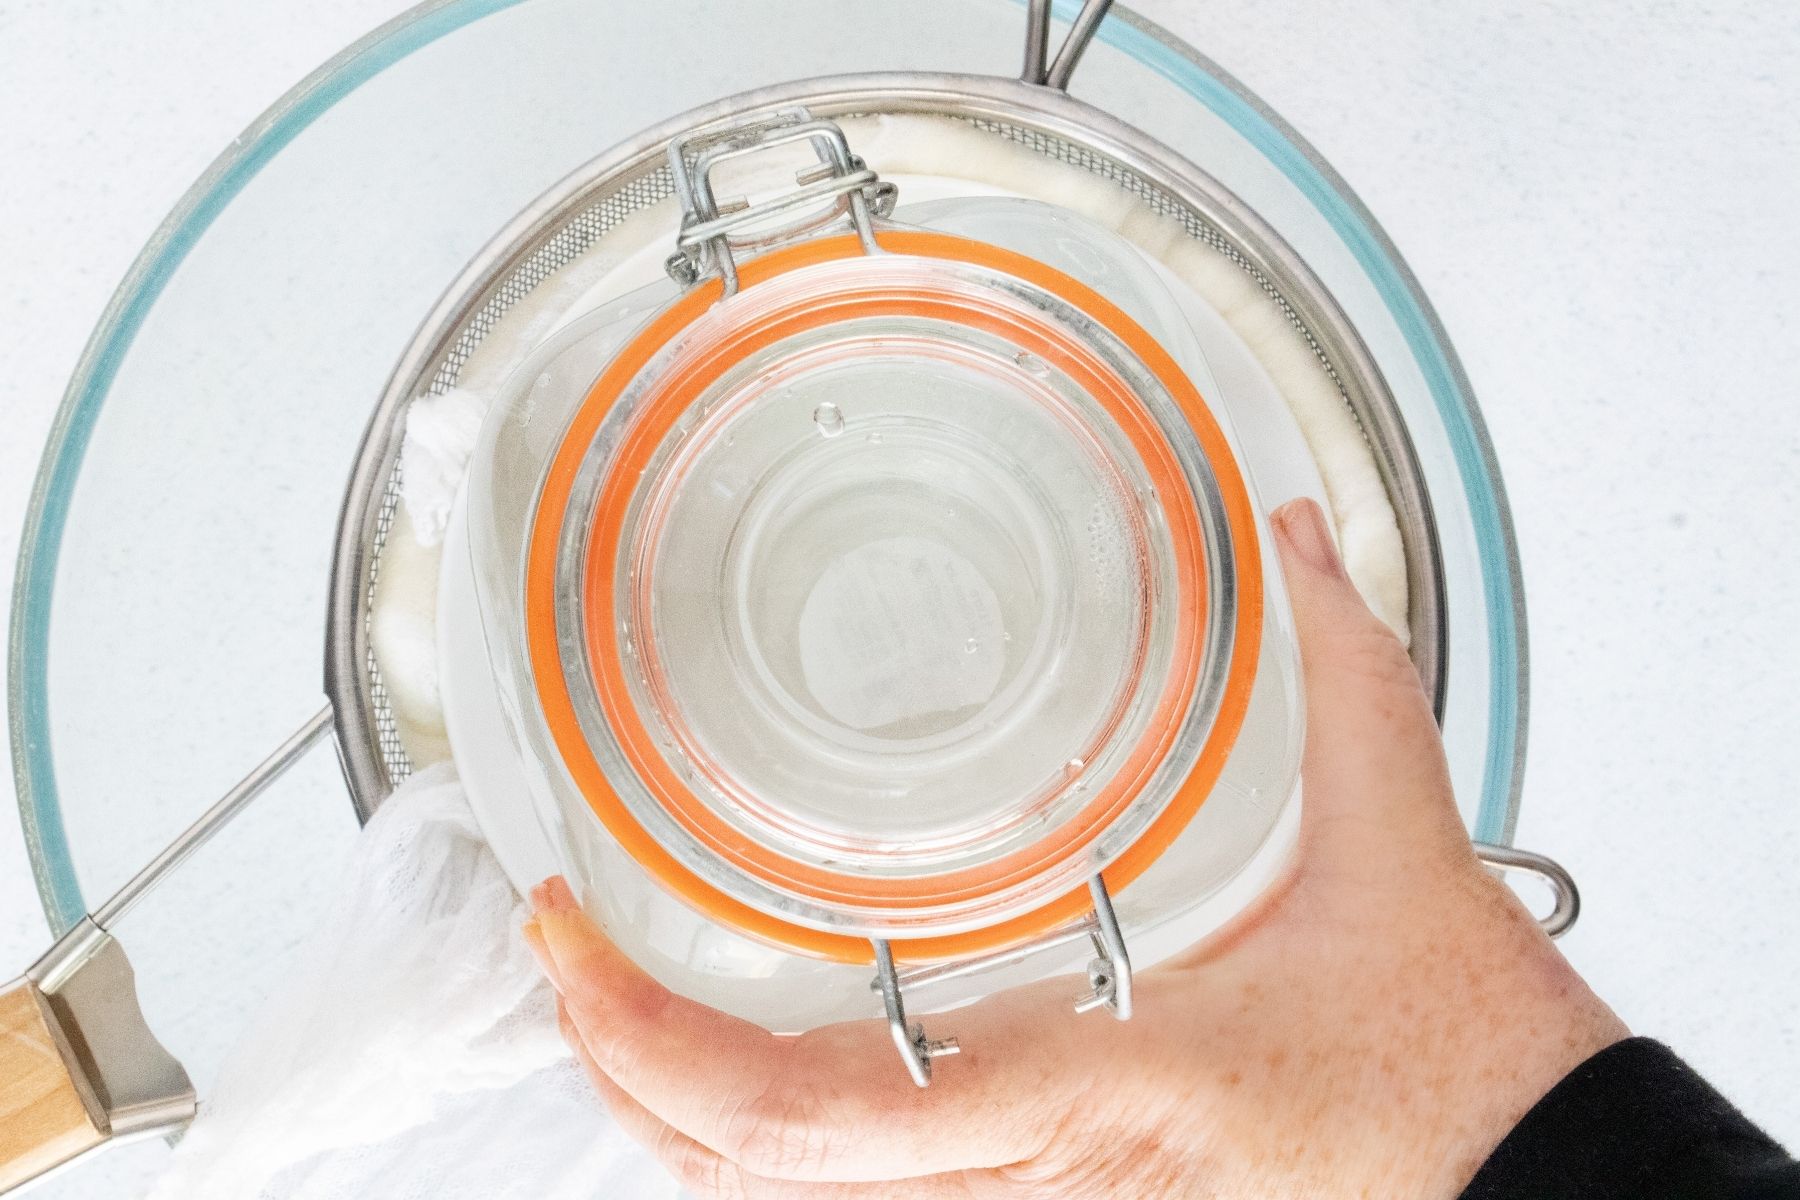
- Step 3: Sit a saucer on top of the folded cheesecloth then a jar filled with water on top. This helps push the yogurt down and remove some of they whey to thicken it as it chills.
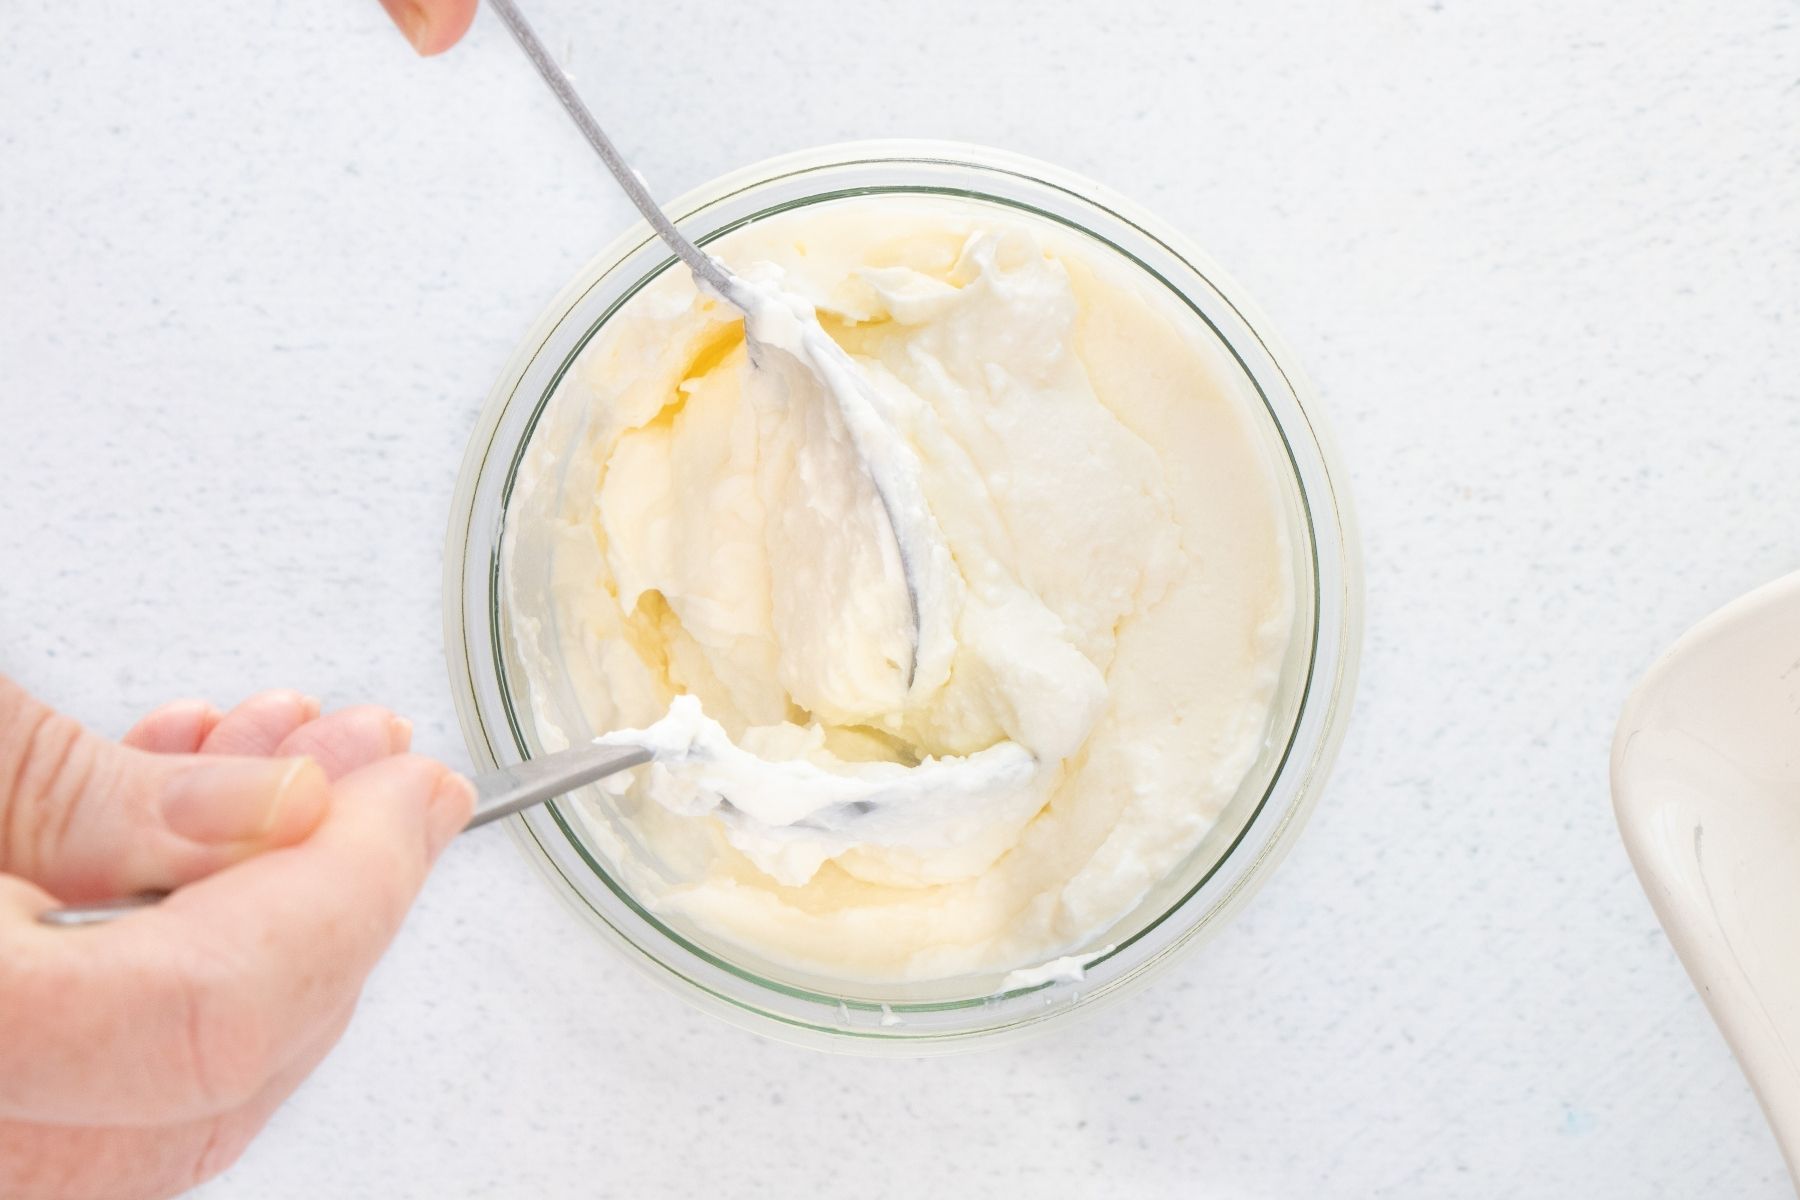
- Step 4: Tip the strained yogurt into mason jars or any large jars you have on hand and keep in the fridge.
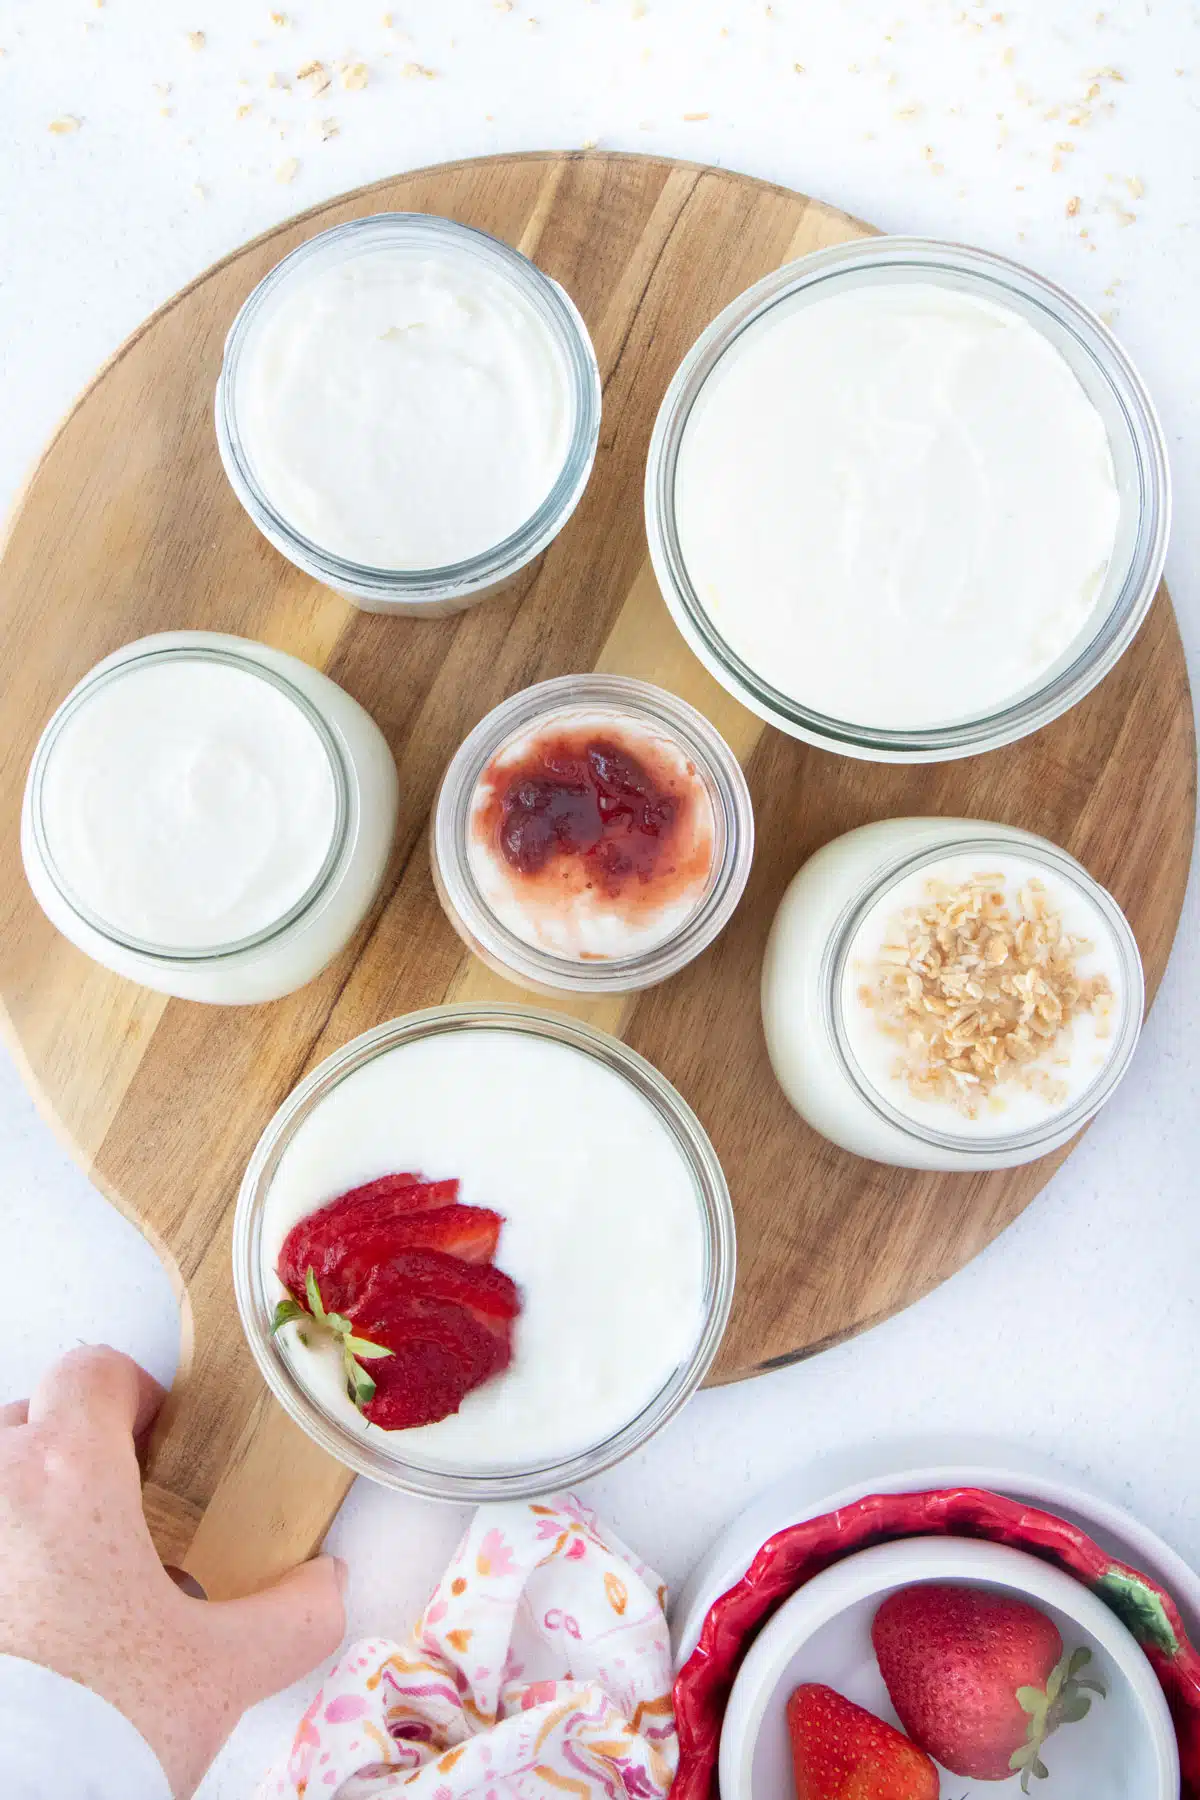
Serve your deliciously thick Greek yogurt over granola, this delicious Gingerbread Apple Crisp recipe, make yogurt parfaits, use it to make Tiramisu Overnight Oats, or use in place of sour cream. Or try adding a touch of sweetness to it by mixing through some fluffy Whipped Honey.
Expert Tips
- The type of milk you use can make a huge difference to how thick your yogurt is. Whole milk with a high fat content consistently returns the best results.
- Always remember to save a couple of tablespoons of yogurt to make your next batch. This is essentially your starter culture.
- Once the yogurt is strained you will be left with a yellowish liquid. This is the whey. Leftover whey makes a great starter culture for other ferments like sauerkraut, vegetables or fermented chutneys.

Storing And Freezing
Store the yogurt in clean glass jars in the fridge where it will last for up to two weeks. Before finishing your jar, always remember to keep 2 – 3 tablespoons of it aside to inoculate your next batch with the probiotic cultures needed to ferment the yogurt.
While I don’t recommend freezing Greek yoghurt in bulk, it can be frozen into little treats for a hot day. Simply mix some yogurt with peanut butter and maple syrup in a bowl. Dollop into little rounds on a baking sheet lined with parchment paper and freeze for an hour or two. Enjoy as is or dip in melted chocolate and refrigerate until firm.
A Note On Sterilizing Jars & Equipment For Ferments
Many recipes note that sterilizing everything is essential when making yogurt, or any ferment for that matter. I’ve been a mad fermenter for well over a decade and I don’t sterilize anything. The point of sterilizing is generally to kill off any harmful bacteria that may be lingering on your equipment. This is because the bacteria can interact with your ferment and cause it to mould. In my many years of fermenting, I’ve only lost a small handful of projects to mould. I’ve found that if the equipment you’re using, and the jars you’re storing in are spotlessly clean, you’re unlikely to have any issues. My process involves 1) making sure everything is spotless (including my hands), and 2) rinsing all jars and equipment with boiling water just before use.

Troubleshooting
- Don’t have cheesecloth? Line the strainer with a nut milk bag, disposable kitchen wipes or coffee filters. There are also yogurt strainers that are made specifically for this task. Straining is not a necessary step but it will yield the best and thickest results. Unstrained yogurt will be thinner and lumpier than the strained variety and will be a pourable rather than scoopable consistency.
- If you’ve overstrained the yogurt, whisk back in a tablespoon of the strained whey, or more, until you achieve your preferred thickness. Adding one tablespoon at a time ensures you don’t end up with a runny yogurt again.
FAQ
More Fermenting Recipes


Did you make this recipe?
If you try this recipe, I’d love to know. Leave a comment, rate it, and remember to tag @wholenaturalkitchen in your pics or reels on Instagram, Facebook or TikTok!

Thick And Creamy Instant Pot Greek Yogurt
Equipment
- 1 Instant pot
- 1 Digital thermometer
- 1 Strainer
- Cheesecloth
Ingredients
- 2 quarts whole milk (see note 1) (2 litres)
- 2 tbsp plain Greek yogurt
Instructions
- Pour 2 quarts/2 litres of milk into the inner pot of the instant pot and secure the lid. It doesn't matter what position the venting knob is in because no pressure cooking is involved in this process.
- Depending on your instant pot either press the yogurt button twice or hold it down until 'boil' appears. Leave the pot to heat the milk, which will take roughly 25-30 minutes.
- Once the instant pot beeps, press cancel, remove the lid and check the temperature of the milk straight away with a digital food thermometer. It needs to be between 180ºF-190ºF (80º-90ºC).
- If the milk is not quite at this temp, turn on the sauté mode for 3-4 minutes and check the temperature again very frequently. I hold the thermometer in the pot because it rarely takes more than a couple of minutes. Hit cancel as soon as the milk is at temp.
- Remove the inner pot of the instant pot and set it aside on the stove top to cool to 115ºF (45ºC). This generally takes 45 minutes to an hour. To speed this up, fill your kitchen sink with 1-2 trays of ice cubes and fill about one-third full of water. Place the inner pot into the ice bath and check the temperature every 5 minutes. This cools rapidly and is generally at temp within ten minutes.
- When the milk has cooled, remove half a cup and add it to a jug with 2 heaped tablespoons of plain Greek yogurt. Whisk together to form your starter mixture, then pour this back into the pot with the rest of the milk.
- Put the inner pot back into the instant pot, put the lid on and press the yogurt button once or until 'yogurt normal' appears. Press the + or- button until the time says 12 then leave the yogurt to ferment. For a tangier yogurt – leave the mix to ferment for 14 hours.
Straining the Yogurt
- Once the instant pot beeps, line a strainer with one to two layers of cheesecloth and sit it over a deep bowl. Pour the yogurt in, fold it over so the top is covered and place in the fridge for 1 – 2 hours to thicken (see note 2). For an even thicker yogurt, leave to strain overnight. This will produce something close to a labneh.
- Spoon the strained yogurt into mason jars or any large jars you have on hand and keep in the fridge for up to two weeks.
- Tip the whey into a clean jar and also keep this in the fridge to use for future fermenting projects.
- Serve your homemade Greek yogurt alongside some fresh berries and granola, use it to make Tiramisu Overnight Oats or use in place of sour cream.
Video
Notes
- Pour 2 quarts/2 litres of milk into the instant pot.
- Hit the yogurt function twice until boil appears then leave the milk to heat.
- Once the IP beeps, use a digital thermometer to measure the temp. It needs to be 180ºF-190ºF (80º-90ºC).
- Remove the inner pot and leave the milk to cool to 115ºF (45ºC)
- Mix 2 Tbsp of Greek yogurt with ½ cup of the cooled milk then pour back into the milk.
- Put the inner pot back into the IP, put the lid on, and press the yogurt button until ‘yogurt normal’ appears.
- Set the timer to 12 hours.
- When the IP beeps, set a strain over a deep bowl and line with cheesecloth. Pour the yogurt in, cover with the overhanging cheesecloth and strain for 1-2 hours.
- Spoon into jars and store in the fridge for up to 2 weeks. Keep the strained whey for future fermenting projects.

I’m not sure why it won’t let me rate this any higher than 4 stars? I tried clicking on the fifth star many times with no response. Thank you for the easy to follow directions that produced perfect results! I fermented 1/2 the batch an extra 10 hours for 24 hours total. I like the extra sour flavor and have read that it produces even more beneficial bacteria and probiotics. The 16 hour batch is delicious as well.
Thanks so much Kara! You’re the second person that’s said this to me in the last couple of days. I had thought it was fixed but will get back to checking on it! I’m so glad you got great results with the recipe and that’s fantastic to know re the yogurt sitting in the pot for 24 hours. I’m going to give that a try myself because I love it extra sour.