How To Make Cultured Butter At Home
Cultured Butter is made by fermenting cream with a little yogurt before it’s churned to create a rich, tangy butter. It’s a simple process that requires very little hands-on time, and it yields a bonus ingredient you can use in your kitchen too – cultured buttermilk.

Recipe Overview:
What Is Cultured Butter?
Cultured butter is made from fermenting cream with active cultures (in yogurt, sour cream, crème fraiche, or buttermilk) that convert the milk sugars in the cream into lactic acid. This essentially creates a cultured cream that is perfectly fine to use as-is. Cultured cream is great on scones or to dollop onto other baked goods. However, whipping it with a hand mixer, butter churner or stand mixer causes the cream to stiffen and separate into cultured butter and cultured buttermilk.
Key Ingredients
Crafting a batch of homemade cultured butter requires just two primary ingredients, cream and yoghurt.
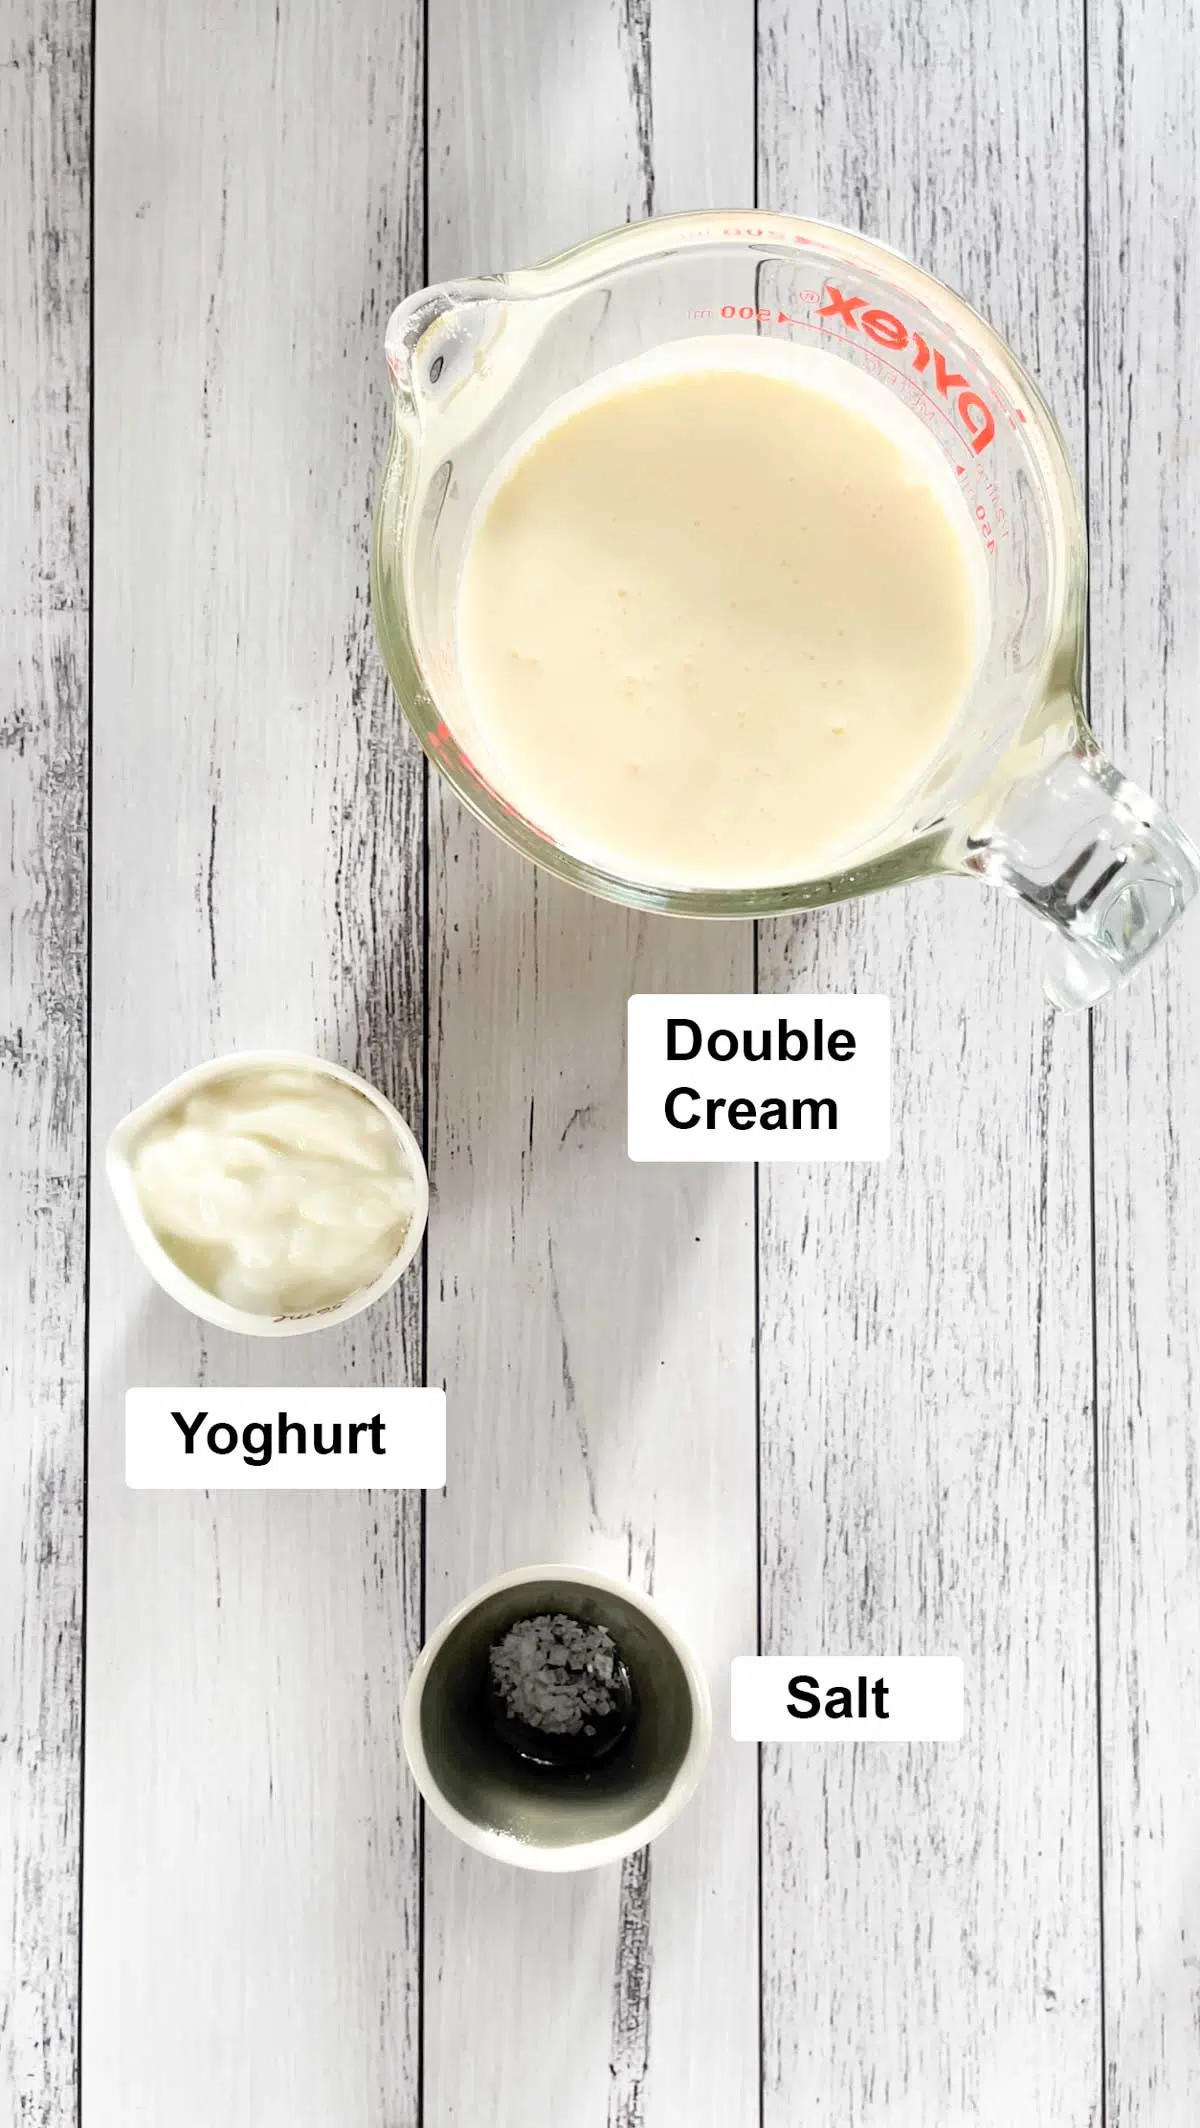
- Double Cream or Heavy Cream – the cream best for butter-making may have various names depending on your location. If you’re unsure you have the right one, look for cream that contains 35% fat or higher.
- Plain yogurt – this introduces the active cultures that initiate the fermentation process. This acid sours the cream, creating the characteristic tangy flavor of cultured butter.
Once the butter is ready you may like to add some salt to the top or mix it through but it’s not essential.
Substitutions And Variations
For an unsalted butter simply leave out the salt.
Substitute the yogurt with buttermilk, sour cream or crème fraîche if preferred. If using buttermilk ensure it’s the traditional full-fat variety, not a skim milk product.
As little as 2 tablespoons of your chosen starter culture will ferment up to 2 cups (500ml) of cream. However, I’ve found this frequently causes the cream to take longer to ferment, which is why I opt for using ¼ cup.
No stand mixer? Try a manual butter churner. This style of churner is a large mason jar with a paddle attachment fitted to the lid. The lid is then attached to the jar and the handled turned for hand-churning. A large jar with a tight fitting lid is also a great option, and churning is done by shaking the jar vigorously. These are both quite strenuous methods that will give you an excellent arm workout!
How To Make This Cultured Butter
The process of making your own butter is surprisingly straightforward. Patience is the most crucial ingredient here, allowing the cultures to work their magic.
Day 1


- Culture the cream – Add the cream to a large bowl, tip in your yoghurt (or other chosen starter culture) and whisk gently until very well-combined.
- Ferment the cream – Cover the bowl with a clean kitchen towel and set aside to ferment at room temperature for 12-24 hours, or until it has thickened significantly and developed a pleasant, tangy aroma. It should resemble a thick yoghurt or sour cream. The longer it ferments, the tangier the butter will be.
Day 2

- Once the cream has cultured, place it in the fridge for an hour or two. This is not essential though cold fat churns more efficiently and results in a firmer butter.
- Fill a large bowl with ice and water and set it aside.
- Line a fine mesh sieve with cheesecloth or a thin, clean dish cloth and place this over a large bowl. Also set this aside for now.
- Tip the chilled, cultured cream mixture into the bowl of a stand mixer fitted with the whisk attachment.
- Begin churning on medium speed, gradually increasing to medium-high. The cream will first thicken to whipped cream, then finally, the butter solids will separate from the liquid buttermilk. This process can take anywhere from 5 to 15 minutes, depending on the speed of your mixer and the temperature of the cream.
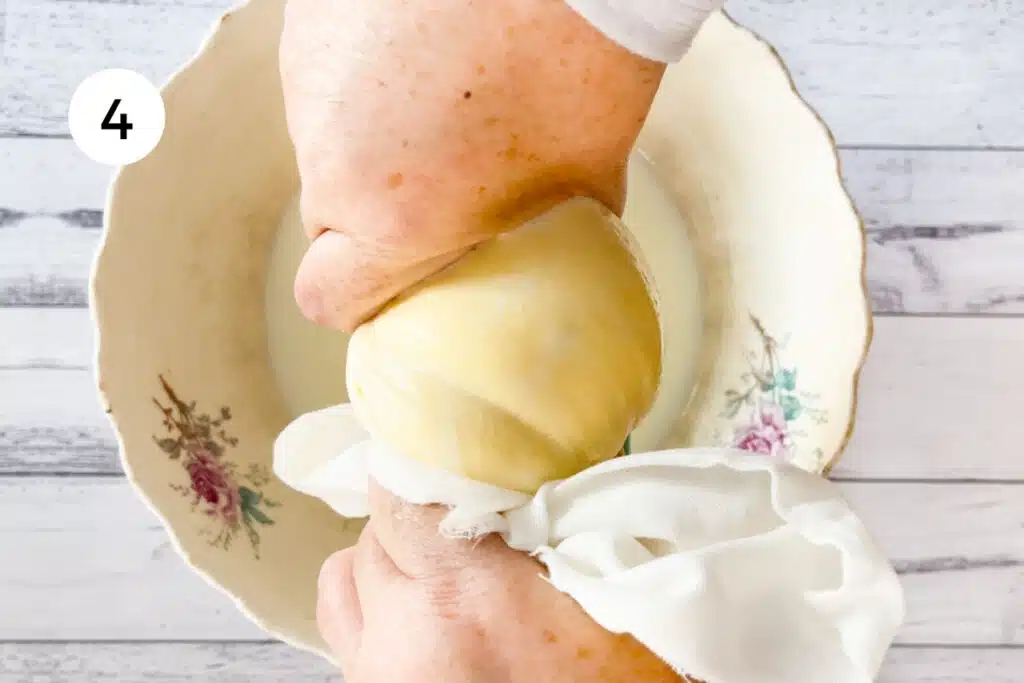
- Once the butter solids have formed a solid mass and the buttermilk has visibly separated, pour the contents into the lined sieve set over a bowl. Pick up the ends of the cheesecloth and bring them together. Squeeze the butter ball so any trapped buttermilk is release into the strainer/bowl below.
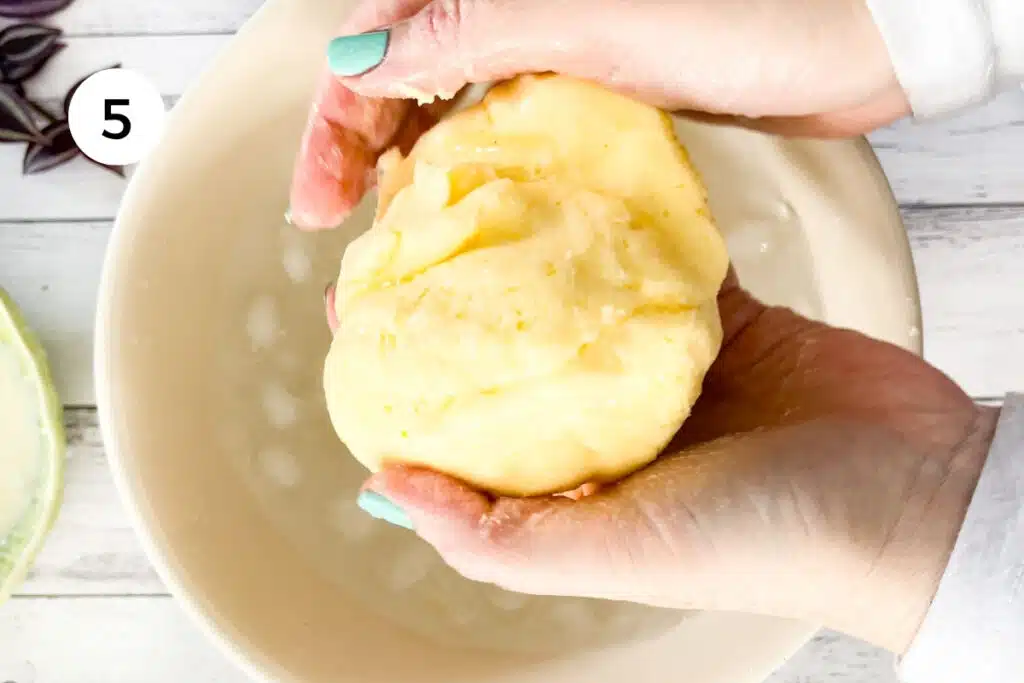
- Add the ball of butter to the iced water bowl. Using your hands, press and knead the butter, squeezing out any excess buttermilk. Drain the cloudy water and repeat the washing process several times with fresh cold water and ice until the water runs clear.
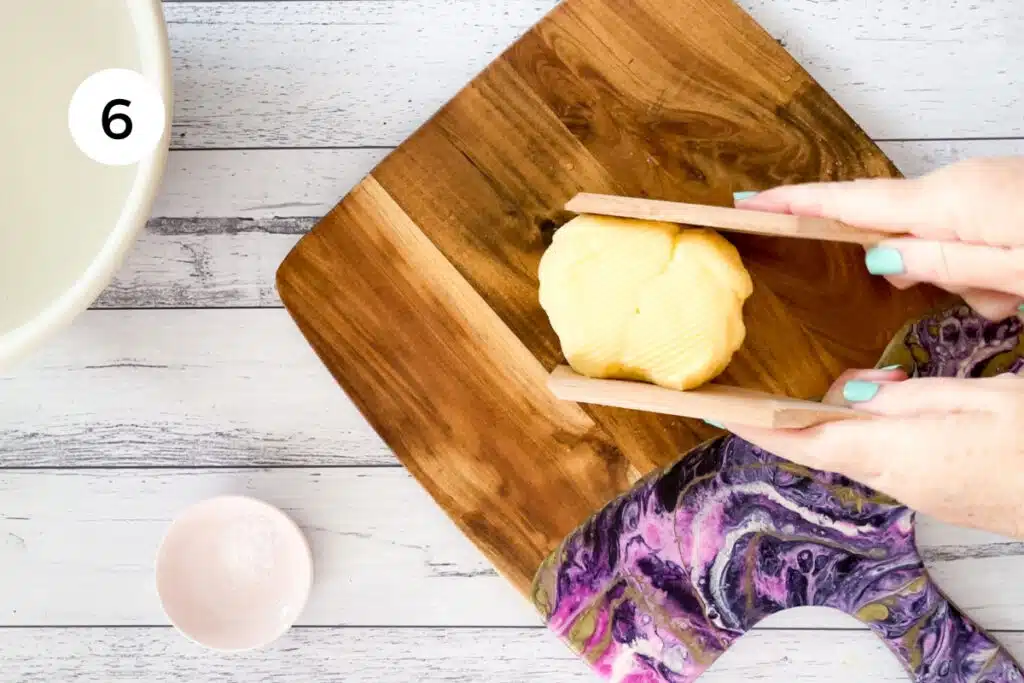
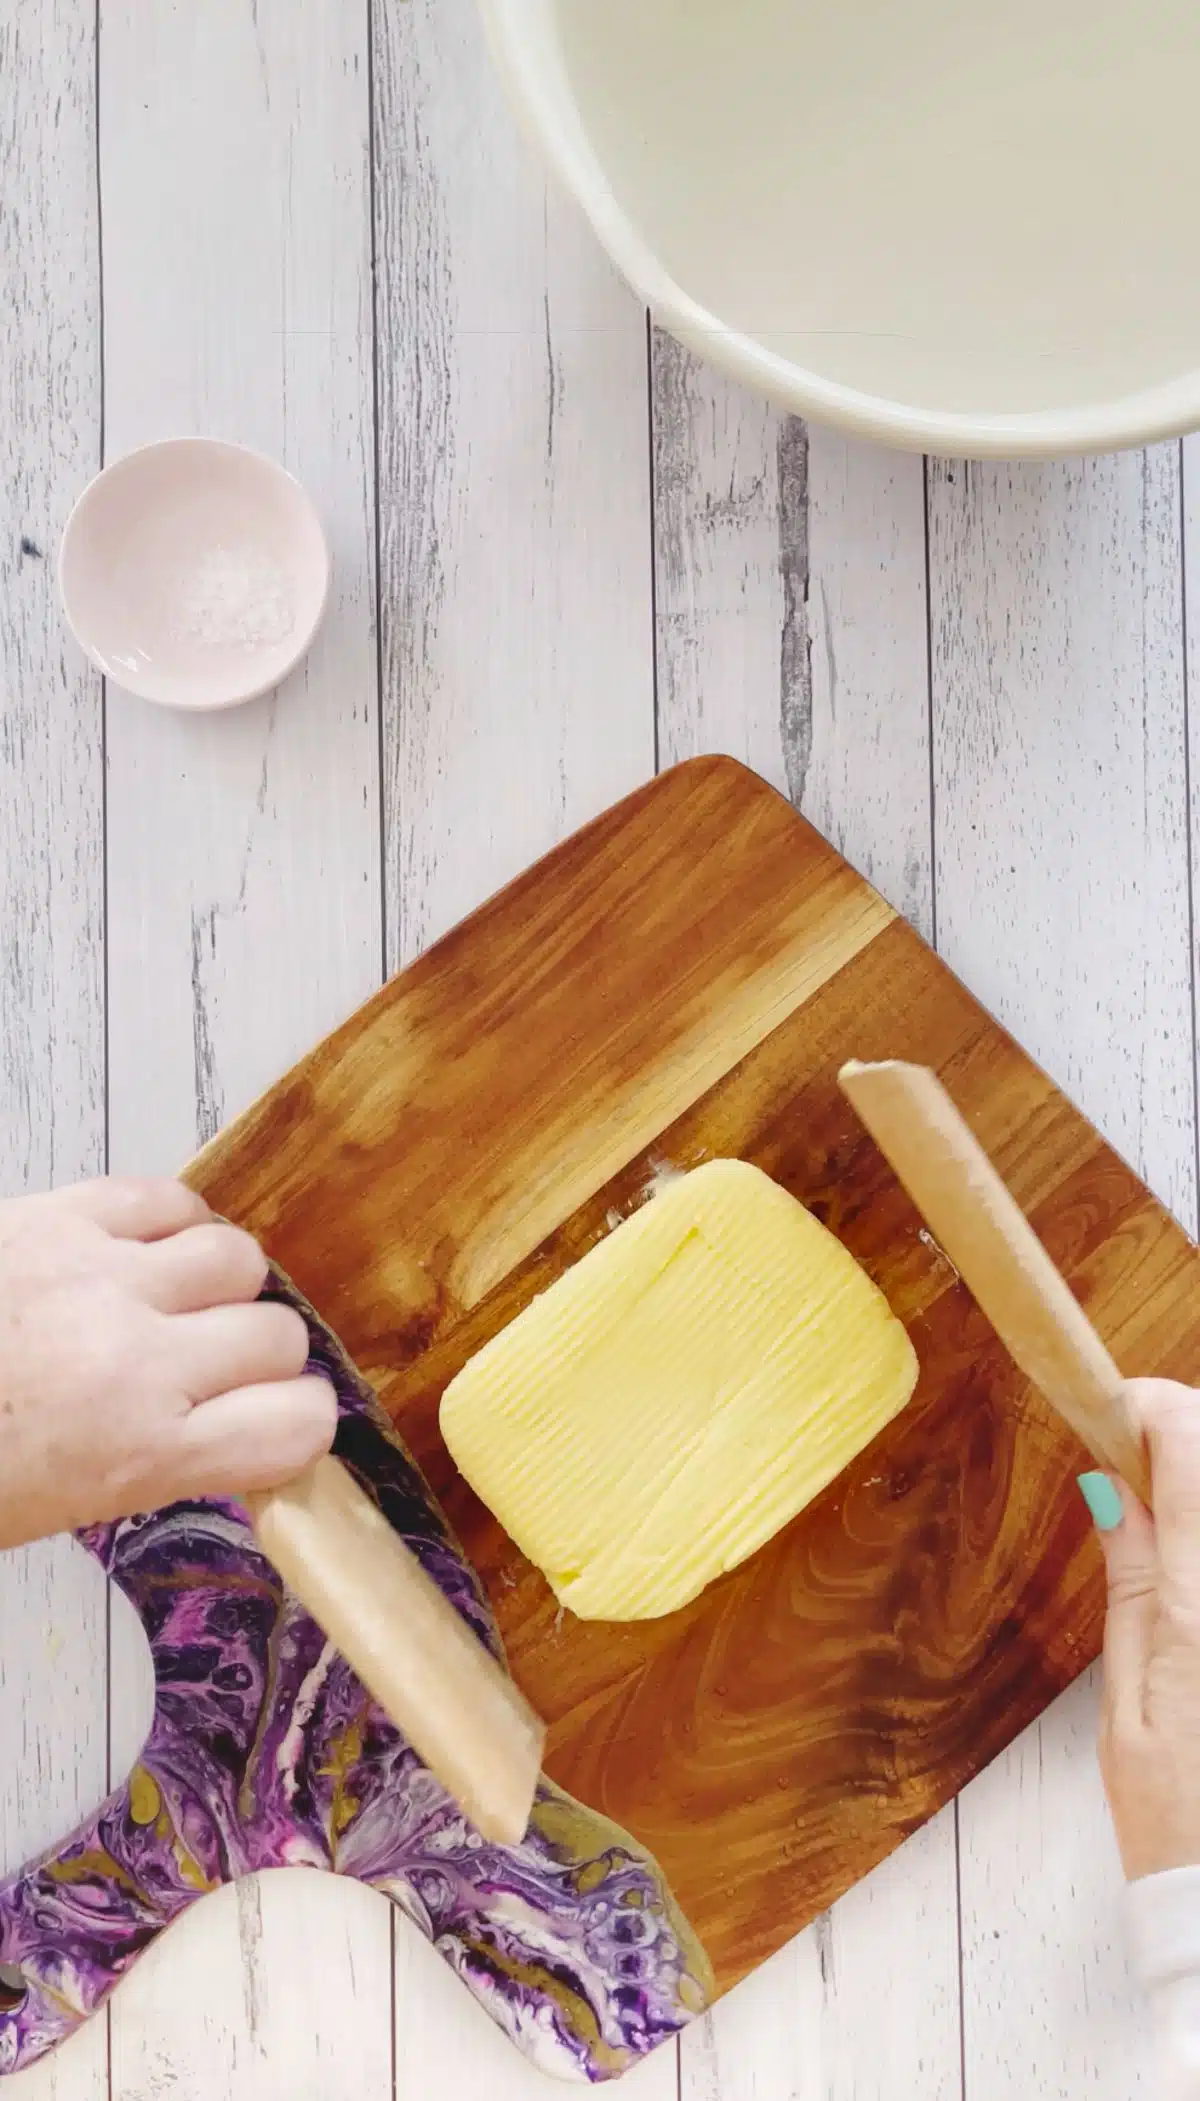
- Squeeze out any excess water from the butter then, place it on a clean kitchen bench or chopping board and sprinkle with salt and knead it through before shaping.
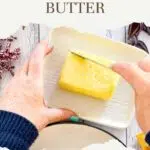
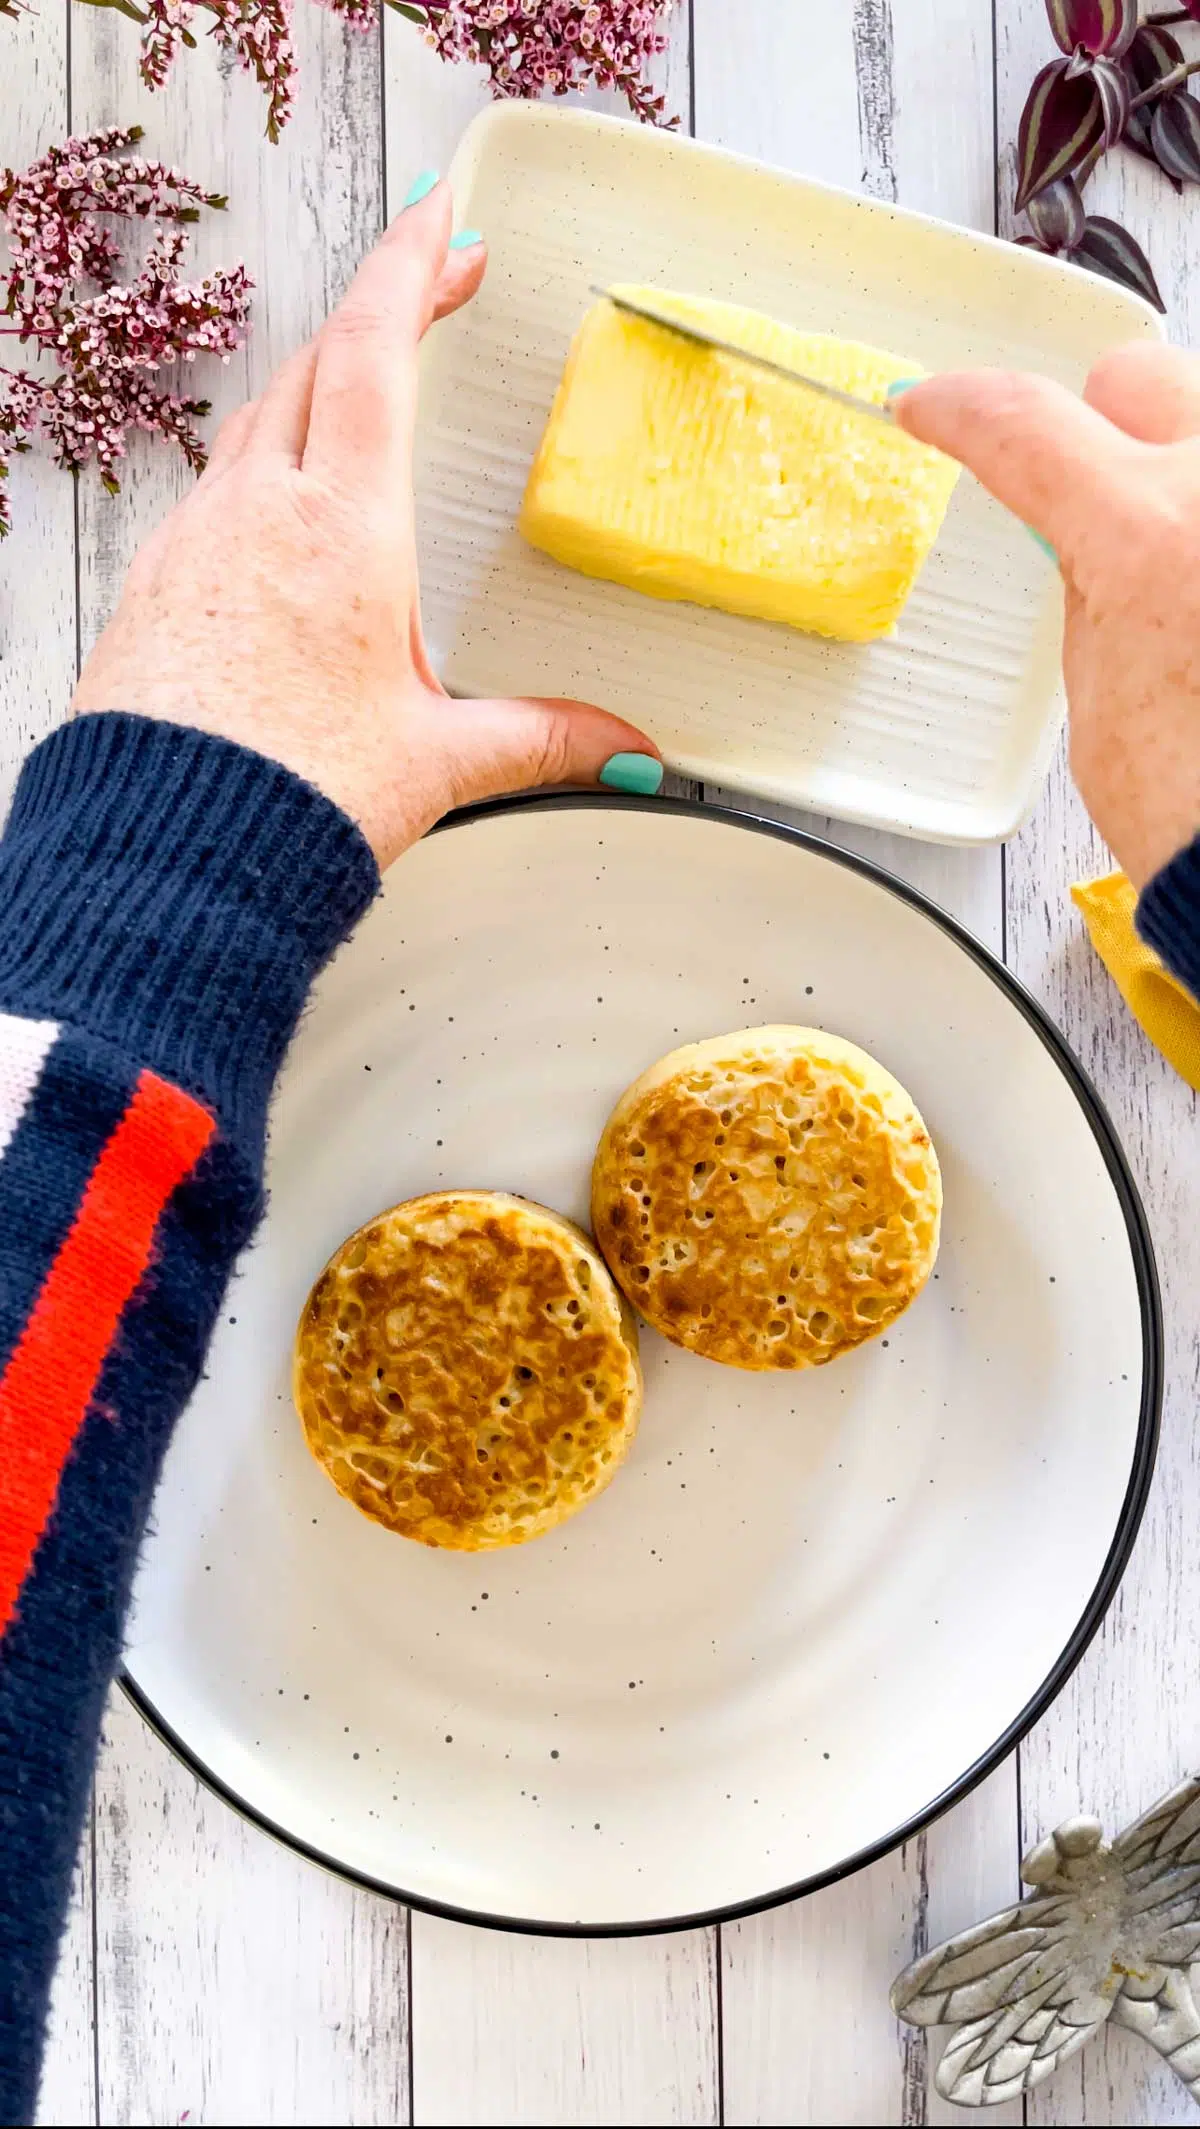
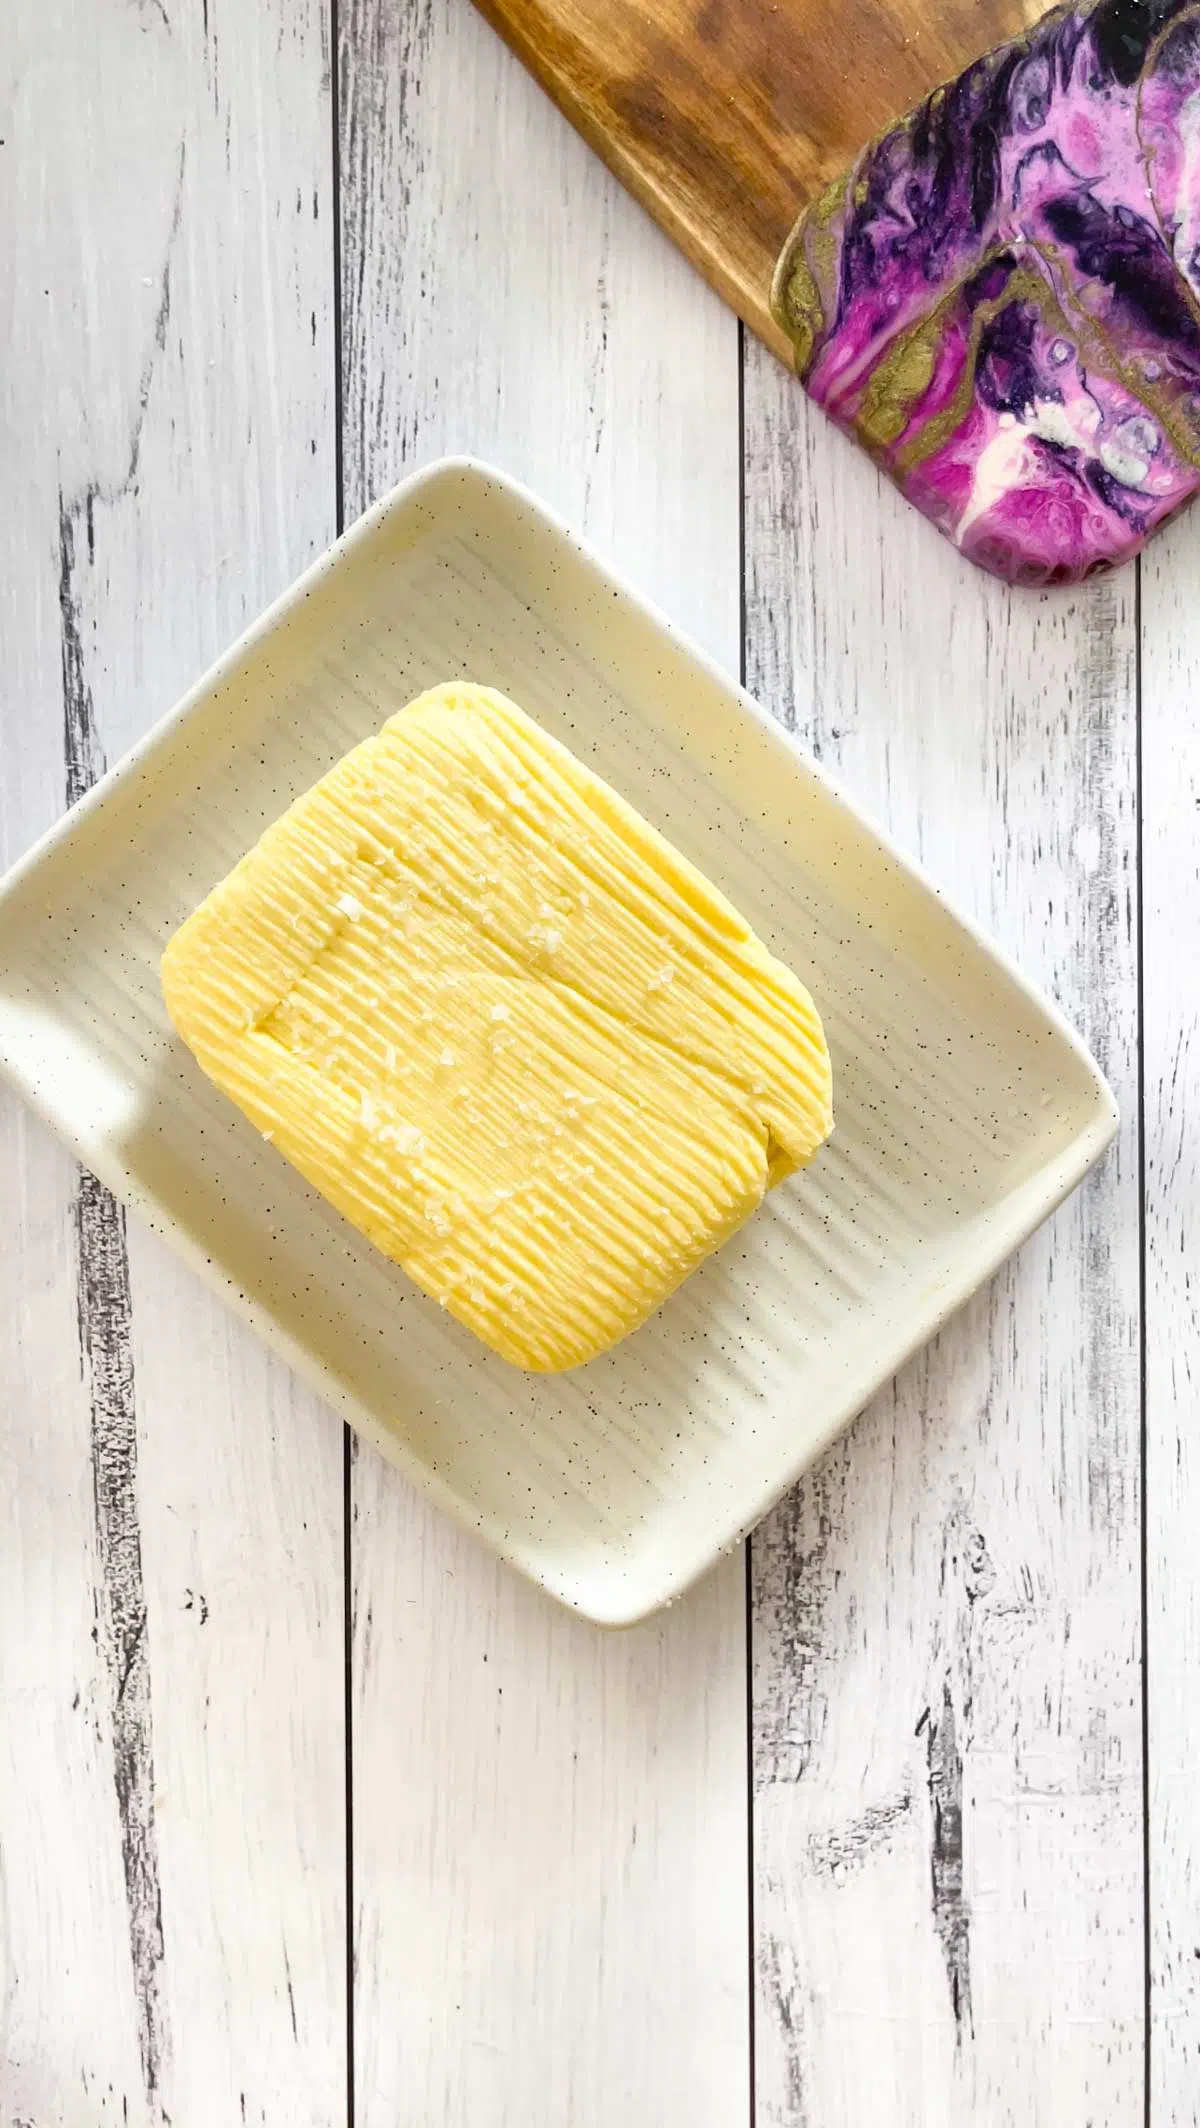
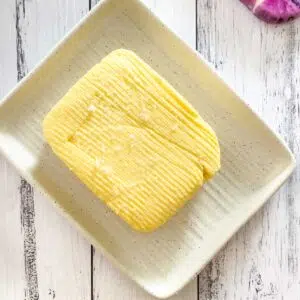
- Shape the butter into a block using butter paddles, roll it into a log, or press it into a butter mold.
Place in a butter dish or wrap tightly in wax paper or plastic wrap, then store in an airtight container in the fridge. Remember to reserve the excess buttermilk too! It’s a valuable byproduct for baking, to use in dressing, to tenderise meat or just nice to drink.
Expert Tips
- Your cream must have a high fat content (35% or higher) for successful butter making. Using high-quality cream, ideally from grass-fed cows, will yield butter with a richer colour and more complex flavour. The freshness of the cream is also important too; older cream can develop off-flavours the that will carry through to the butter the longer it sits.
- Wash the butter until the water is clear/not cloudy. This is crucial as residual buttermilk can cause the butter to spoil. Leaving residual buttermilk in the butter can also reduce its shelf life.
- Avoid using cream with gums, thickeners or stabilizers added. They are often ultra pasteurized and the fermented cream won’t churn into butter.
Storing And Freezing
Store in a butter dish, butter bell, or another suitable airtight container in the fridge. For best flavour I suggest using the butter within a month.
Freeze the butter as a block of smaller portions for ease of use. To do this wrap very tightly in plastic wrap, then an additional layer of aluminium foil before placing it in a freezer bag. To use, place in the fridge overnight to thaw.
Cultured Butter Recipe FAQs
More Fermented Condiments
Did you make this recipe?
If you try this recipe, I’d love to know. Leave a comment, rate it, and remember to tag @wholenaturalkitchen in your pics or reels on Instagram, Facebook or TikTok!
Cultured Butter Recipe | Make Your Own At Home
Equipment
- 1 Stand mixer or hand churner
- 1 Piece of cheesecloth or a thin, clean dish cloth
Ingredients
- 400 ml heavy cream or double cream (min. 35% fat)
- ¼ cup plain yoghurt (see note 1)
- sea salt (optional – see note 2)
Instructions
Day 1
- Pour the yoghurt into a large bowl, add the cream, and whisk together to combine.
- Cover the bowl with a clean cloth and set aside to ferment for 12-24 hours. The cream will have thickened slightly and smell a little sour when ready.
Day 2
- Once the cream has cultured to your liking, place it in the fridge for an hour or two. This is not essential though cold fat churns more efficiently and results in a firmer butter so I recommend not skipping this step.
- Put some ice cold water in a large bowl and set it aside. Line a fine mesh sieve with cheesecloth or a thin, clean dish cloth and place this over a large bowl. Also set this aside for now.
- Tip the chilled, cultured cream mixture into the bowl of a stand mixer fitted with the whisk attachment.
- Begin churning on medium speed, gradually increasing to medium-high until the butter solids separate from the liquid buttermilk.
- Pour the butter ball and buttermilk into the lined sieve set over a bowl. Pick up the ends of the cheesecloth and bring them together. Squeeze the butter ball so any trapped buttermilk is release into the strainer/bowl below (see note 3).
- Next, take the butter and form it into a ball in your hands. Now dunk it into the iced water several times squeezing it as you do. You want to rinse it well and wash off any remaining buttermilk to ensure the butter doesn't spoil (see note 4).
- Squeeze out any excess water from the butter then, place it on a clean kitchen bench or chopping board, sprinkle with salt and knead it through before shaping.
- Shape the butter into a block using butter paddles, roll it into a log, or press it into a butter mold.
- Store in a butter dish or butter bell, or wrap it in plastic wrap/wax paper and store it in an airtight container in the fridge. It will keep this way for 3-4 weeks.
Why have I never thought of making my own butter? I am so excited to make this ASAP this weekend, thank you so much for sharing 🙂
It’s such a great thing to do Cathleen! Once you have you’ll be making it all the time, it’s so simple.
I have always wanted to try making my own butter. This recipe came out perfect. Thank you for sharing.
Thanks MacKenzie, so great to hear!
Great post! I’ve never made this before but with these pictures and directions, it looks very easy to follow and delicious! Wonderful!
Thanks so much Beth! I hope you get to try it at some point. It’s truly delicious.
So cool to be able to make your own butter at home. And who knew it was so simple?!
It’s so very easy!
This was the first time I made cultured butter, and it really is a game changer! Thanks for the recipe!
That’s great to hear Tavo! Hope you’re enjoying it.